Since I had little to no exposure to playing with Azure outside of having an O365 subscription, I wanted to change that. Azure has the option to create a free account with access to a number of services, so I took the low risk plunge.
I had intended to start with deployment of some basic virtual machines to compare the ease of use to AWS and GCP but found there was little to no availability on the free tiers. That was a step outside my comfort zone, but it’s probably best.
This is part 1 of my quest to explore Azure Functions for self-education in functions-as-a-service. In this post, the goal is to create a function app and add at least one function to it using the Azure portal. Are you ready? Let’s do this!
Into the Azure Portal We Go
We’ll start in the Azure portal and assume the reader already has a subscription created. First, use the search box to find the Function App service, and click on it. A Function App will serve as a logical grouping of serverless functions to make them easier to deploy and manage.
![]()
The screenshot below shows a list of all function apps created so far, and there is only one called networknerd1. Let’s click Add to create a new one.

There are many options that could be selected when creating a new Function App, but we’ll step through them screen by screen even when we go with the default settings in case you’re reading this and are new to it like me.
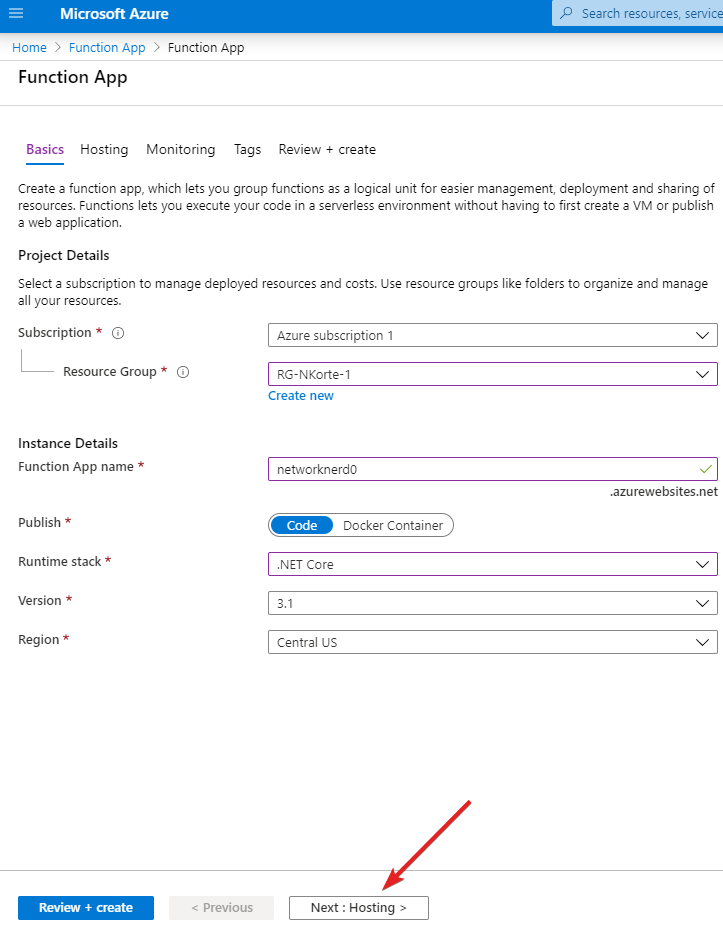
The Basics screen shown below requires the following fields:
- Subscription
- This is the name of your Azure subscription. In this case there is only one (Azure subscription 1), but someone reading this may want to attach to a specific subscription.
- Resource Group
- You will need to create one if there are none yet. I created one called RG-NKorte-1.
- Function App name
- This can be whatever you want, but certain characters are restricted. I chose to go with networknerd0.
- Publish
- Let’s start with just code.
- Runtime stack
- I went with .NET Core, but there are several choices like Python, Java, and Powershell.
- Version
- This defaulted to 3.1 when I chose .NET Core and should have version options based on the runtime stack selected.
- Region
- This is the Azure region in which resources will be consumed to run any functions inside the Function App. I chose Central US in this case.
Once all fields have been filled, click Next : Hosting > to continue.
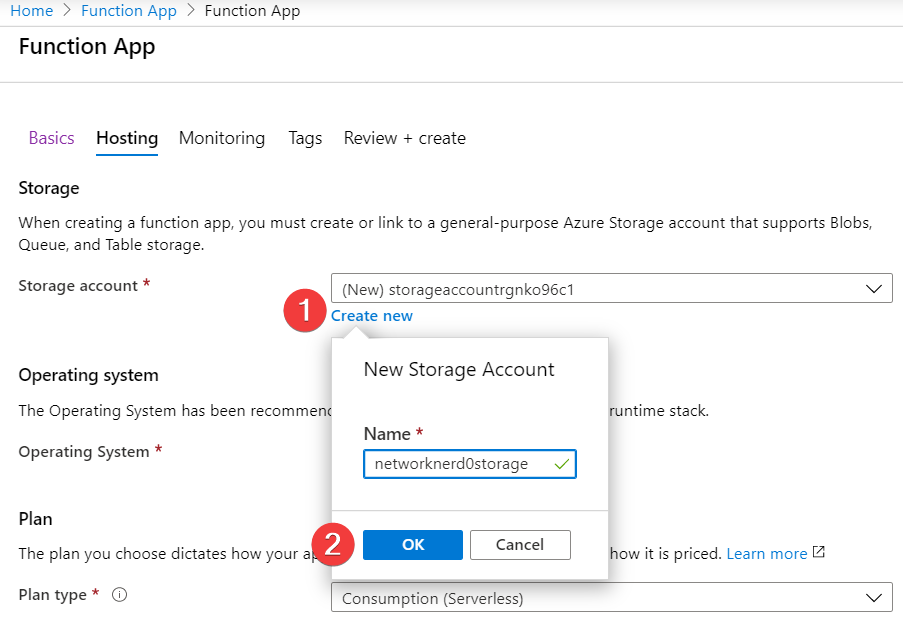
On the Hosting screen, a storage account is required. Click Create new to provide a custom name for a new storage account followed by ok (assuming you do not have one already that would suffice). I chose to name the storage account for this function app networknerd0storage. Maybe it makes sense in some cases to have separate storage accounts for each Function App, but that probably depends on the way a company wants to do billing.
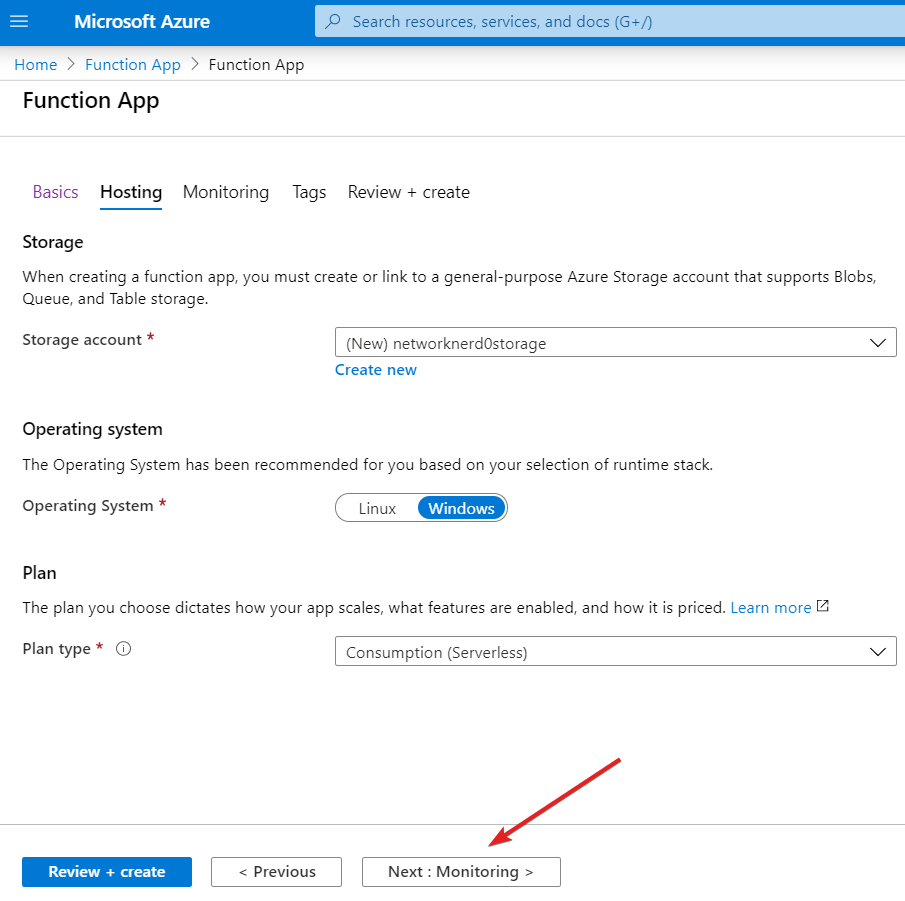
The recommended operating system was Windows (as you would guess with .NET being the runtime), and I left the Plan type set to Consumption (Serverless). A list of specific plan types can be found here for further explanation. Once all fields are set, click Next : Monitoring > to continue.
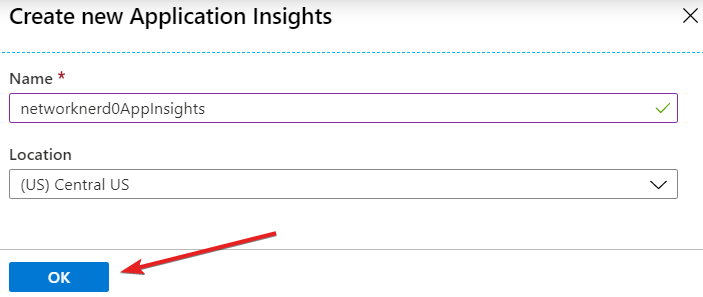
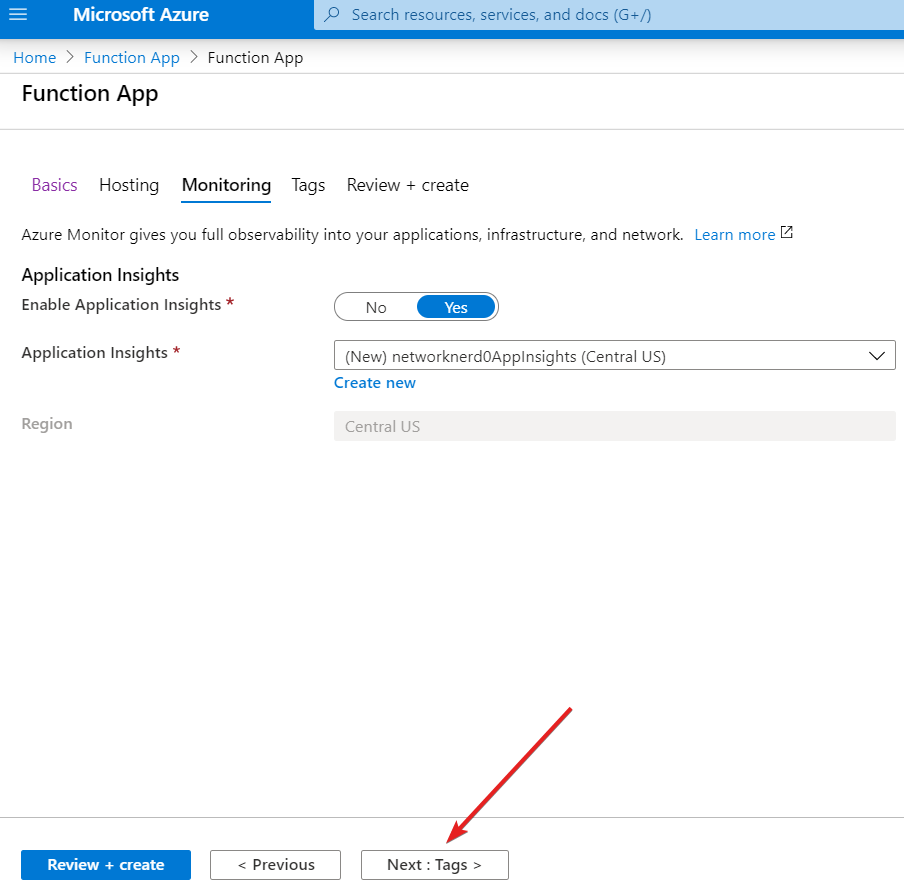
From the Monitoring screen, we have the choice to turn Application Insights on or off (see also Azure Monitor). I turned it on but needed to create a new Application Insights as a result.

The new Application Insights name is networknerd0AppInsights and is in the Central US. I believe this is the equivalent of an instance of the monitoring service specific to this function app. It’s wise to ensure you’re in the same region as selected previously on the Basics screen since a regional difference probably results in egress charges. If the Function App and Application Insights are not in the same Azure region, we would get a warning when trying to create the Function App, but we would not be stopped from successfully creating a Function App.
With all selections made we can click Next : Tags > to proceed to the next screen in the workflow.
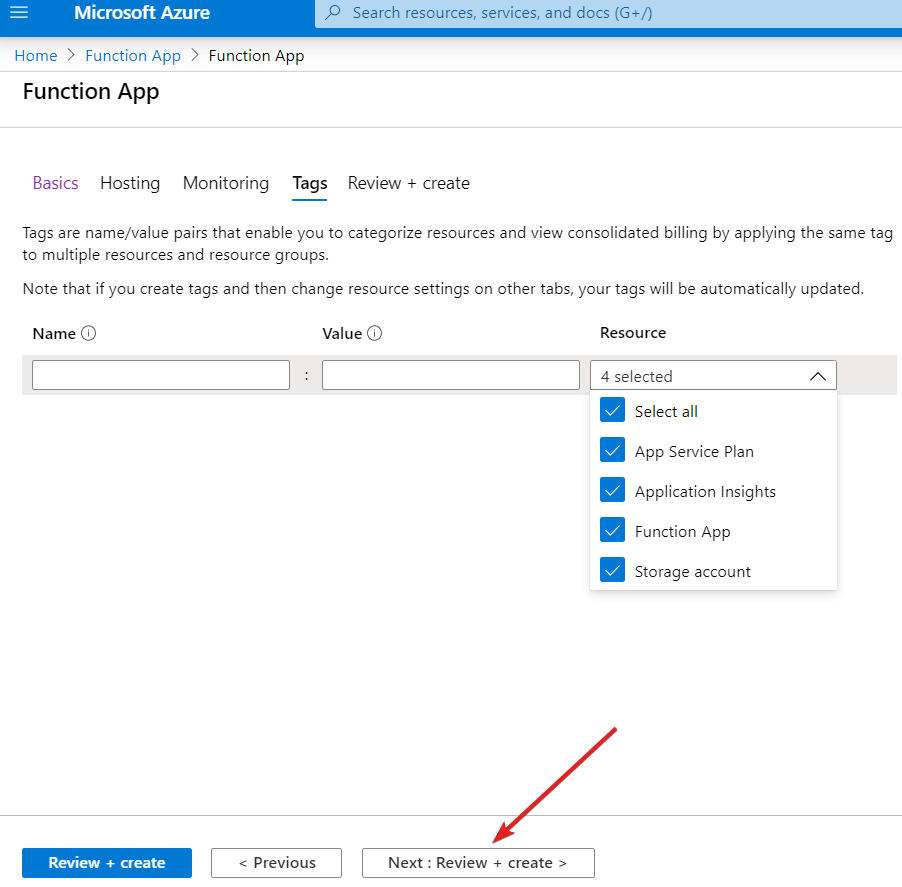
On the Tags screen, I chose not to add any at this time. The Resource menu is expanded in the screenshot below to show all options for tagging. Click Next : Review + create > to continue.
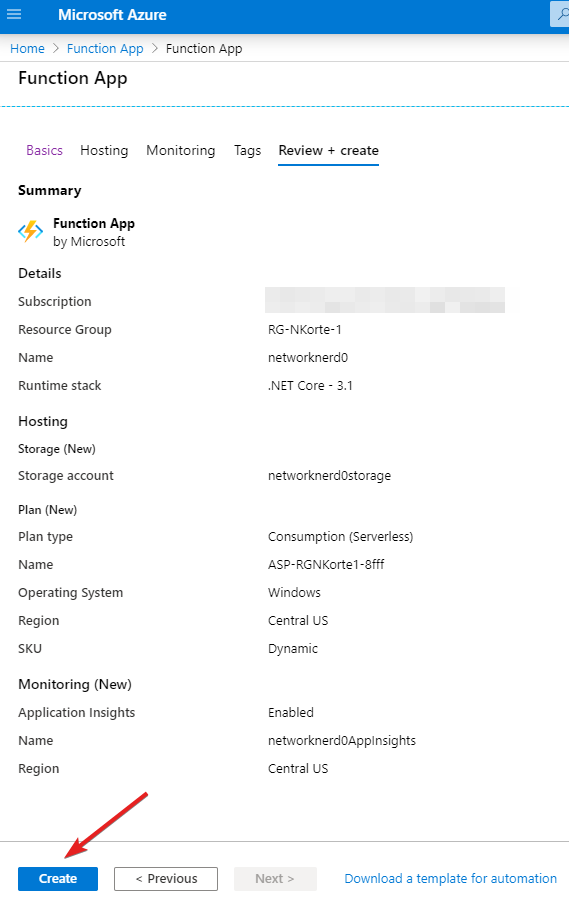
At this point we review all settings, make sure they look good, and press Create. There is a way to download an automation template for this process, but let’s take the manual approach first.
As shown below, we can see the deployment is underway with no results just yet.
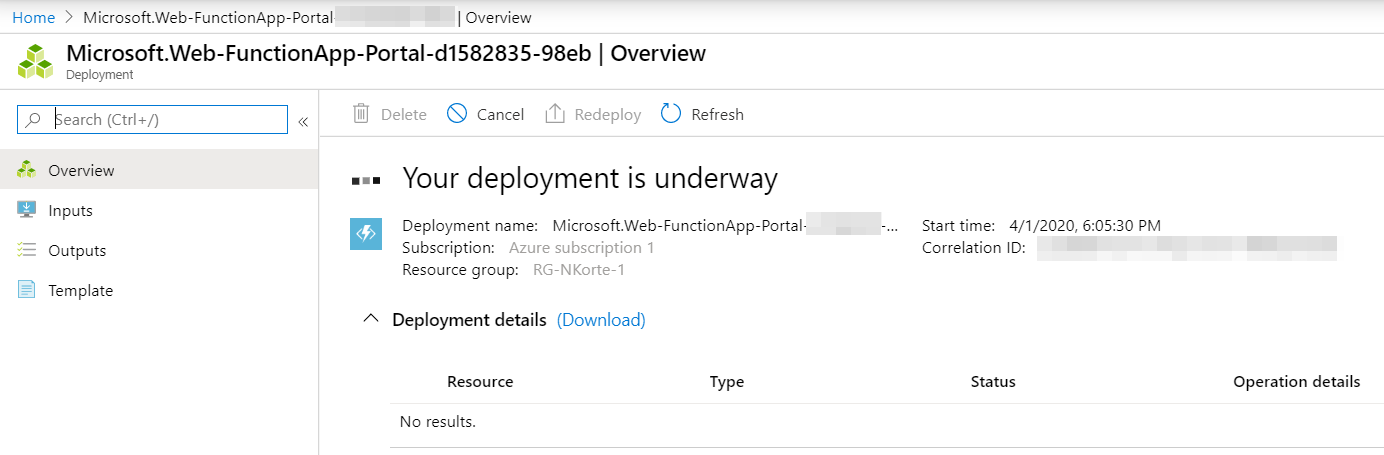
And in less than 3 minutes, we have deployment success! Keep in mind we have only just now deployed the Function App and not any functions. Click Go to resource to dig into the Function App so we can start to add functions.
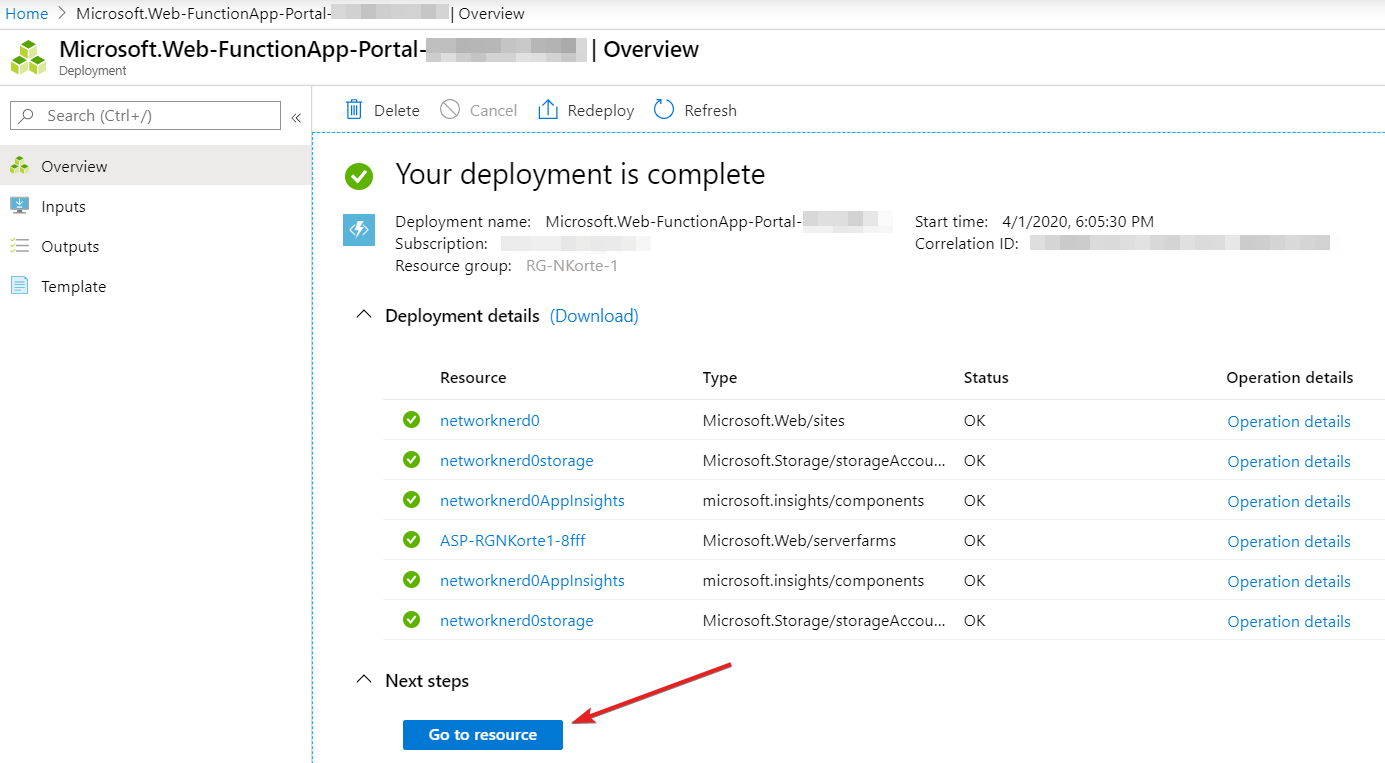
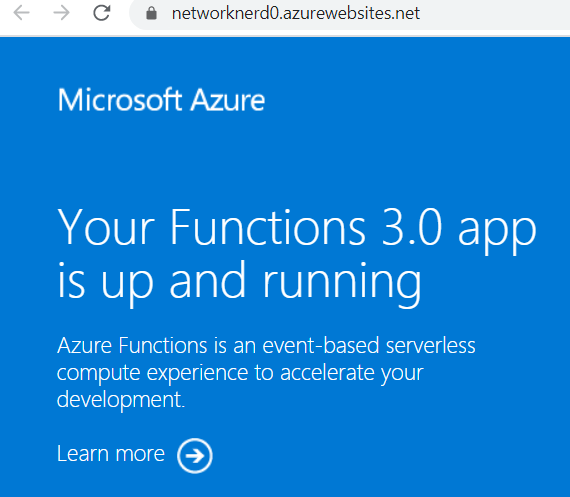
Here’s the next screen we reach that shows details of the Function App. We can easily see a status of Running at the moment. Notice there is a specific URL for this (which we saw during the creation process). What happens if we click on it?

Following the link takes us to this screen. We know our functions app is up and running, but it’s not really doing anything at the moment. Clicking on Learn more only takes us to Azure documentation.
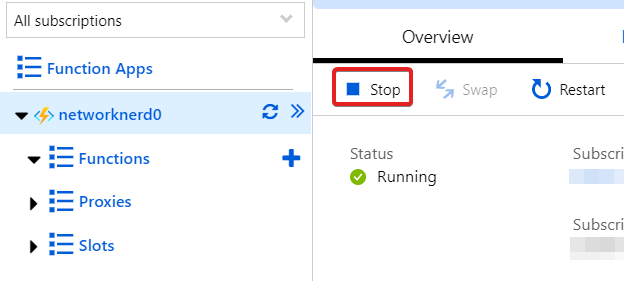
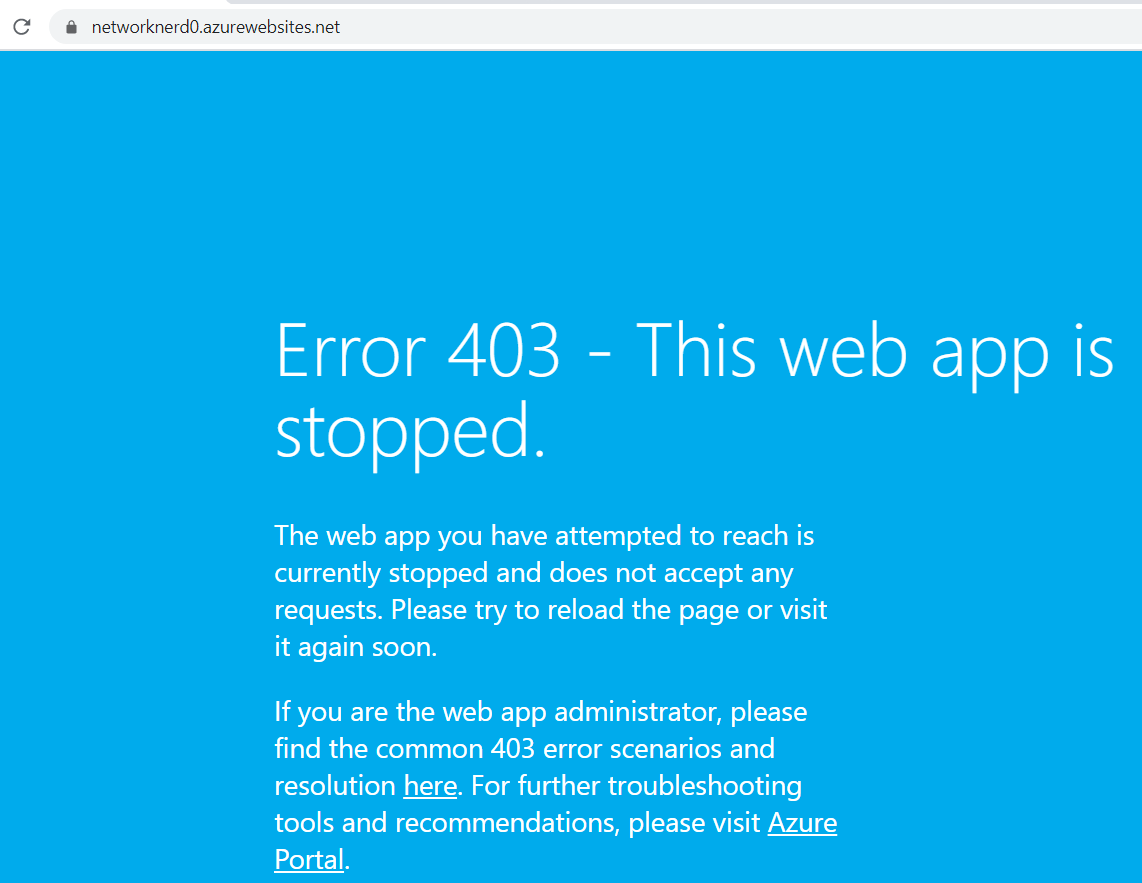
What happens if we go back to the previous screen and stop the function app? Does this site become unreachable? That would seem logical, but let’s try it.
At this point we get asked if we’re sure we want to continue. Of course, we’re sure! Click Ok to continue.
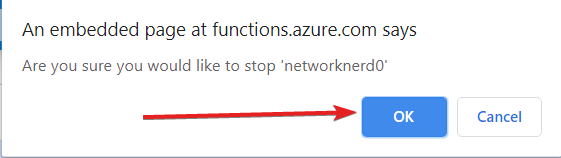
Now try to visit that same URL for the function app, and here’s what we see. If nothing else, now we know what happens when a function app is stopped.
Adding a Function to Our Function App
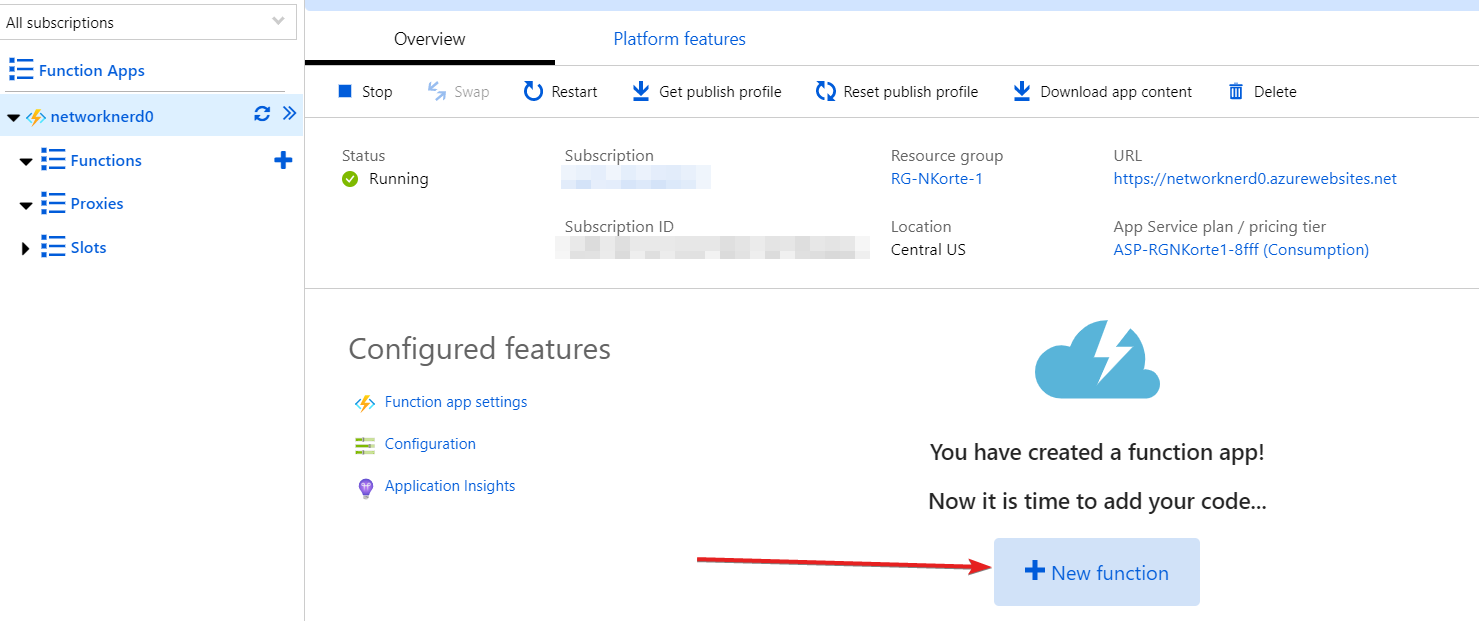
Go back to our Function App settings in the Azure portal, and Start it again before we continue. At this point there are still no functions added. We see an Overview tab and a Platform features tab in the screenshot below. Click on the New Function button to launch a QuickStart tab that will walk us through function creation.
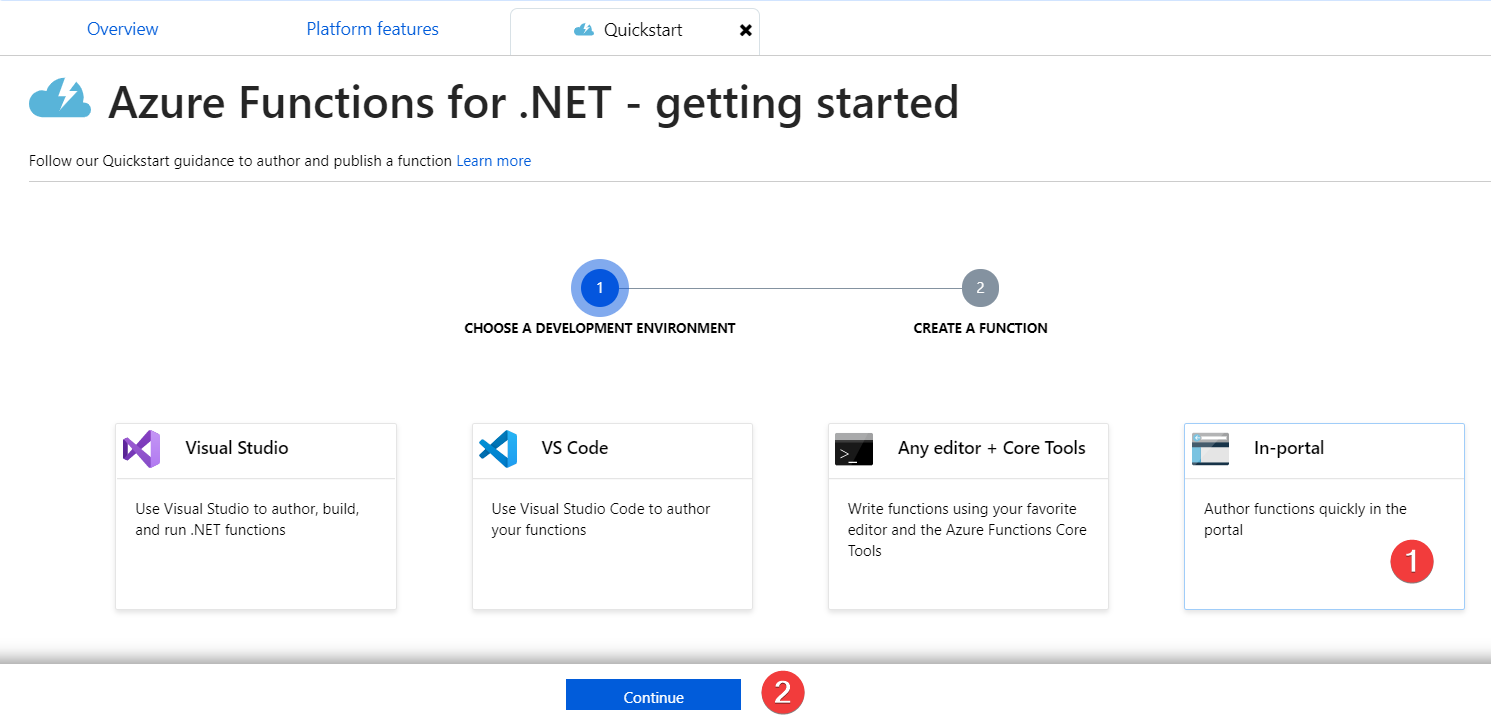
Wait a minute. Why does this say Functions for .NET? It’s because we set the runtime for all functions that will live inside this Function App when it was first created. If you made it this far expecting to use Python for functions, you would need to create a different Function App for functions using that runtime. There are many choices for development environment, but in an effort to walk before we run, let’s stick with In-portal for now to get a feel for the process. Click on In-portal, and then click Continue.
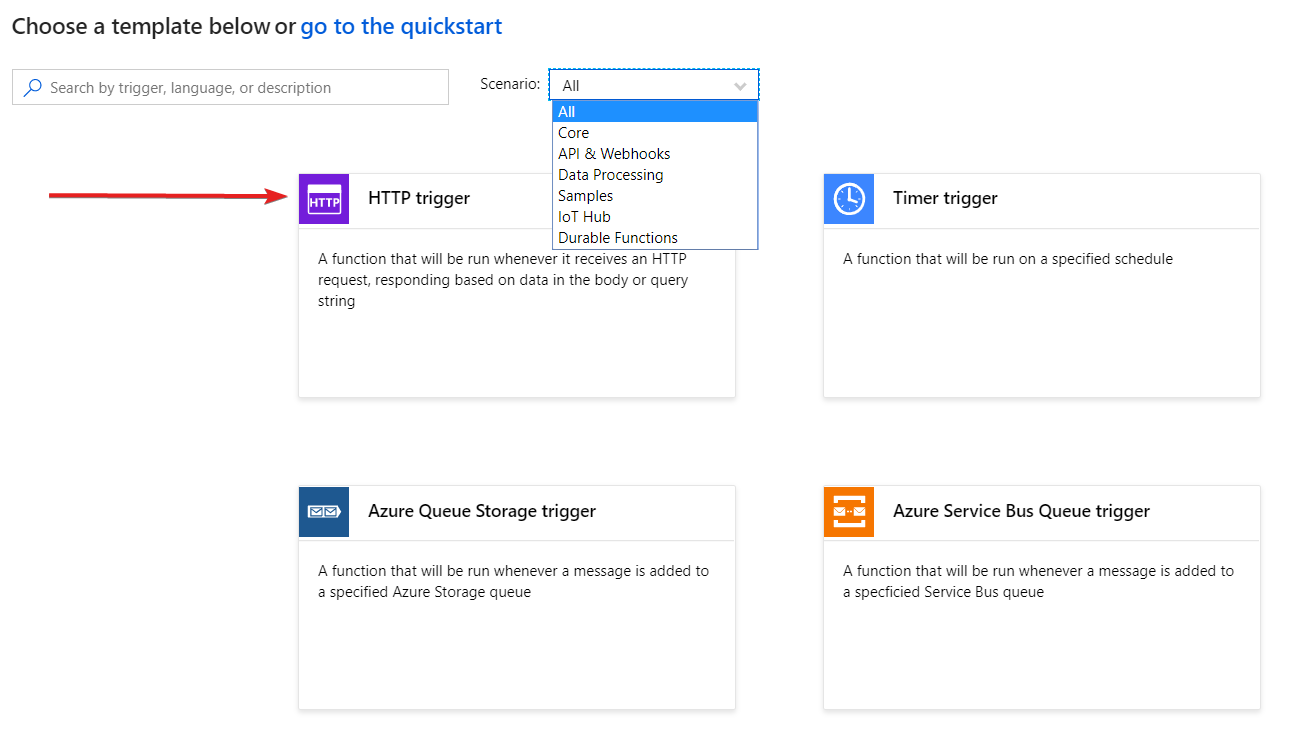
At this point, let’s be curious about the kinds of functions we can create. Click More templates, and then click Finish and view templates.

There are many functions here (16 total by my count at the time this was written), each fitting different scenarios. But to keep things simple on the first attempt, let’s pick HTTP trigger. This means the function we build will run every time a specific web address is visited (i.e. visiting the address is the trigger).
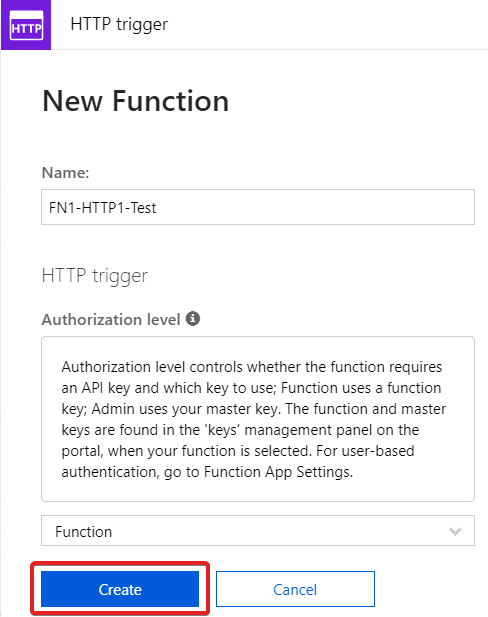
We start by giving our HTTP trigger function a name. I went with FN1-HTTP1-Test. Since this is new, let’s stick with the default authorization level of Function for now. But, if you want to read up on the various authorization levels for functions, check out this document.
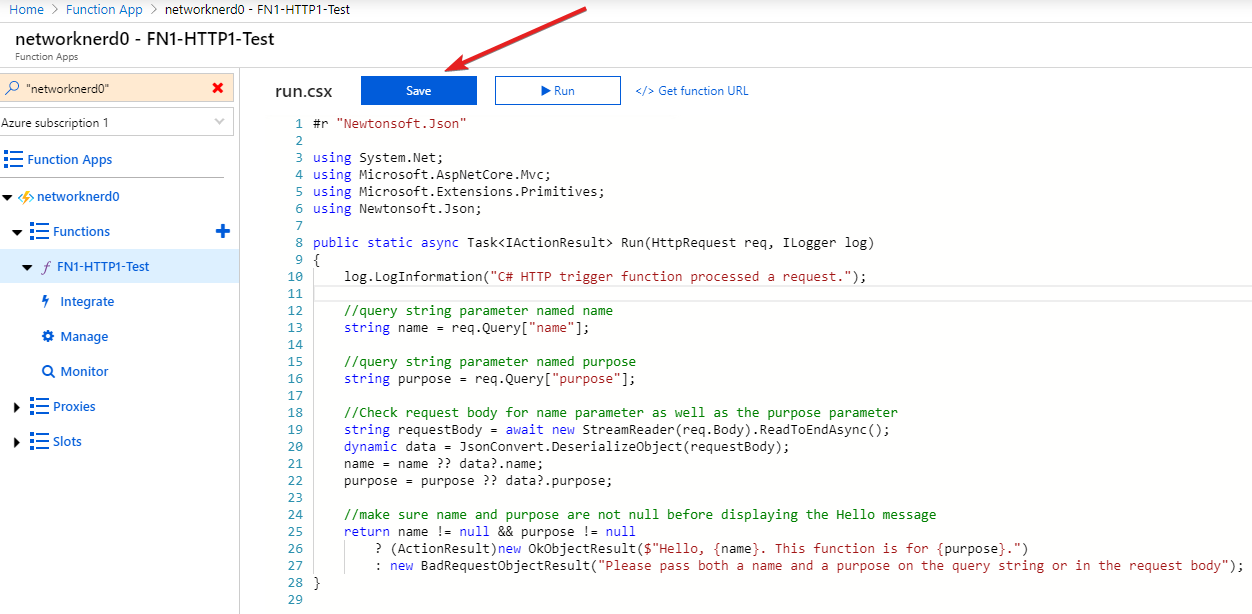
The creation process is pretty short. Once it finishes, we see the actual function code.

Notice lines 19 and 20 above give us a clue as to what this function will do. If the variable name is part of the query string when this function is accessed, the page should spit the value we pass to it onto the page. If you need to read up on what query strings are, check out this post. This is a HTTP trigger function, which means visiting a specific URL will execute the function. But how do we know the URL of this function? Remember that Get function URL link in the previous screenshot? What happens if we click it?

Now we’re getting somewhere. That URL looks lengthy, so copy it to the clipboard.

Once we paste the full URL (https://networknerd0.azurewebsites.net/api/FN1-HTTP1-Test?code=cDQam9yMNMYLdebbtPtjMcNzjdwwA4oV2MSuaeferOs1zDvt5FH7DQ==) into a browser, here’s what we get:

Take a look at that URL for a second. The first part (https://networknerd0.azurewebsites.net) is something we tested earlier in the article and was created this way since networknerd0 is the name of the FunctionApp. The function we created is named FN1-HTTP1-Test (also part of this URL). Because of the way we set the Authorization level for this function, the last part of the URL (?code=cDQam9yMNMYLdebbtPtjMcNzjdwwA4oV2MSuaeferOs1zDvt5FH7DQ==) is a querystring that passes the API key for this function into a parameter named code. This would not be the case if we had chosen the Anonymous Authorization level previously (no API key). This is good information, but it does not quite explain the message above.
Let’s look at the code again (snippet below). Line 11 declares a string variable called name and sets it to be a specific value – req.Query[“name”]. If you look at line 8, req is an object representing an instance of the HttpRequest class. Objects of this class have specific properties, each corresponding to types of data contained in a HTTP request. The object req has a Query property, for example, that can be retrieved. The Query property (which is referenced by req.Query) contains everything in the query string of our URL. On line 11 we’re searching the URL query string for a parameter called “name” and storing the value of that parameter in our variable.
Lines 13 and 14 do some manipulation of req.Body (i.e. Body property of req is the equivalent of HTTP request body). This property of the req object returns a Stream object. The Stream needs to be read character by character until its end (result of which looks to be some kind of JSON string that is then deserialized). Notice the operator ?? in line 15. This is a null-coalescing operator. So if name is not null (i.e. not empty), nothing on the right-hand side of ?? will be evaluated. Also, the ?. operator is a null-conditional operator. If name were null (i.e. no name parameter in the query string), data.?name would end up being null. Once line 15 executes it means the variable called name is either null or contains a value. If that was a mouthful, just know that both the query string and the request body are searched to determine if a name parameter was passed in upon a client accessing the URL.
#r "Newtonsoft.Json"

using System.Net;
using Microsoft.AspNetCore.Mvc;
using Microsoft.Extensions.Primitives;
using Newtonsoft.Json;

public static async Task Run(HttpRequest req, ILogger log)
{
    log.LogInformation("C# HTTP trigger function processed a request.");
    string name = req.Query["name"];

    string requestBody = await new StreamReader(req.Body).ReadToEndAsync();
    dynamic data = JsonConvert.DeserializeObject(requestBody);
    name = name ?? data?.name;

    return name != null
         ? (ActionResult)new OkObjectResult($"Hello, {name}")
         : new BadRequestObjectResult("Please pass a name on the query string or in the request body");
}
If we look specifically at the return statement of the function above, we see that if name is not null, we should see the “Hello, …” message. But there’s a conditional operator in play as well, which tells us if name happens to be null, we will see the message “Please pass a name on the query string or in the request body” instead.
Here’s the URL of the function we started with:
https://networknerd0.azurewebsites.net/api/FN1-HTTP1-Test?code=cDQam9yMNMYLdebbtPtjMcNzjdwwA4oV2MSuaeferOs1zDvt5FH7DQ==
And here’s the URL with the name parameter added (appending the characters &name=NetworkNerrd to the end of the URL).
https://networknerd0.azurewebsites.net/api/FN1-HTTP1-Test?code=cDQam9yMNMYLdebbtPtjMcNzjdwwA4oV2MSuaeferOs1zDvt5FH7DQ==&name=NetworkNerd
What will we see now if we visit the new URL?

After passing in the name parameter, we see “Hello, NetworkNerd” as you would expect. We could change “NetworkNerd” to a different value and see a similar result. To this point we understand how this function works out of the box.
As an additional help, if we look in Developer Mode in Chrome while loading the new URL above, it’s easy to verify query string parameter values passed into our function.

Some Function Tweaks
Suppose we want to add another parameter to the query string and have this function display that value in a new message (in addition to the name parameter). Let’s use a query string parameter called purpose to indicate the purpose of this function. See below for a screenshot of the new code (this time with comments). Remember to click Save after making code changes!
Here’s the code snippet in addition to that screenshot for reference:
#r "Newtonsoft.Json"

using System.Net;
using Microsoft.AspNetCore.Mvc;
using Microsoft.Extensions.Primitives;
using Newtonsoft.Json;

public static async Task Run(HttpRequest req, ILogger log)
{
    log.LogInformation("C# HTTP trigger function processed a request.");

    //query string parameter named name
    string name = req.Query["name"];

    //query string parameter named purpose
    string purpose = req.Query["purpose"];

    //Check request body for name parameter
    string requestBody = await new StreamReader(req.Body).ReadToEndAsync();
    dynamic data = JsonConvert.DeserializeObject(requestBody);
    name = name ?? data?.name;
    purpose = purpose ?? data?.purpose;

    //make sure name and purpose are not null before displaying the Hello message
    return name != null && purpose != null
        ? (ActionResult)new OkObjectResult($"Hello, {name}. This function is for {purpose}.")
        : new BadRequestObjectResult("Please pass both a name and a purpose on the query string or in the request body");
}
As far as code changes go, here’s what was changed from what we saw earlier:
- Comments added in lines 12, 15, 18, 24
- Added a variable definition in line 16 that pulls the value of a parameter named “purpose” out of the query string
- Added line 22 to check for purpose parameter in body of request (only to be thorough and consistent based on how this function was originally written)
- Changed line 25 to check for both variables not null before returning Hello message
- Changed line 26 to modify Hello message and include the value of the purpose parameter
- Changed line 27 to reflect a new message to show if one or both name and purpose do not exist in the query string
The changes have been saved, and it’s testing time. We’ll start by testing as we did earlier in the article. If we want the purpose parameter to be “testing and blogging,”, our URL would look like this:
https://networknerd0.azurewebsites.net/api/FN1-HTTP1-Test?code=cDQam9yMNMYLdebbtPtjMcNzjdwwA4oV2MSuaeferOs1zDvt5FH7DQ==&name=NetworkNerd&purpose=testing%20and%20blogging
And here’s the result in a browser. Notice since we used spaces in our purpose parameter, they are represented by %20 in the URL (and would automatically be inserted even if you typed spaces when you added the purpose parameter to the URL).
![]()
And if we confirm the query string parameters in Chrome’s developer mode, we can see exactly how they are interpreted.
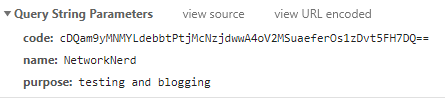
Keep in mind with multiple query string parameters, they can be in any order in the query string (just need proper syntax between them – &). If we take one of the parameters out of the URL (i.e. remove name from the query string), you’ll notice we get a different message (part of the way the return statement is written).
![]()
Another Testing Method for Functions
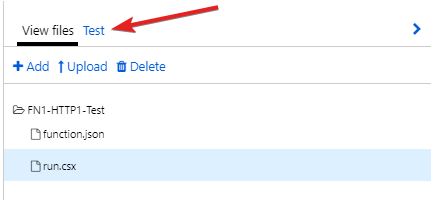
In the previous steps, we chose to leverage writing our function inside the Azure portal but tested it by hitting the URL address directly from a browser. While this is not a bad approach, it is possible to test functions from inside the portal. On the same screen where we can modify the code of the run.csx file, there are some menus which may appear docked on the far right. Let’s click on that arrow to expand the menus and see what happens.
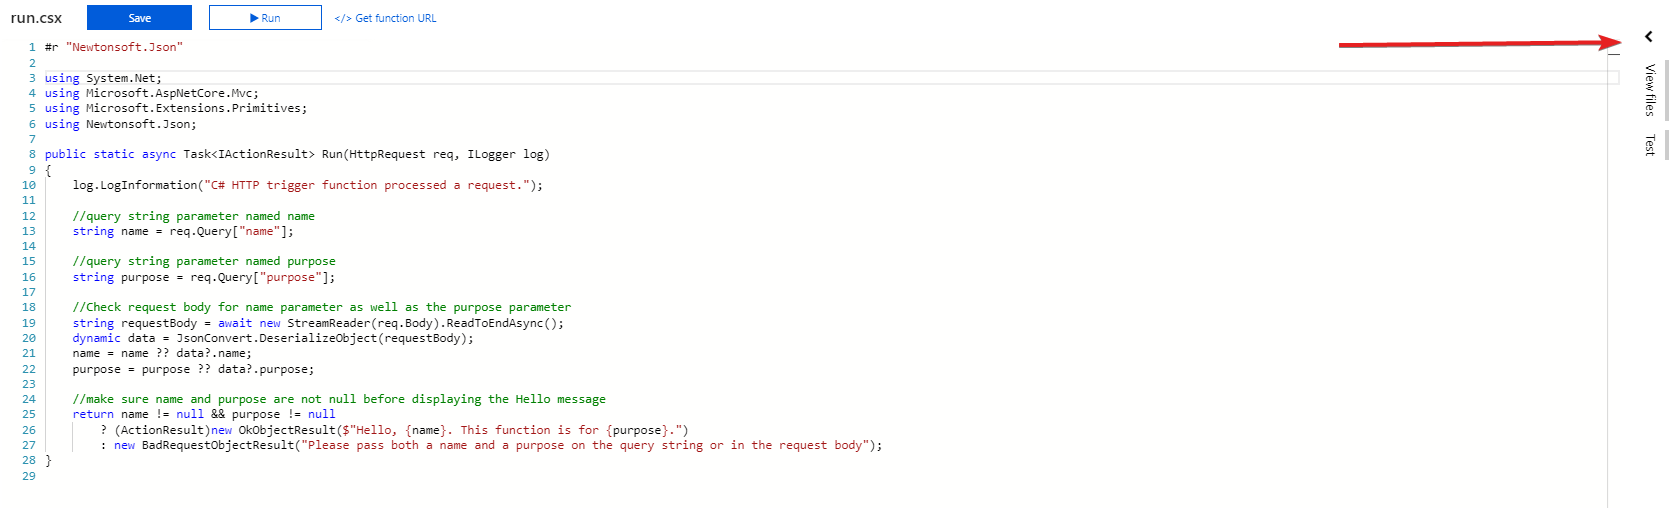
Once the menu pops out, we can see a way to navigate files that contain our function code, but click on the Test tab.
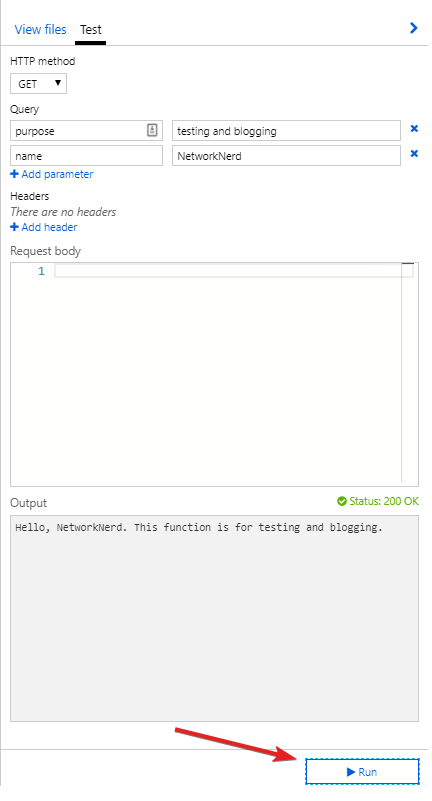
What you see the first time this is opened may or may not look like what is shown below. For me, the request body area was pre-populated. But since we tested our URLs live with query strings, let’s add the same parameters here to see if tests come out successful. We know this is a HTTP GET because we are just accessing a URL and passing information in the query string. This request method can be confirmed in Chrome similar to what we did to verify the query string parameters above. Click on Add parameter.

In the next screenshot, both query string parameters and their corresponding values have been added. For simplicity, I cleared the request body. Clicking Run shows output just as we would see it in a browser as well as the same success status code we would see if using Chrome’s developer tools (200 OK).
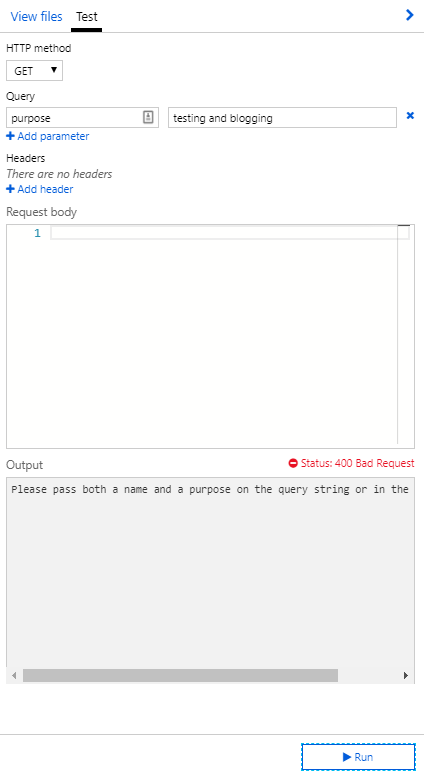
Notice also if we remove one of the query string parameters, the output changes as expected based on our code.
In Summary
Hopefully it’s obvious we have barely scratched the surface with Azure functions and Function Apps in this post. Could I have written the code for the C# function on my own instead of using a template? That’s possible, but it would have taken way longer and lots of syntax research to do so. There was a template to start from, which allowed us to follow the logic and make some tweaks to the code that changed the functionality. Keep in mind this is only one type of function (HTTP trigger) in one specific language (C#). But I have to say this was a fantastic learning experience. There are more posts to come on Azure functions.
Other Posts in This Series
- Part 1 – This post
- Part 2 – Deploying Azure Functions with Visual Studio Code
- Part 3 – Push and Pull – Using VS Code with Azure Repos
- Part 4 – Azure Functions and C# Code Intricacies – An Azure Pipelines Prequel
- Part 5 – From VS Code to Azure Pipelines – Basic CI/CD with Azure Functions
- Part 6 – The Next Wave: Exploring Tanzu Observability’s Integration with Azure Functions
- Part 7 – Introduction to Distributed Tracing with Tanzu Observability and Azure Functions
- Part 8 – Coming soon!
Further Reading
I found the following articles very helpful as I was writing this post and wanted to share if you’re looking to learn more about Function Apps.
- Azure Functions 2.0 – Real World Use Case for Serverless Architecture
- Read this post to get a feel for why multiple serverless functions might be stitched together throughout a business process.
- Azure Functions Tips: Grouping Functions into Function Apps
- If you have no idea how to properly build Function Apps or are new to it like me, this post is a must read. Starting to build things in a logical way from the beginning builds proper habits that won’t need to be broken later
- Create Your First Azure Function
- I used this to help as I worked through this article, but not all screenshots matched what was in the Azure portal.