A fellow Redditor responded to this post sharing an experience with Azure Functions and Azure DevOps, and it got me to thinking. Several others also posted helpful replies. Since I was planning to dig into using some kind of code repository as well, why not give Azure DevOps a shot? That, dear reader, is where our story begins.
This is part 3 of my quest to explore Azure Functions for self-education in functions-as-a-service. The goal of this post is to wire up VS Code with source control using Azure Repos.
Back in part 1, we explored Azure Functions and Function Apps via the Azure portal. In part 2 we explored deploying function code to Azure directly from VS Code. Now that we’ve reviewed, let’s get to work!
In my last post, we configured VS code to build, test, and deploy functions directly to an Azure Function App. In the spirit of once again walking before we run, let’s go back to the Azure portal and add some hooks into code repositories. As before, I’ll be documenting both successes and failures throughout this post, so you may want to read it completely before following all steps in order.
Revisiting the Azure Portal
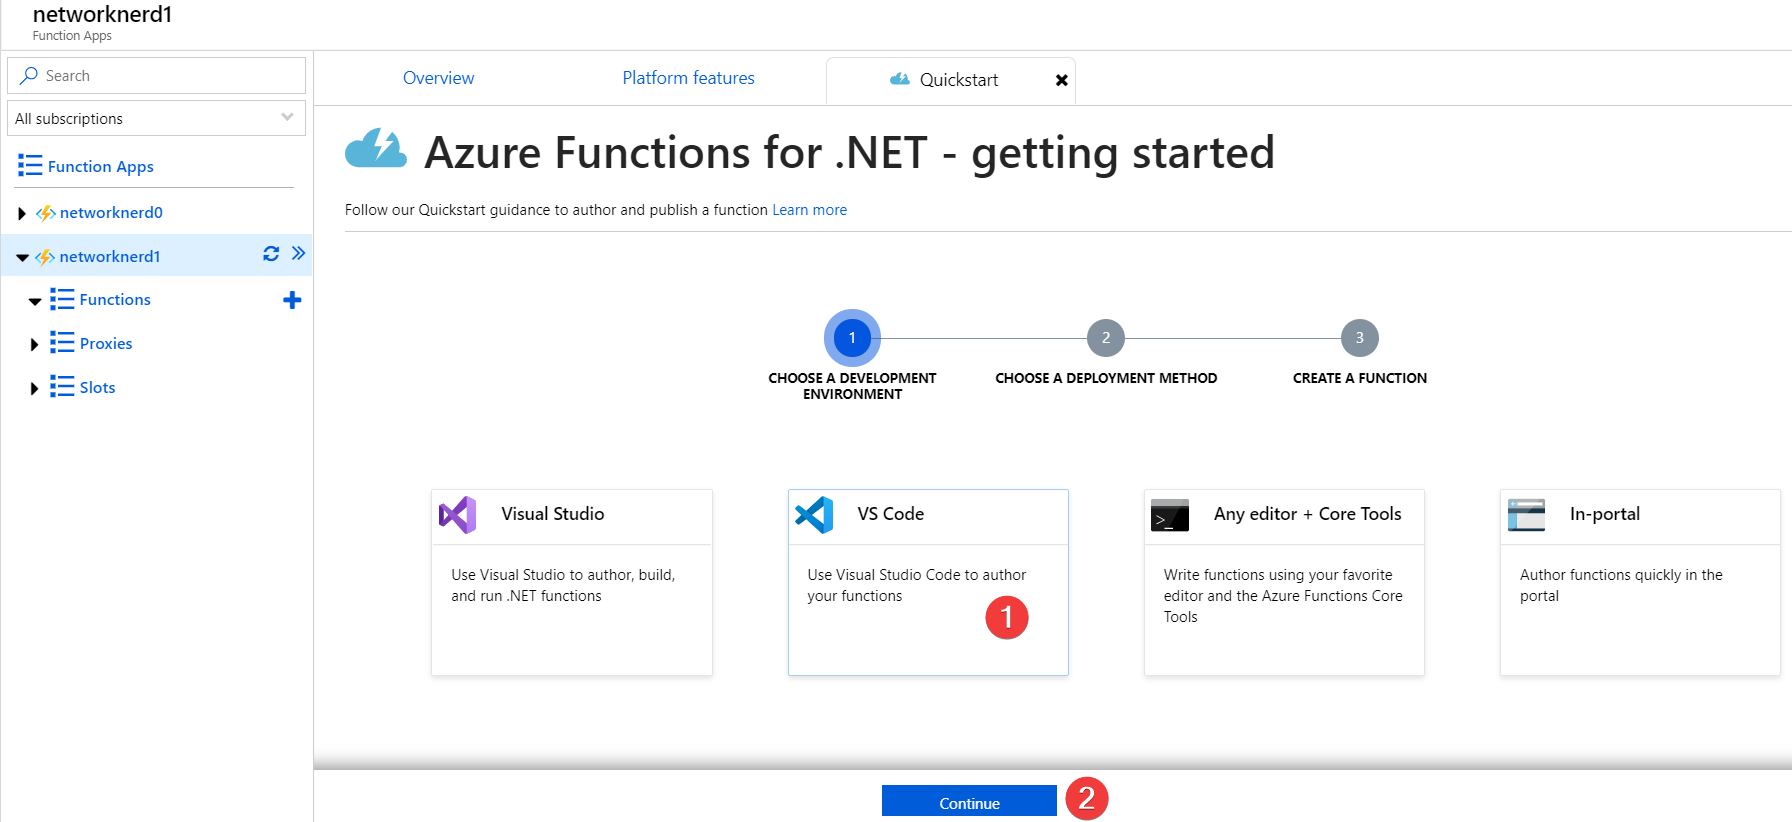
For this exercise I’ve created a brand new Function App called networknerd1 with no functions inside (instructions for doing this part can be found here). Remember deploying functions from VS Code made every function inside the Function App read-only in the portal, so we’re starting fresh. To add a function to networknerd1 using the Azure portal, we can leverage the Quickstart menu again. We’ll select the option to use VS Code (as we did previously) and then click Continue.
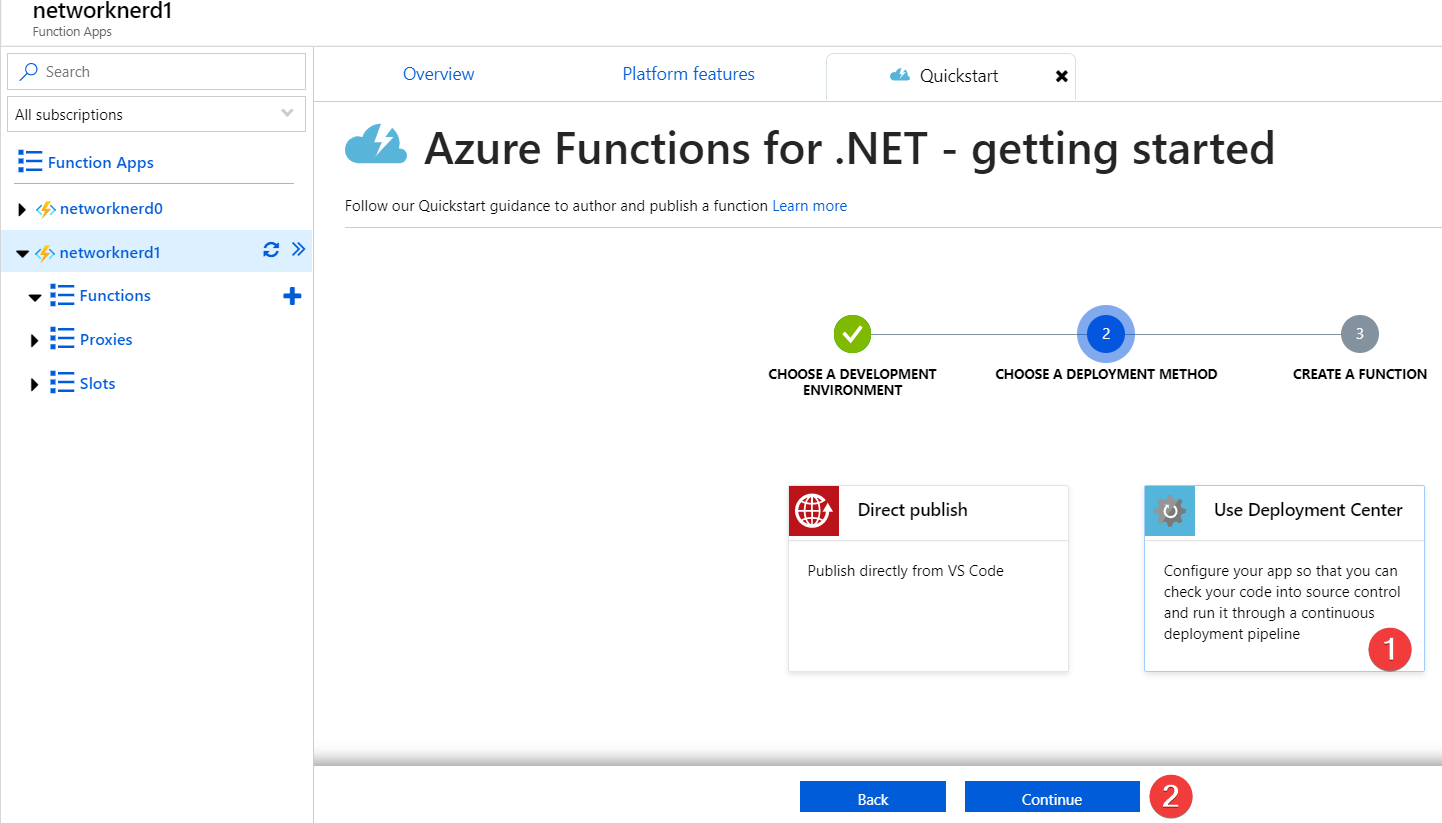
From here, select the option to Use Deployment Center instead of Direct publish. Then click Continue.
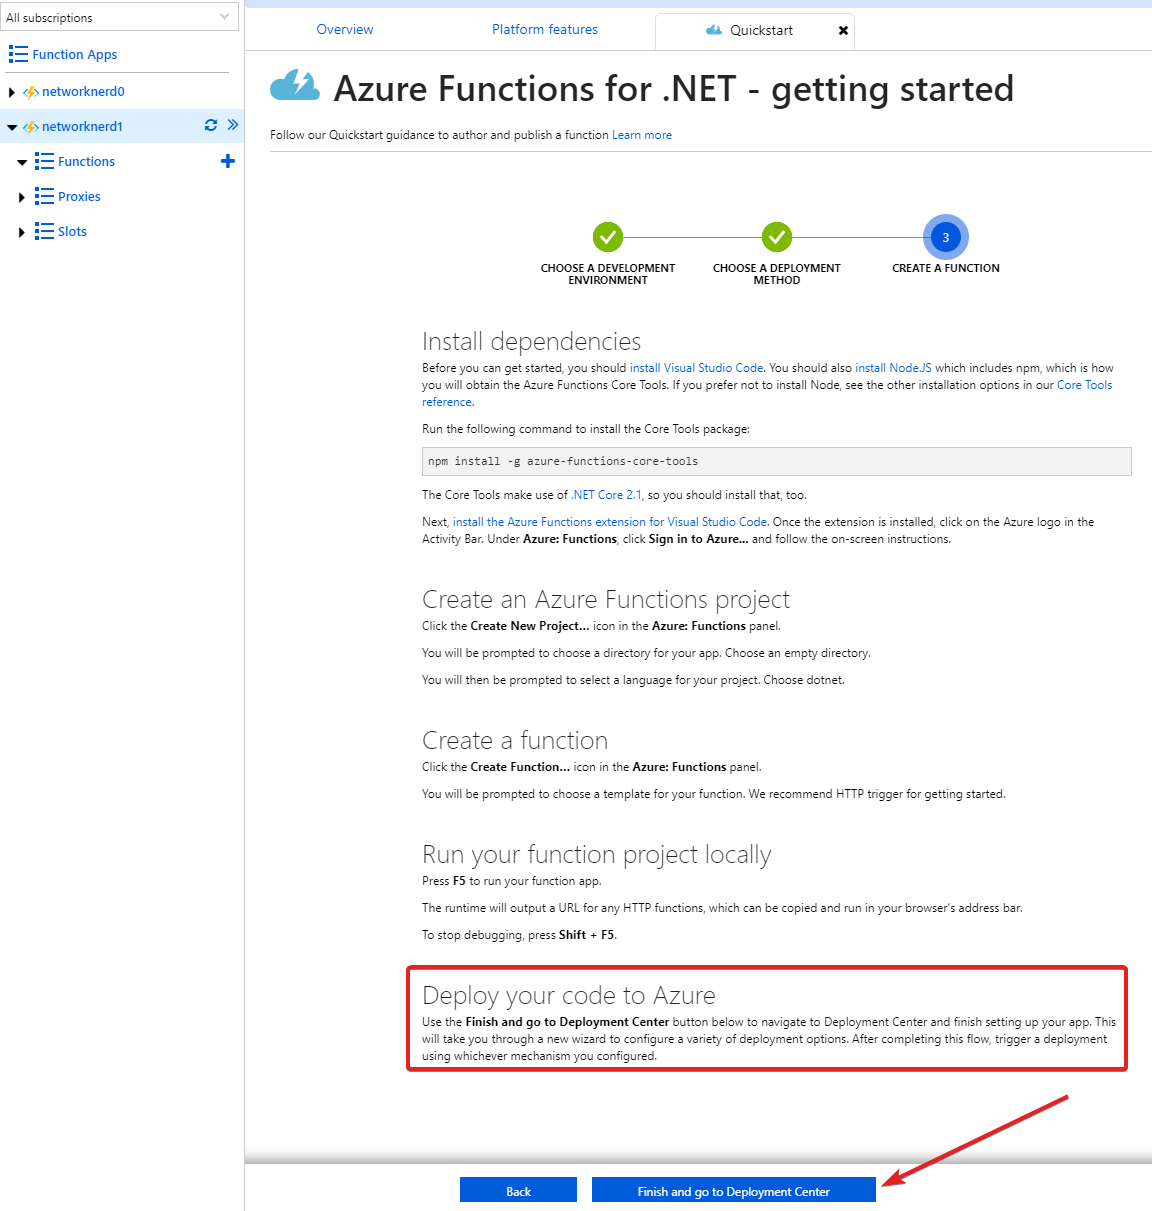
This screen looks extremely familiar. All the work needed to get VS Code working and overcome errors is documented here. For now, we will skip the process of creating and testing a new Azure function inside VS Code. But there’s a new option to finish and Go to the Deployment Center. Let’s see what happens next.
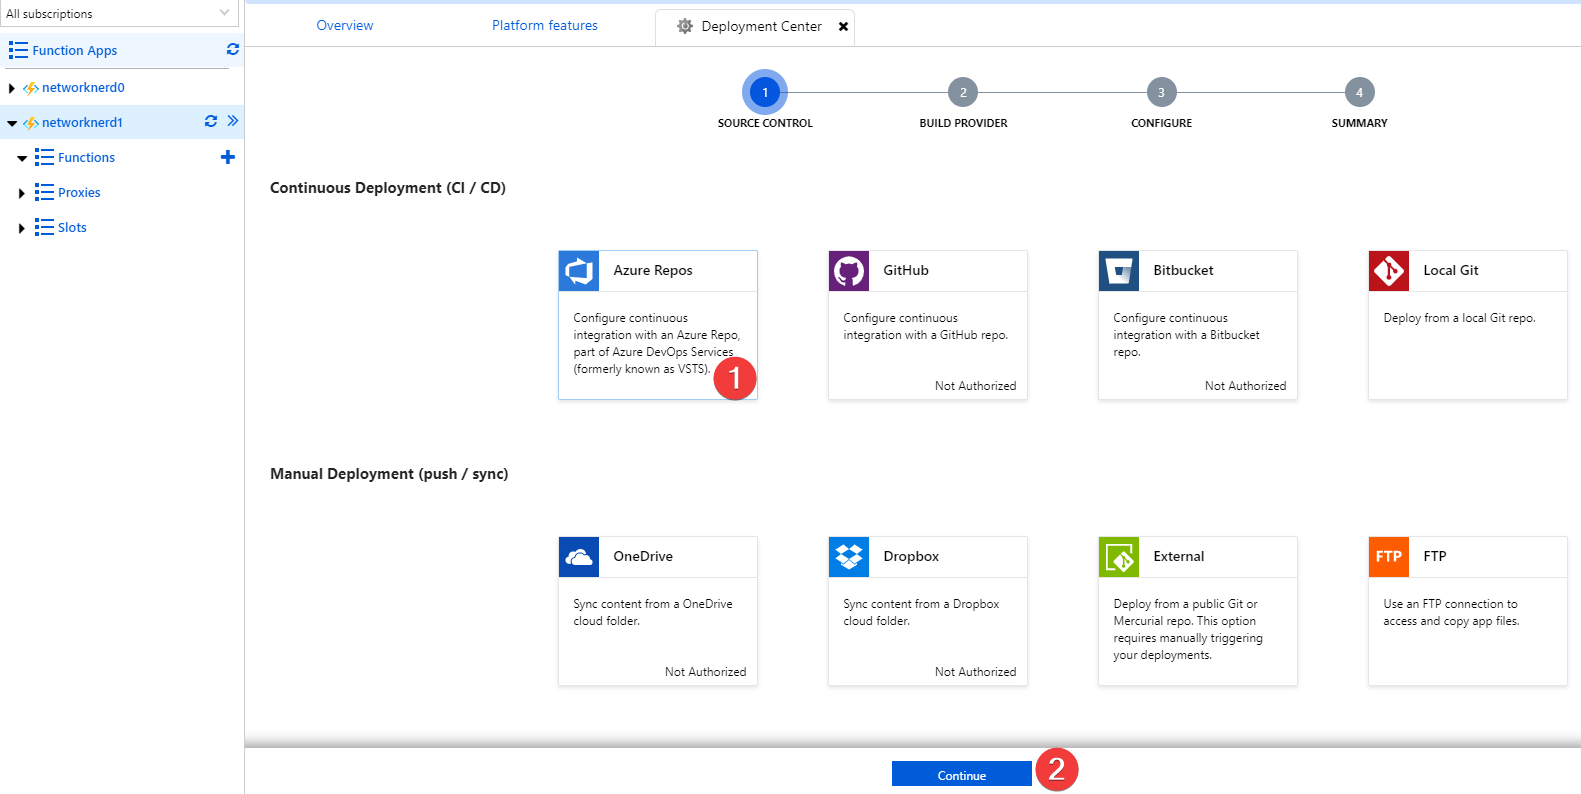
The Deployment Center menu allows us to select many different options. Select Azure Repos and click Continue.
On the next screen, select Azure Pipelines as the build provider. Then click Continue.
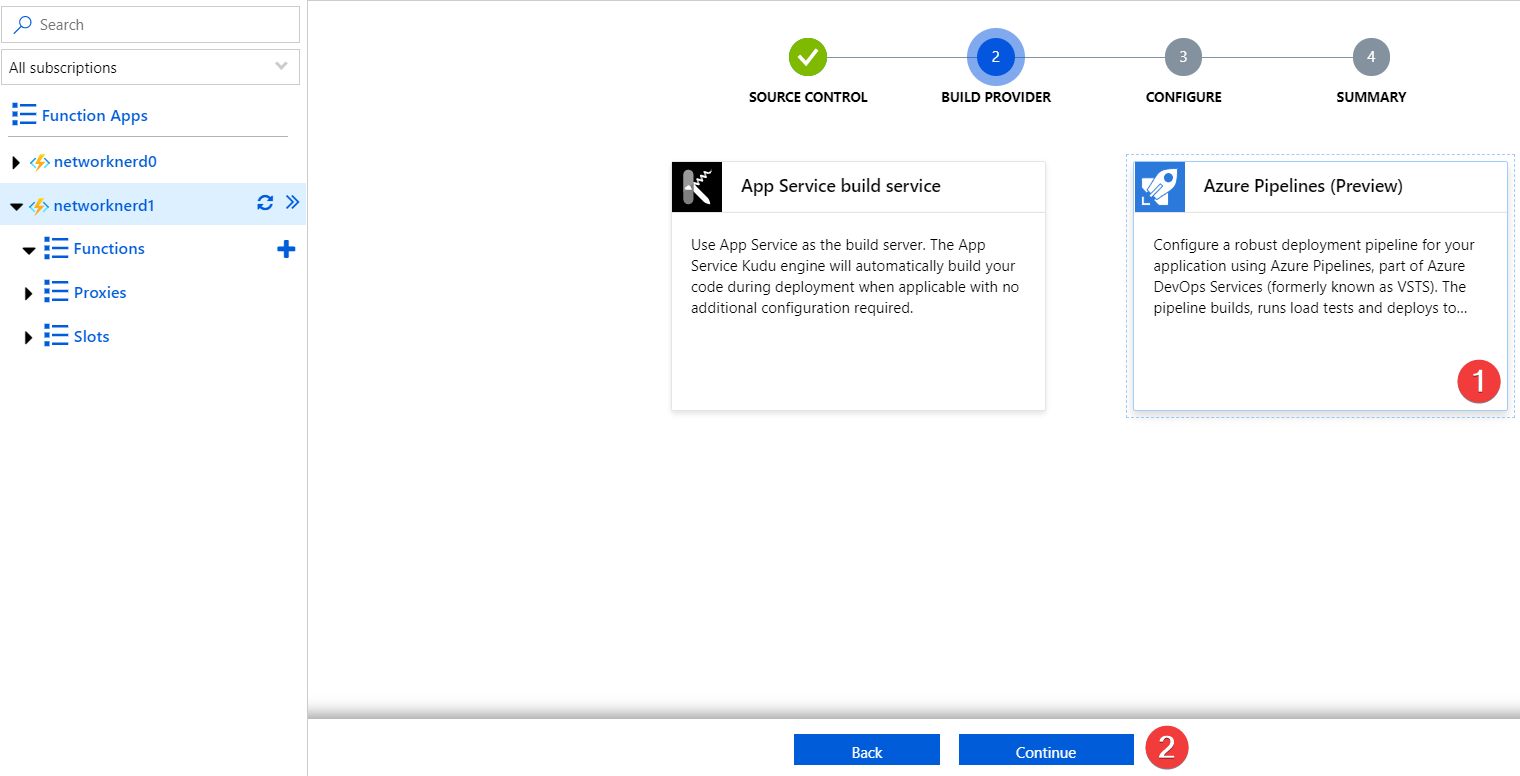
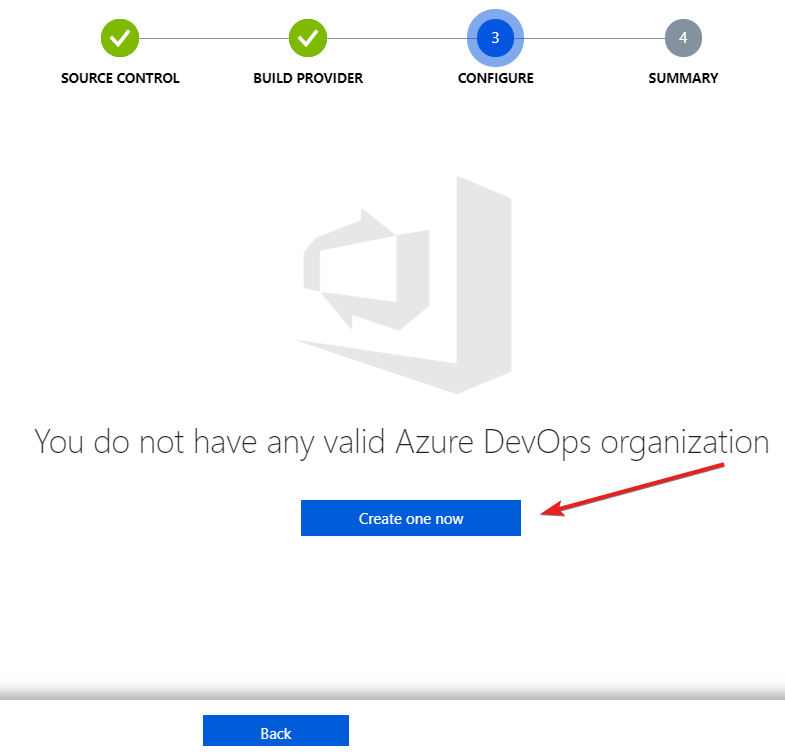
Oops. The Azure repos and pipelines functionalities are part of Azure DevOps. We’ve not done configuration to setup Azure DevOps. There is no time like the present to keep going. Click the button to create an Azure DevOps organization.
Configuring Azure DevOps
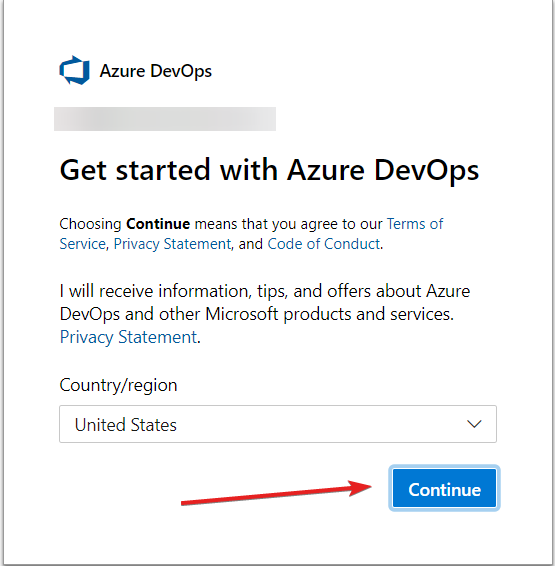
Clicking the “Create one now” button above opened a new tab showing this document containing a number of best practices, explanations of concepts, and pre-requisites for using Azure DevOps. Within the document there is a link to sign in to Azure DevOps, so let’s see what happens when we try it. After clicking the link, we’re presented with the following screen. The e-mail address tied to your Azure portal account should show here as well. Click Continue to proceed.
This is automatically creating an Azure DevOps organization. And we really only need 1 organization to get started.
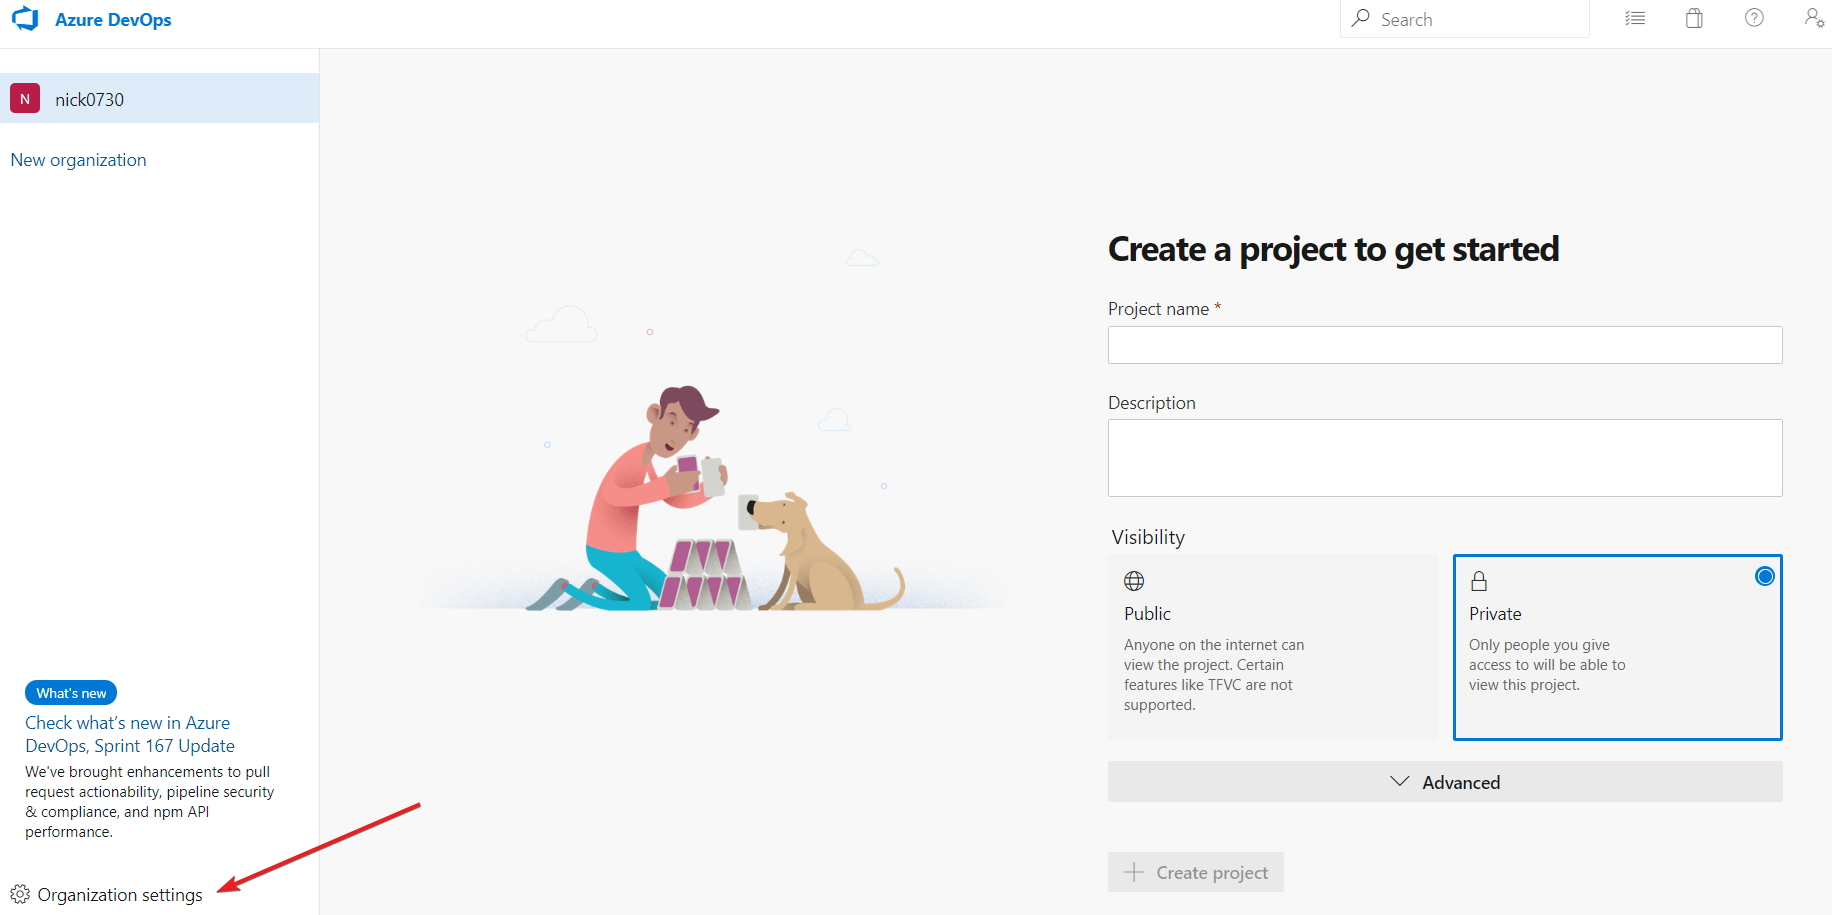
What we see now are the details of an Azure DevOps organization construct named nick7030, which is a mechanism for organizing and connecting groups of related projects. Rest assured there is a free tier of services available to each organization which should do just fine for tinkering. See this document for more details on organizations and what specific services are free. Let’s not settle for an auto-generated organization name. Click Organization settings in the lower left to change it.
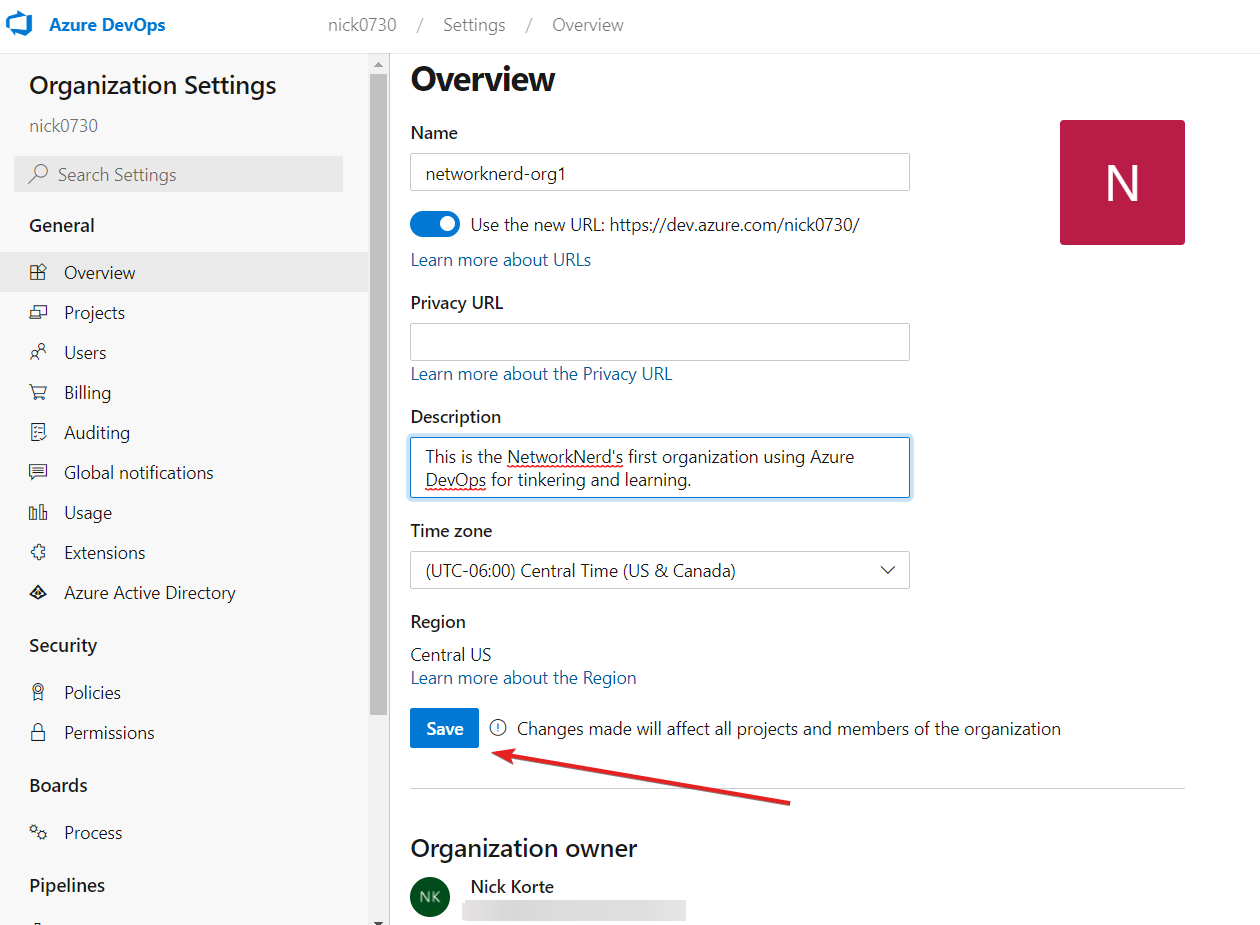
There are so many organization settings we could explore here, but for now focus on changing the organization name to something better. I went with networknerd-org1. The Privacy URL field is for adding a link to a privacy policy (read more on that here), so leave it blank. Add a description, set the time zone, and click Save.
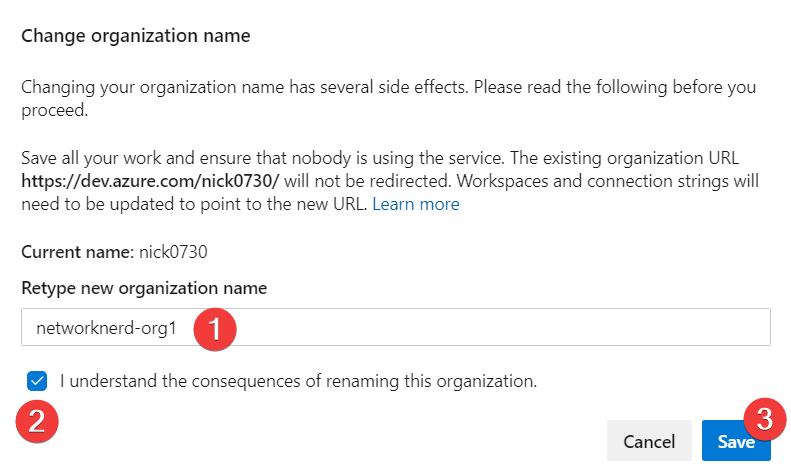
Changing an organization name can have some wicked side effects, but for us it has none since the organization is empty. Retype the organization name we want to change to (networknerd-org1), check the box that we understand the consequences, and click Save.
The changes we made worked. Don’t success messages (in green) make the heart happy? Keep in mind the change affected the URL of this Azure DevOps organization. Leave the organization details open in your browser window because we will need to come back to it.

Going Back to the Deployment Center
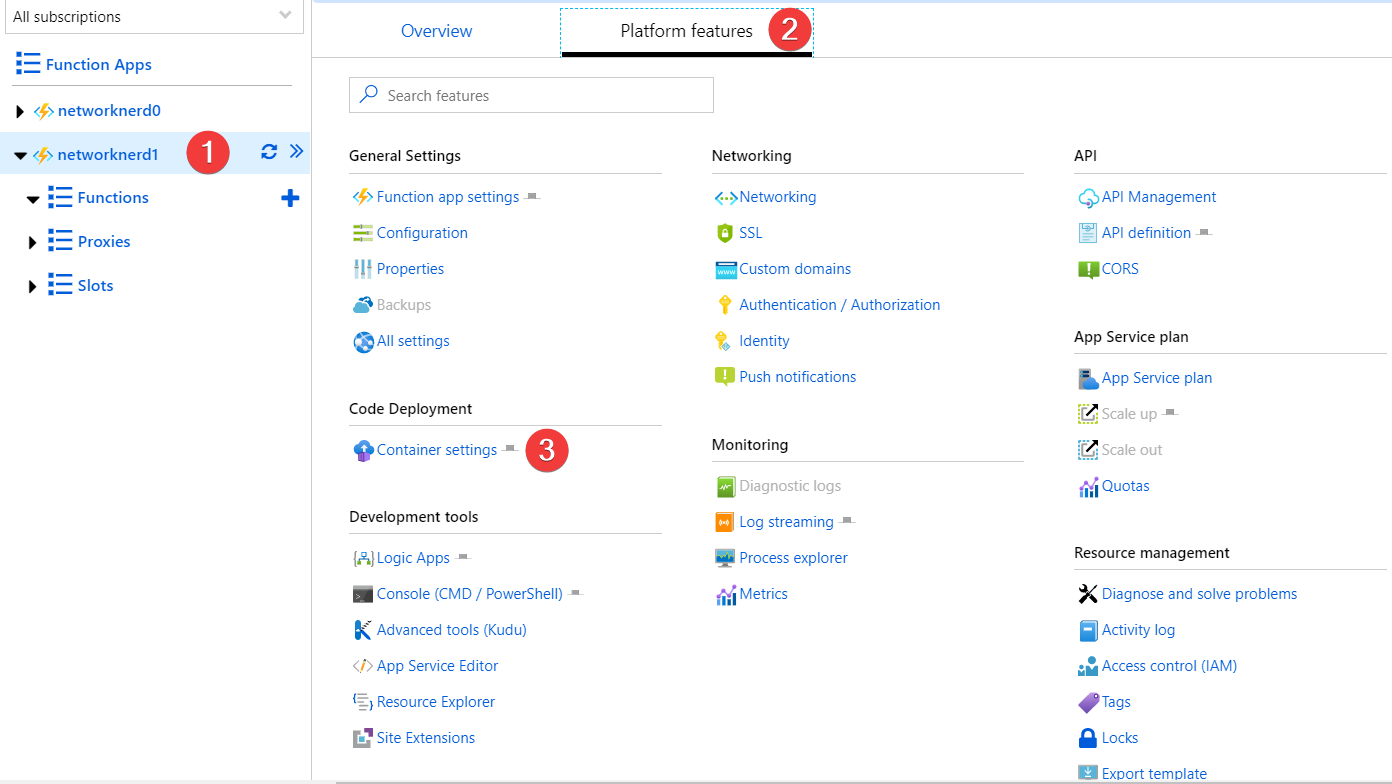
The Quickstart menu for adding functions to a Function App is not the only way to get back to the Development Center workflow. Since we have an Azure DevOps organization created now, what does progress look like inside the Development Center? We can use that workflow to help determine what information might be needed from Azure Repos and Pipelines to complete our desired setup. After selecting Function App networknerd1 in the Azure portal, click on the Platform features tab. Then click on Container settings in the Code Deployment area.
This launches the Deployment Center once again. Select the same options for steps 1 and 2 as before (Azure Repos, Azure Pipelines) so we can fast forward to step 3.

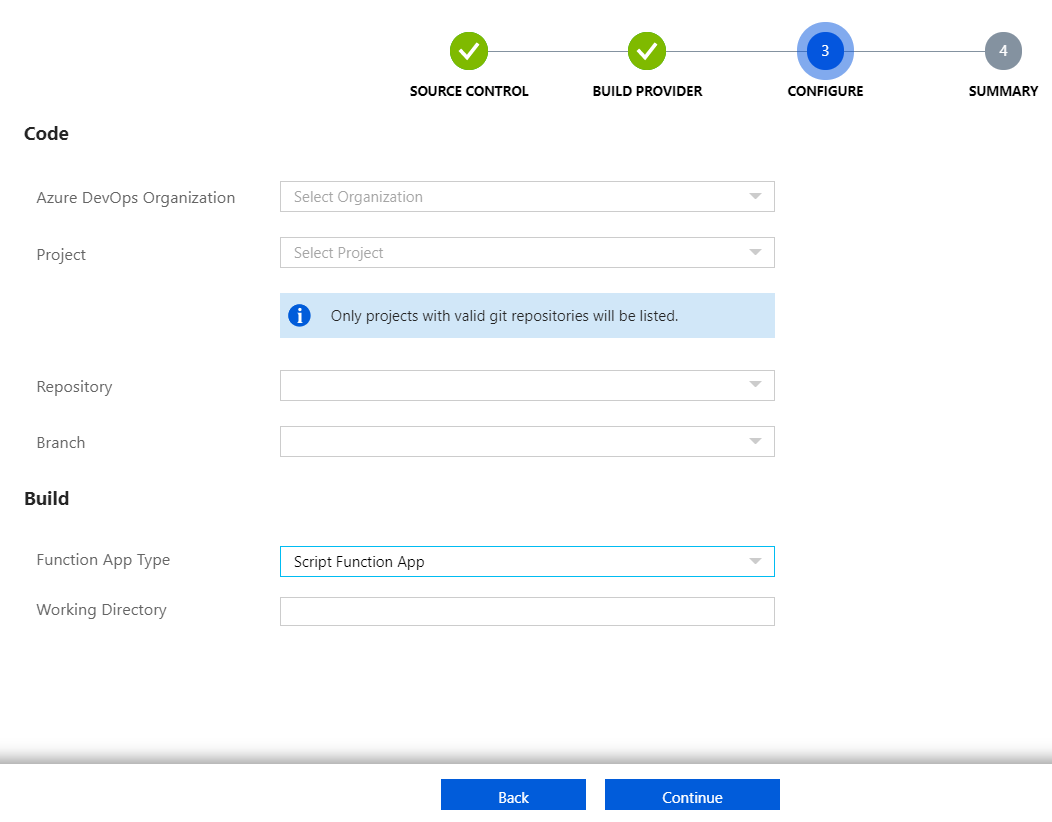
This is new territory. At this point we have an AzureDevOps organization created. It will appear as a selection from the organization dropdown. But no projects exist within the organization yet. The repository and branch fields must have to do with Azure Repos somehow, and we can only assume everything in the Build section is something related to Azure Pipelines. There’s no way to move forward without doing more prep work.
Creating an Azure DevOps Project
According to the documentation referenced earlier, we need at least one project created to start using Azure Repos or Azure Pipelines. Since we are still on the organization settings page from earlier progress inside Azure DevOps, click Projects in the left-hand window. At present, this organization has no projects within it. Click the New Project button to create one.

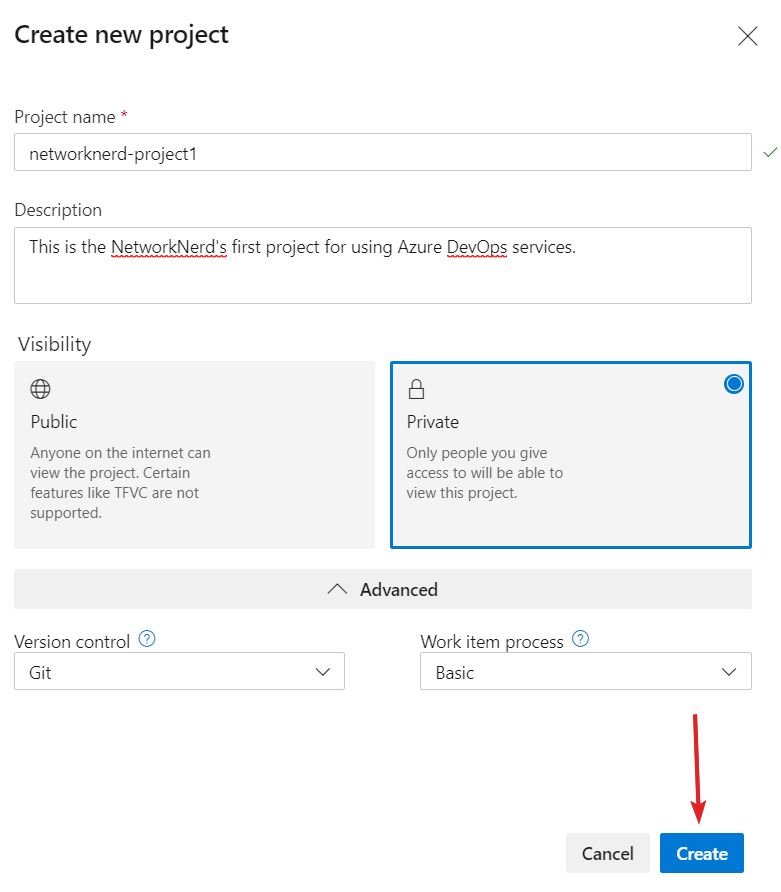
To read up on projects and how to structure them, check out this doc. A more detailed process for creating a new project can be found here. For a name, let’s choose networknerd-project1. Notice the green check mark shows that we have not used any illegal characters. We’ll choose to make the project private for security purposes. For version control, we will stick with Git (the default – read this for how to decide). And we’ll leave Work item process set to Basic (the default – read about the options here). Click Create.
As soon as we click Create, the magic starts to happen.
Our project was created successfully with process set to Basic and Visibility set to Private. It probably isn’t extremely obvious from the screenshot, but our project takes up one “row” of space in the list of projects for organization networknerd-org1. When we hover our cursor over the “row” containing the project or select the checkbox on the far left, the color of the “row” changes from white to gray, causing an ellipsis appear at the far right. Clicking it allows us to either rename or delete the project. Click on the project name to dive into the project settings.

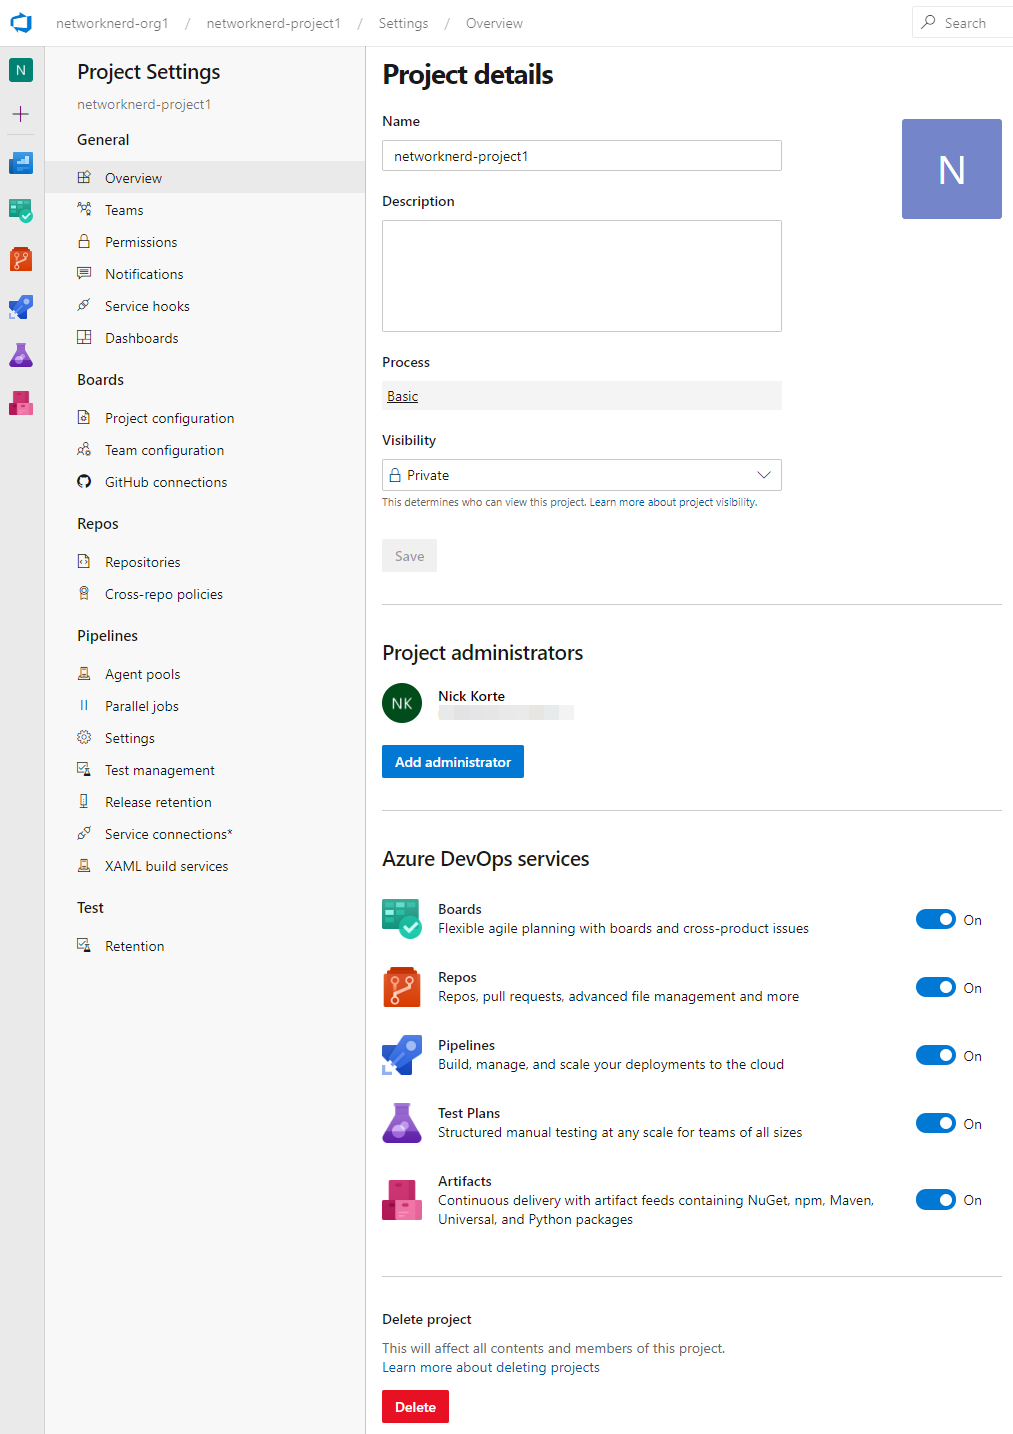
Looking at the details, we see that I am the project administrator. There are no other administrators of this project to add at present. But, thinking back, all we did was create a project, right? We didn’t have to enable any Azure DevOps services at the time of project creation. All have been automatically activated. If there are services which will not be needed for the project, go ahead and turn them off here and save changes. For our purposes, we indicated back in the Development Center that we would be using Repos and Pipelines. It seems like those services are all we need for now, but go ahead and leave the other services enabled. Every service enabled for this project has its own set of menu options in the left-hand window. To get a feel for how to use this project, click on the organization name in the upper left (networknerd-org1).
From the organization level, here’s the view. If there were multiple projects, we would see them all here. Hovering our mouse over the project shows all services enabled for the project. Click on the project to zoom in a little deeper.
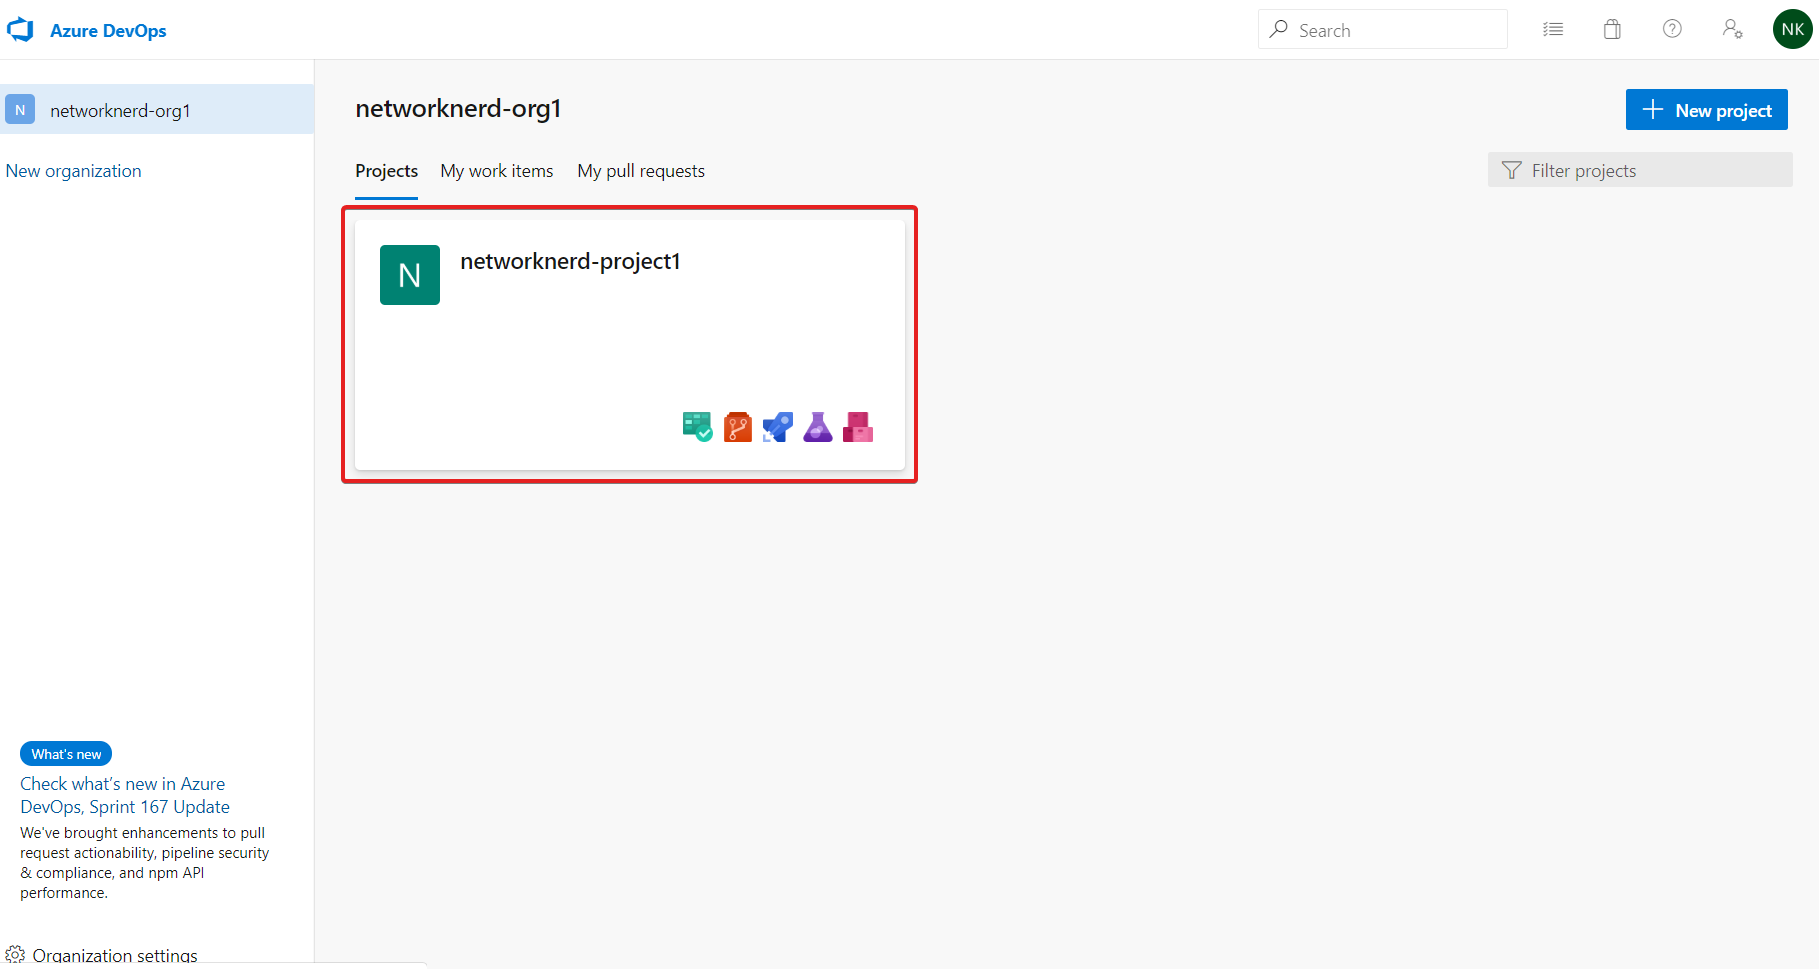
Working with Azure Repos
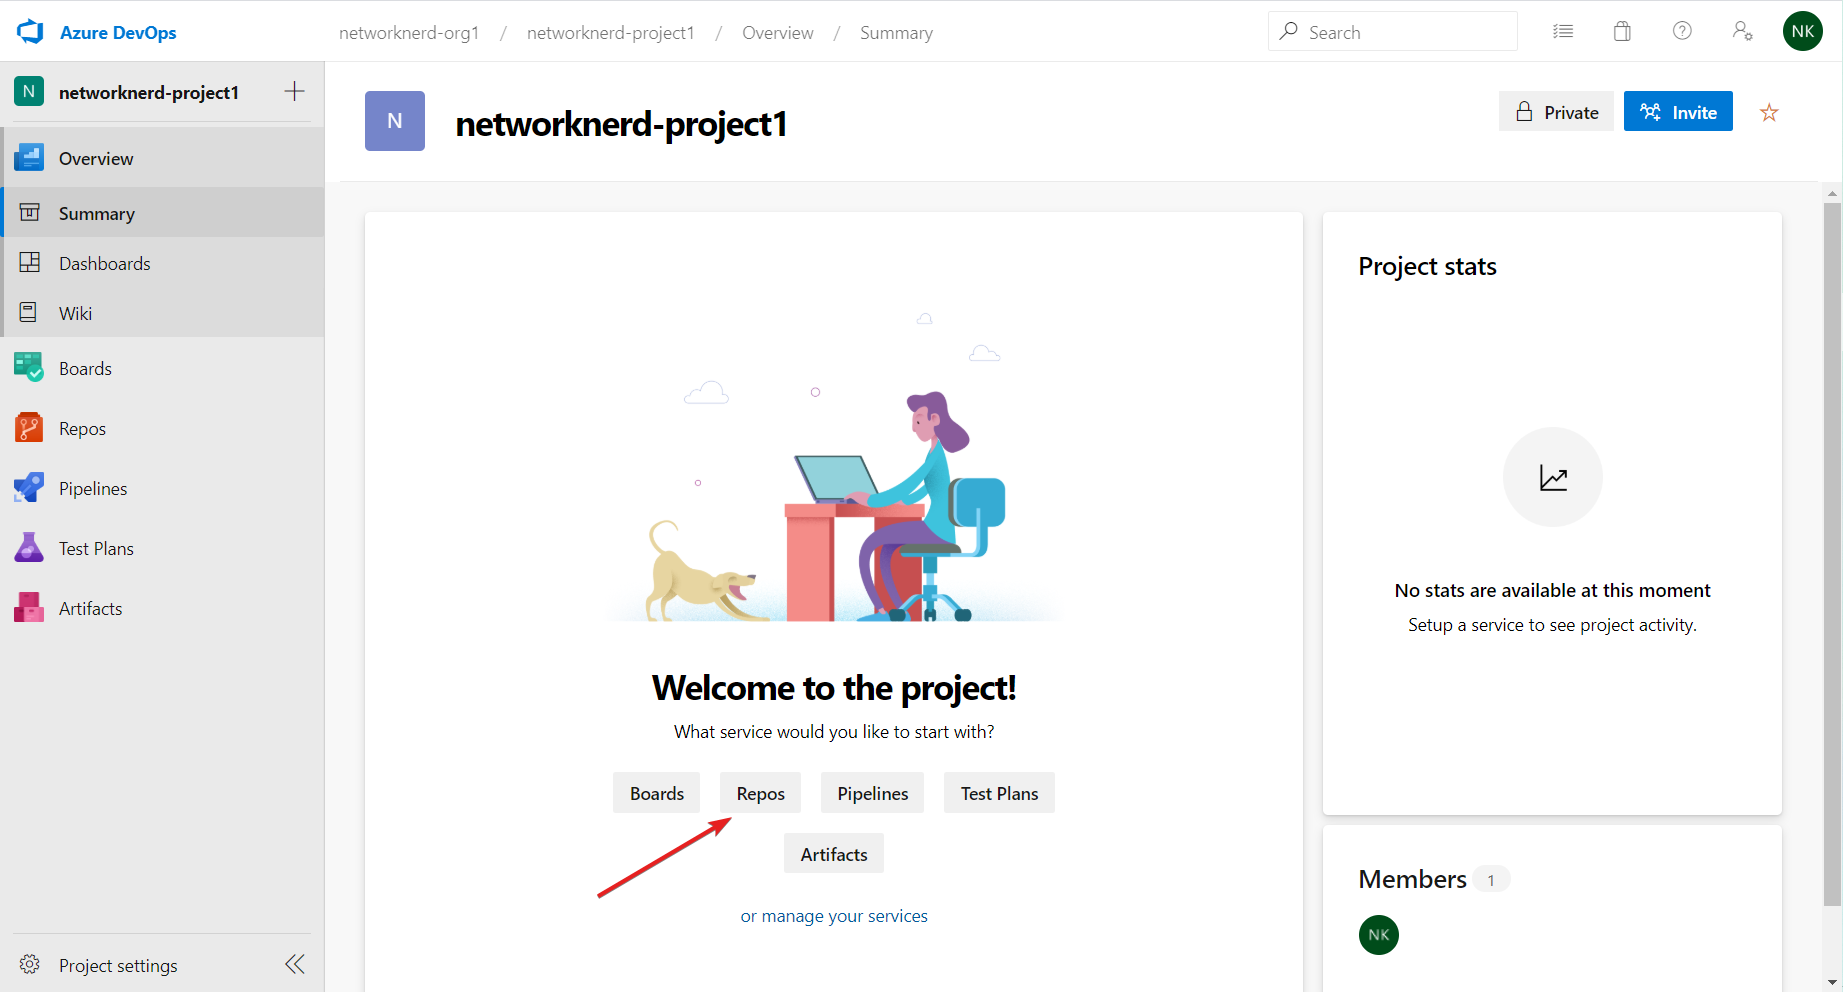
From here, we could invite others to work on the project if needed. Project settings are still accessible from the link in the lower left corner. But we still have a blank slate. Let’s start with the Repos service. We can click the button on the welcome screen or select Repos from the left-hand menu.
There are many options when we reach the Repos area. It may not be extremely clear at first look, but when the project was created, a repo with the same name as the project was automatically created. At the moment it contains no code. Notice the repo name is at the very far right on the top bar (kind of like it’s part of a file path). Before we do anything with the repo, let’s rename it to be something different from the project name. Click the dropdown area for the repo name, and then click Manage repositories.

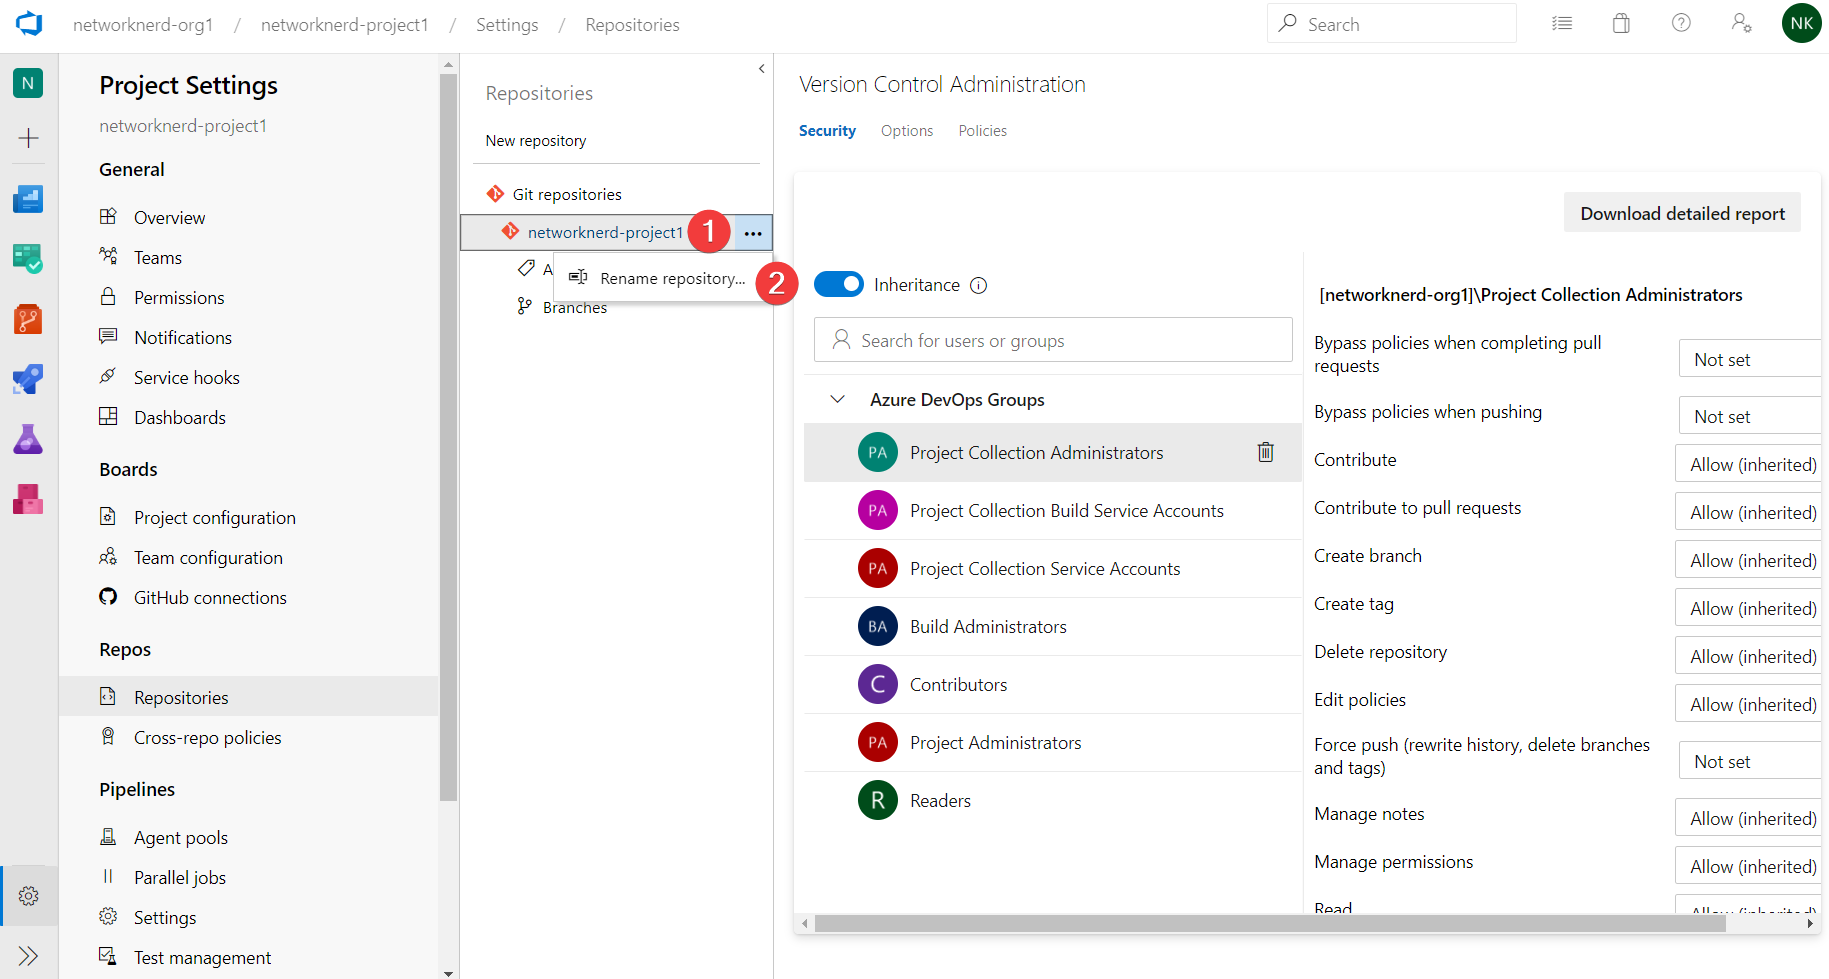
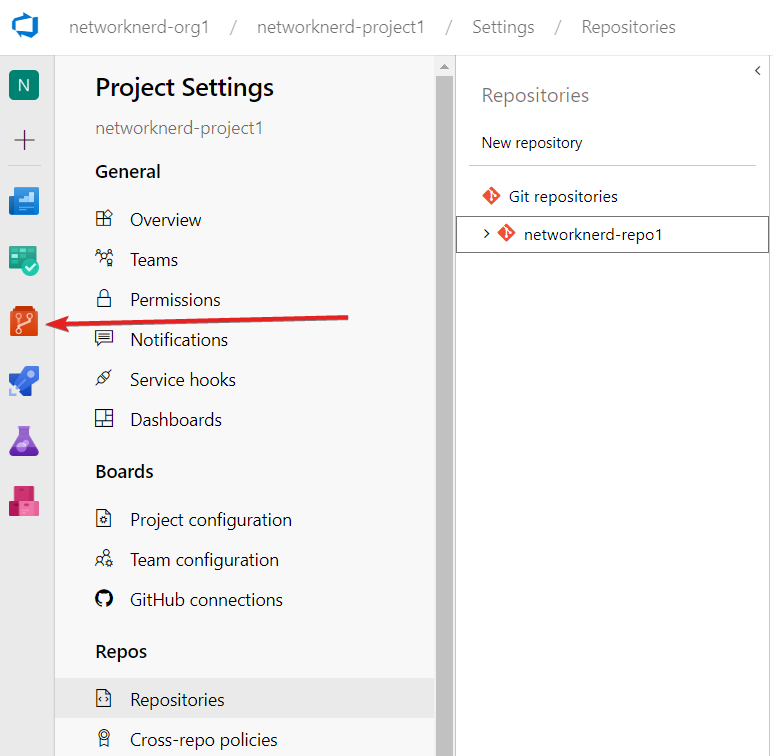
Now we’re back on the project settings page but this time for repositories. Remember, when the project was created, we selected Git as the default for version control. On this screen we see the repo networknerd-project1 listed under Git repositories. Click on the repo name, click the ellipsis next to it, and then click Rename repository.
We’ll go with networknerd-repo1. Once you have typed the new repository name, click Rename.
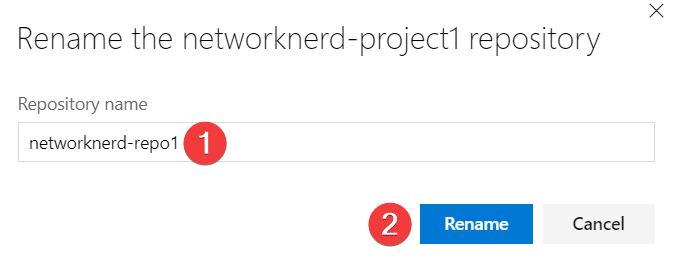
The repository name has been successfully changed. Click on the Repos icon on the left-hand menu to get back to business with repo configuration.
Oops – something is still looking for the repo from before we changed its name. Click the button labeled Switch to the default networknerd-repo1 repository to resolve this issue. That will change the address bar in your browser to point to our newly renamed repo and allow us to continue.

Before we go nuts with the repo that has been created, let’s initialize it with a README file so it is no longer empty. That will make it easier to integrate with VS Code when the time comes. Click the Initialize button.
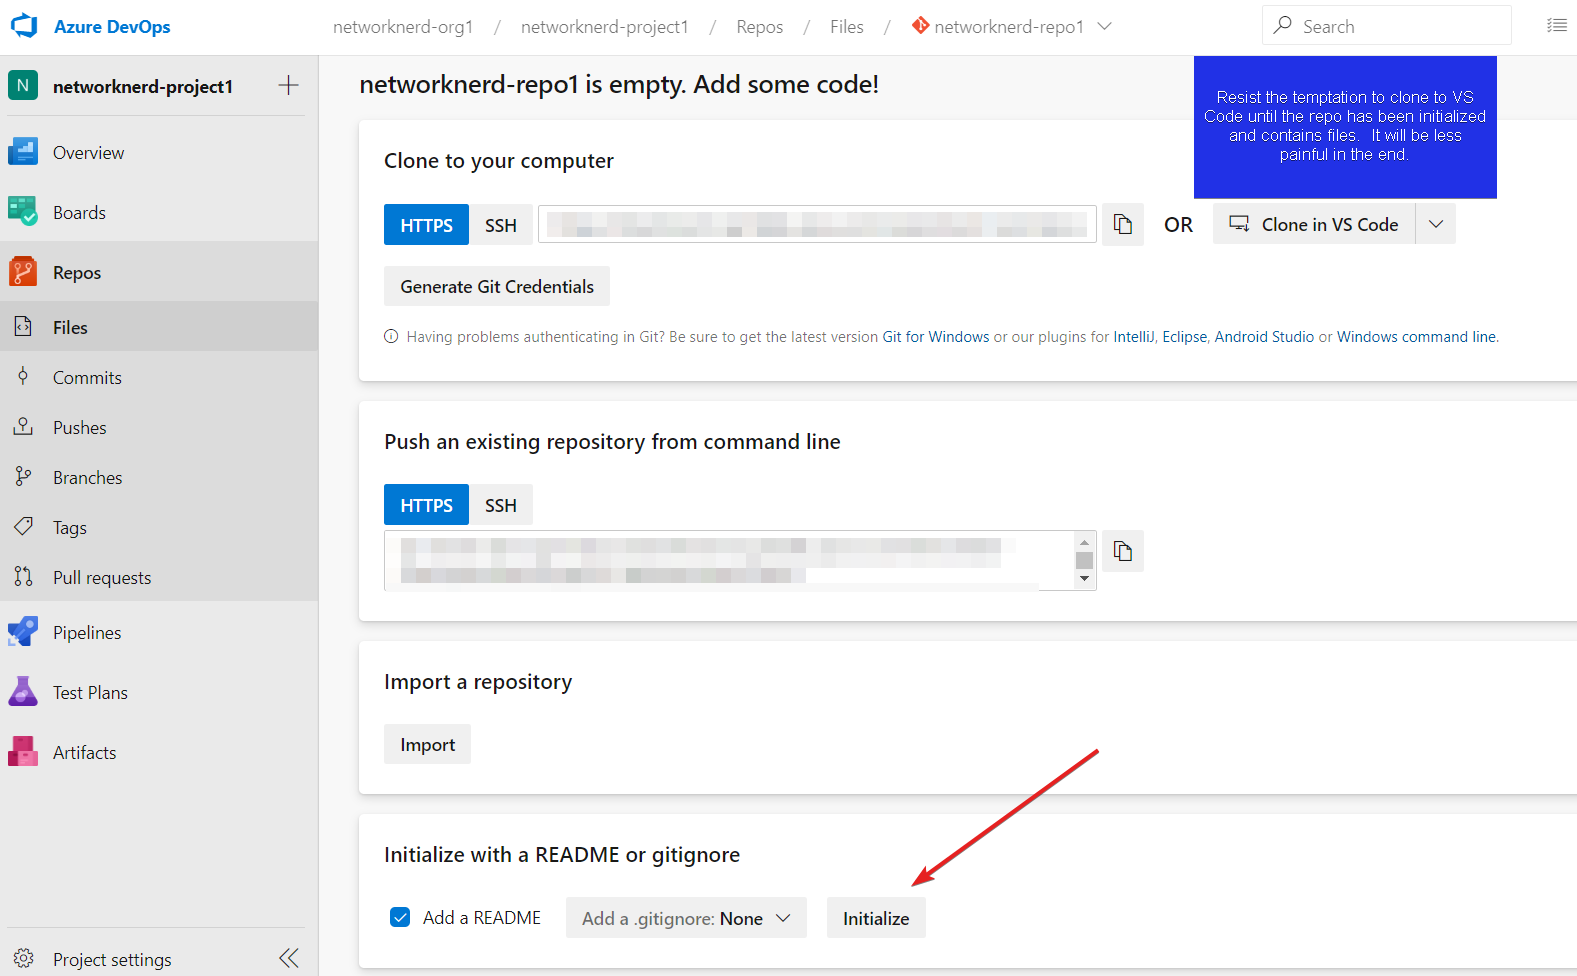
Once the README file (a .md or markdown file) is created in our repo (automatically committed to the master branch), it will be the only file the master branch contains. In fact, until the repo is initialized, it seemed like there was no way (through the Repos area in Azure DevOps or in VS Code) to add a new branch, new folder, or commit anything to the repo. Now we see the contents of the README file and have some new options available. Wouldn’t it make sense to ensure we can perform a commit to this repo from VS Code before setting up Pipelines? We’ll start by creating a folder inside the master branch of our repo to eventually use for code files. Click the ellipsis in the upper right, then select New -> Folder.

We’ll call the new folder VS Code Testing and place a new file inside called VSCodeTesting.md (only because a folder cannot be empty). Click Create to proceed.
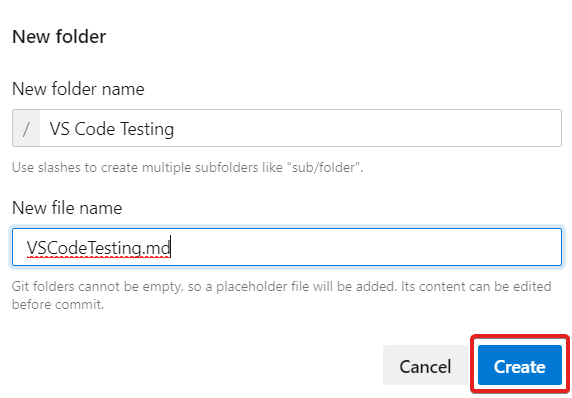
As part of this process, we have the option to add content to the VSCodeTesting.md file. I added a brief description for the purpose of this folder. We can see both in the repo tree to the left and in the underlined folder path exactly where this file will be located in the repo. Go and and click Commit to save changes.

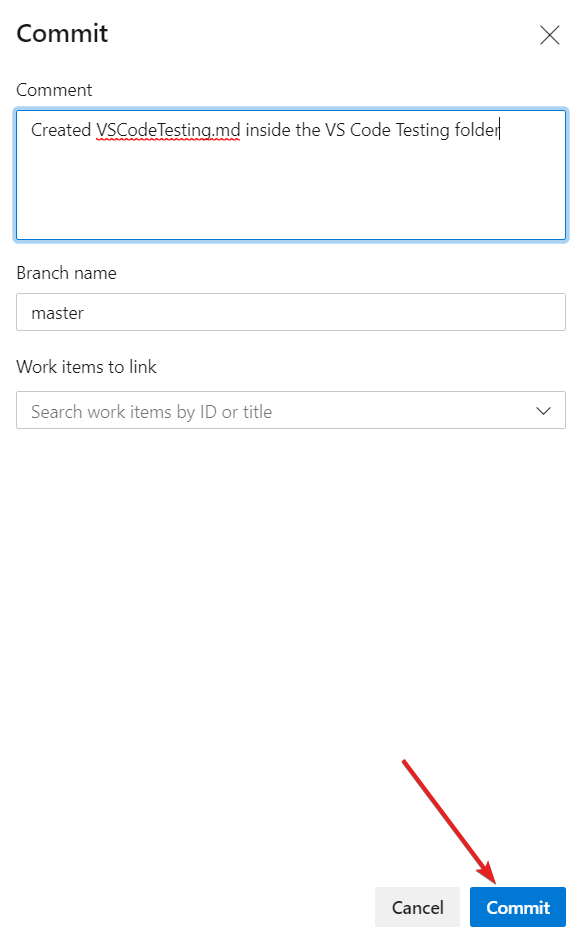
Once we click Commit, we’re given the option to add a comment to help others who read it understand what was changed and confirm the branch to which this will be committed (master). There were no work items to link (and nothing available in the dropdown). Click Commit to proceed.
The commit confirmation message shows all changes were indeed saved. We can still see the contents of VSCodeTesting.md, rename the file, or make changes to its contents. But, let’s go back to the root of the repository. Click the folder icon highlighted below.
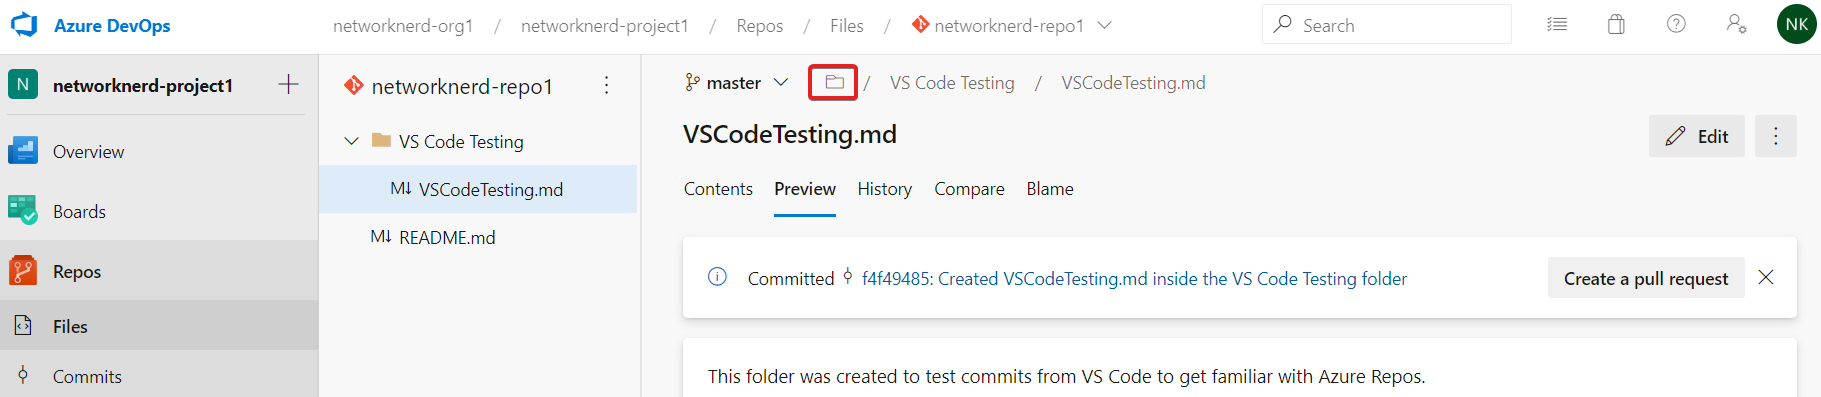
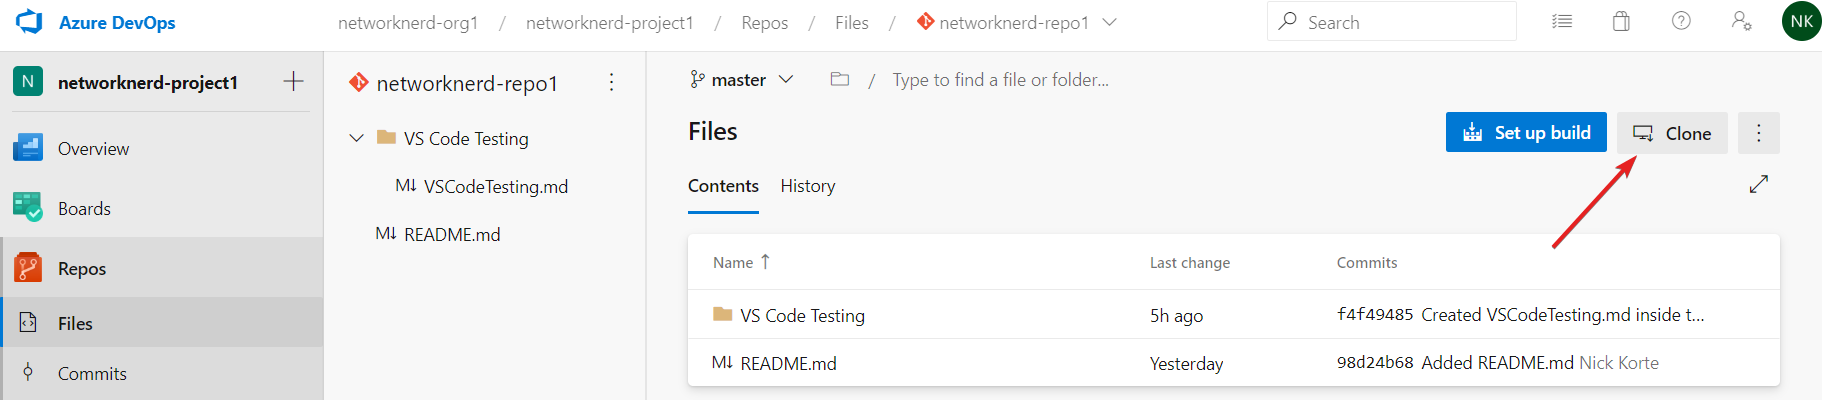
In order to use the repo with VS Code (code is local to my laptop currently and previous to this post was pushed directly to Azure), the repo must be cloned to my computer. Click the Clone button (visible now at the repo’s root) to start the process.
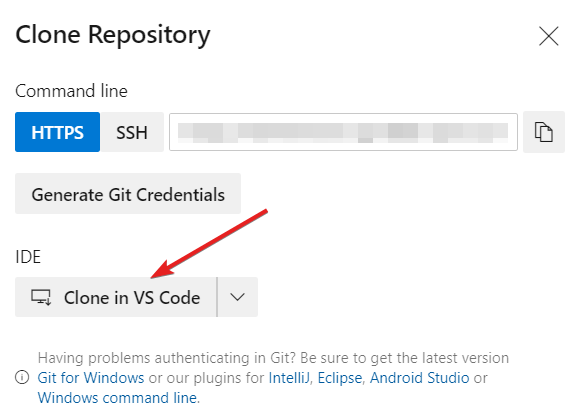
If you’re reading this and want to clone to a different development environment than VS Code (assuming it is installed on your computer), click the dropdown arrow to the right of the Clone in VS Code button to see various options. Click Clone in VS Code to continue.
Clicking the button automatically forwards us to the following page. Click the option to Open Visual Studio Code.
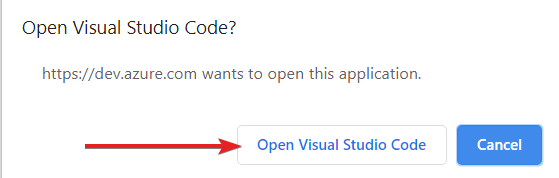
This should automatically launch VS Code and present the following popup. Click Open to continue.
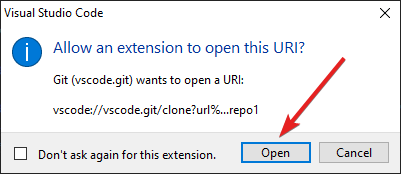
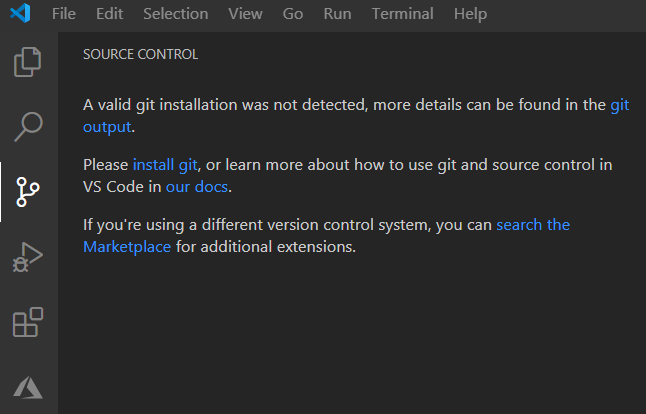
It seemed like that did nothing, and the truth is…it did nothing. There were no errors to troubleshoot, but per this doc, I should have installed Git on my computer before trying to clone the repo. I wasn’t sure if perhaps VS Code installed Git by default, and according to the SOURCE CONTROL area, it does not.
Installing Git
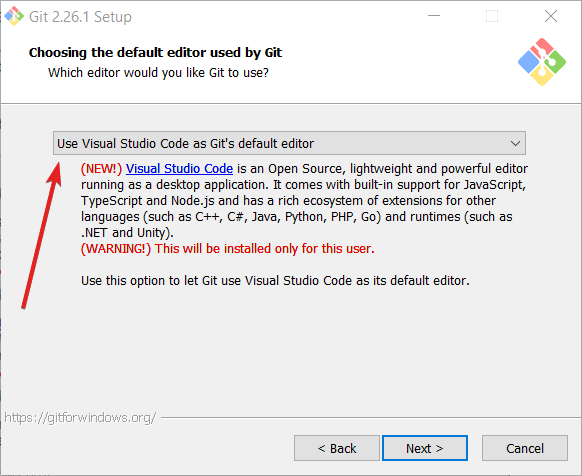
I downloaded the latest version of Git for Windows (2.26.1) from here. During the install, we can set the default editor for Git to VS Code (Vim was the default).
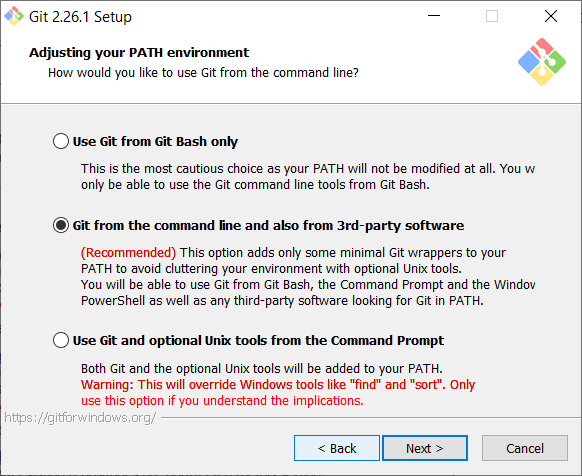
We’ll use the recommended PATH environment.
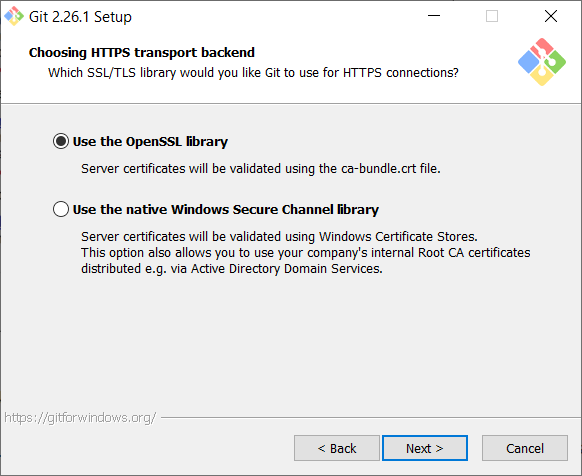
We’re not planning to use an internal Root CA cert, so we will stick with the default setting for HTTPS transport backend.
Stick with the default for line endings in text files.

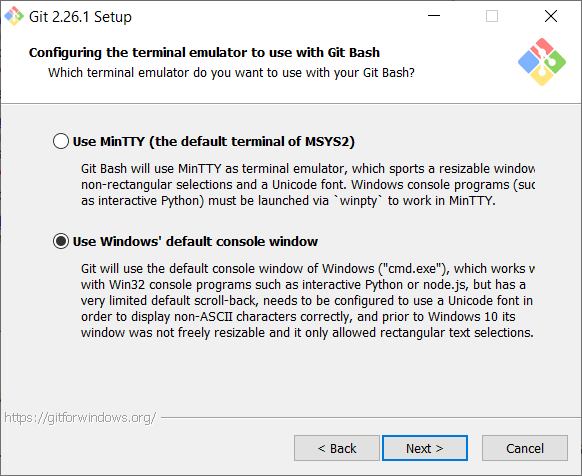
We’ll go with Windows’ default console window for the terminal emulator.
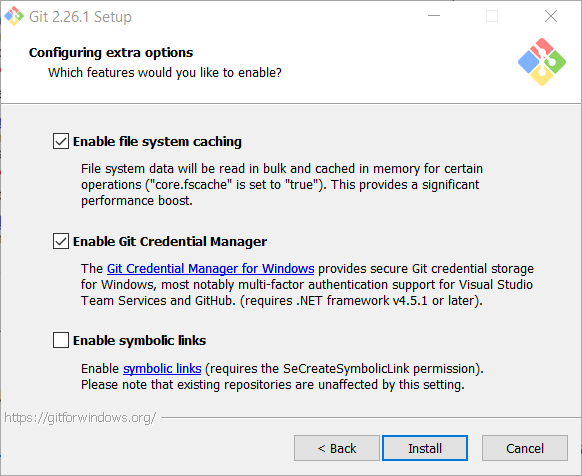
As the documentation recommended, Git Credential manager is enabled.
Cloning the Azure Repo – Another Try
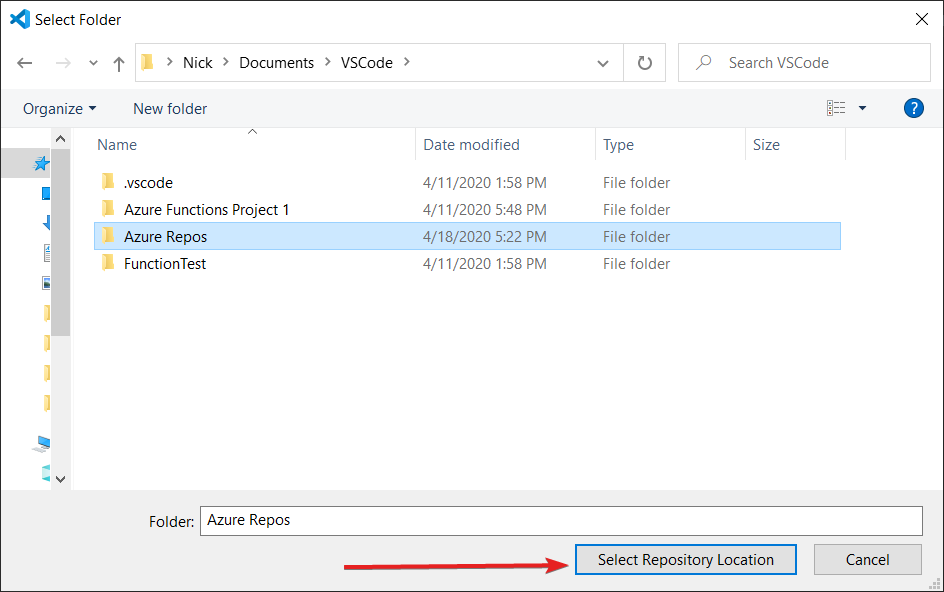
Now that Git is installed, go back to the Azure Repos area where we were earlier. Try clicking the button to clone the repo networknerd-repo1 in VS Code again. After being prompted to allow the extension to access the URI, we are prompted to select a local file path which will hold the cloned copy of the repository. As shown here, the repository networknerd-repo1 and all its contents will exist on my laptop inside C:\Users\Nick\Documents\Azure Repos. This process will create a folder with the name of the repo (networknerd-repo1) inside the folder we select as the repository location. Click Select Repository Location.
At this point, the cloning process begins. Any and all files / folders within the repo on the Azure side will be cloned to the repository location.
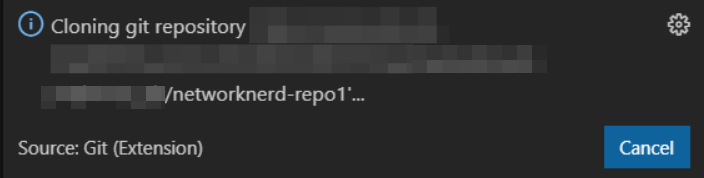
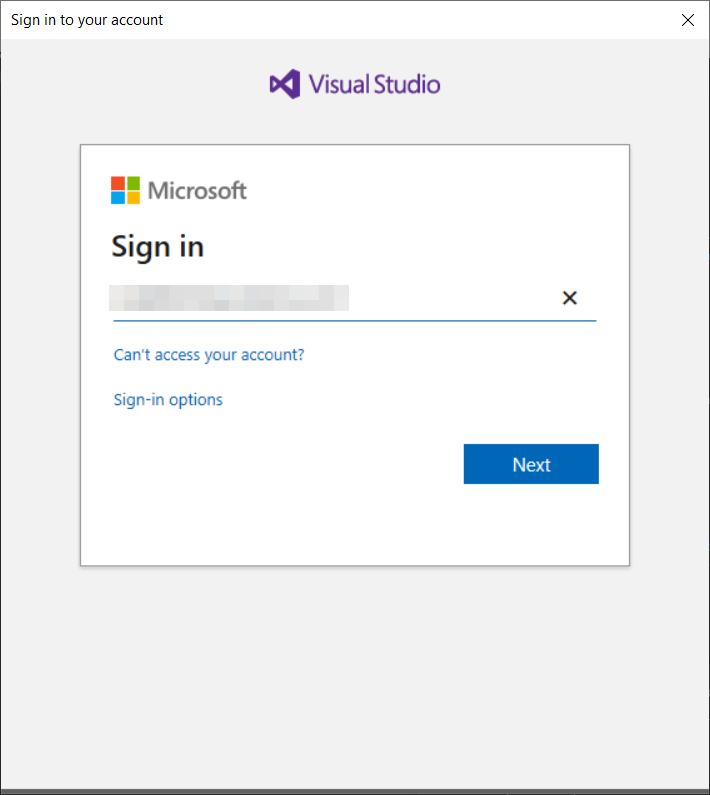
It took a minute for me to notice there was a credentials prompt waiting to be addressed. It opened somewhere behind the VS Code window, and the only reason I noticed was because my task bar was flashing. Login using the e-mail address of an account that has access to clone the repo (read this doc for more on repo roles and permissions). Click Next to continue.
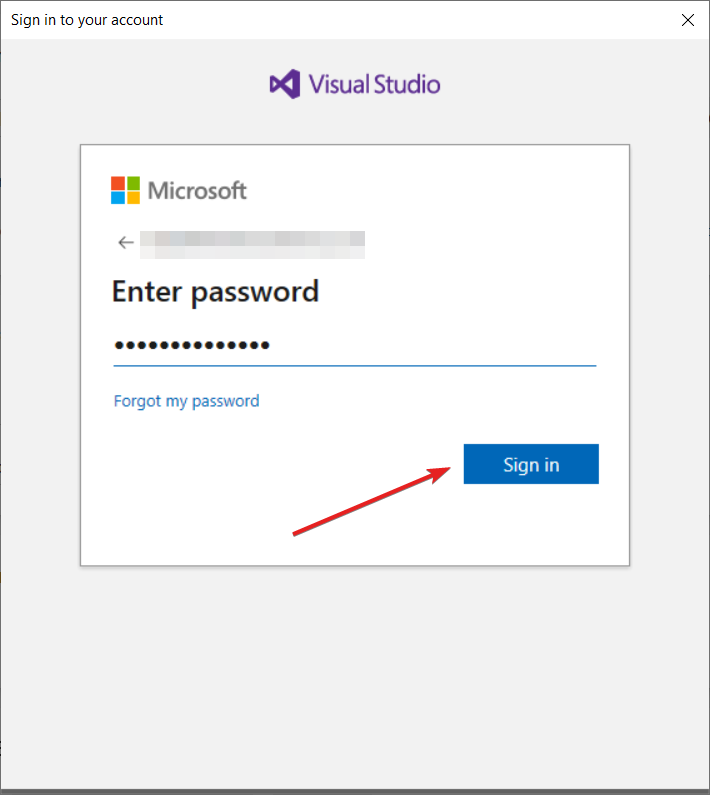
Enter the password for the corresponding account, and Click Sign in.
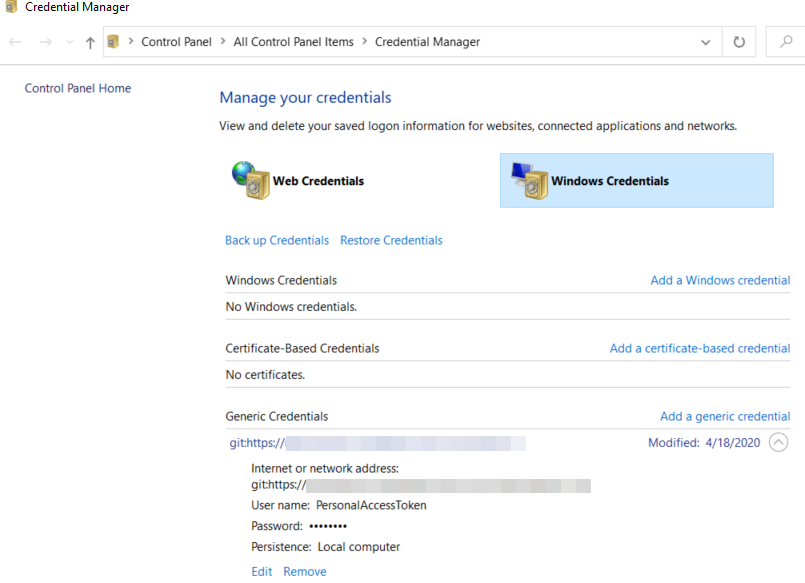
According to this doc, the login prompt was from Git Credential Manager. As such, it should have created a personal access token for Azure DevOps in my Windows Credentials Manager. Just for fun, I went to verify. The address of the AzureDevOps organization is blurred out in the screenshot, but this at least illustrates how to check our work. We should not need to sign in again from VS Code as a result.
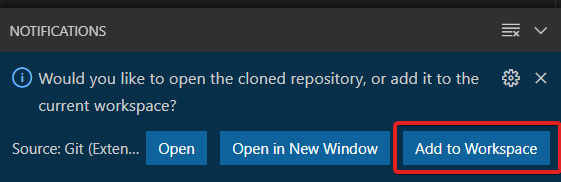
After entering the credential above, the cloning process completes pretty quickly. Select the option to Add to Workspace.
Inside VS Code, the current workspace for Azure Functions now shows a folder named networknerd-repo1. Notice this folder contains the same folder and file structure as we saw in Azure Repos.
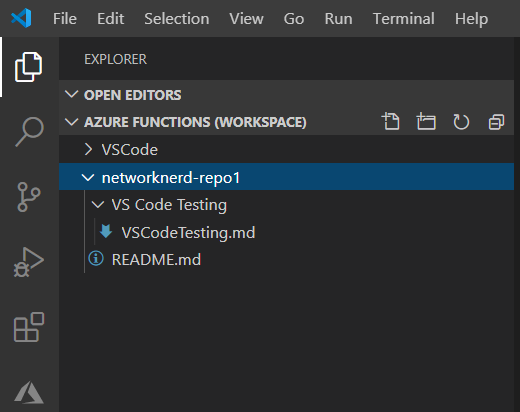
And here’s a shot from Windows file explorer showing the same thing.

The SOURCE CONTROL area in VS Code has changed and shows to be using Git. Any changes to the local copy of our repo should show up here. At the moment, there are none.
![]()
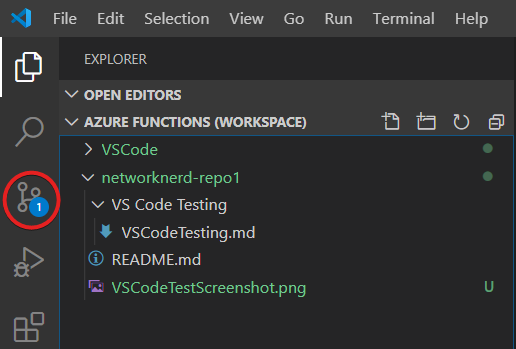
Suppose we add a file to the local repo. We can put any file in the folder C:\Users\Nick\Documents\VSCode\Azure Repos\networknerd-repo1 or in one of its subfolders and expect to see a change to our Workspace view within a few seconds. I copied the file VSCodeTestSCreenshot.png into our local repository root folder. Notice we now see the source control icon in VS Code showing a notification that something changed and can see the file listed in the repo. Everything in green indicates it contains an emphasized item. Since our local copy of the repo exists inside the VSCode folder, that is the reason it is also highlighted in green. The U to the far right of the file we added means “untracked.” To test a commit back to the Azure repo, click the source control icon on the left-hand menu.
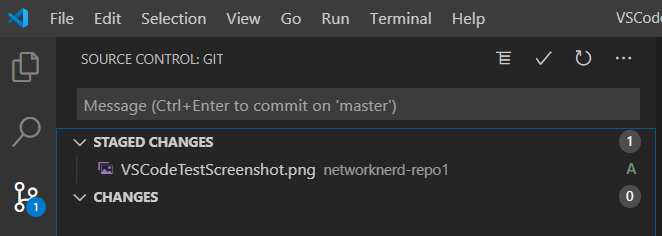
The only change detected in the repo is the addition of the png file. Since this will be a single commit for testing purposes, we can go ahead and stage it. Click the plus sign to stage changes (option also available via a right-click menu).
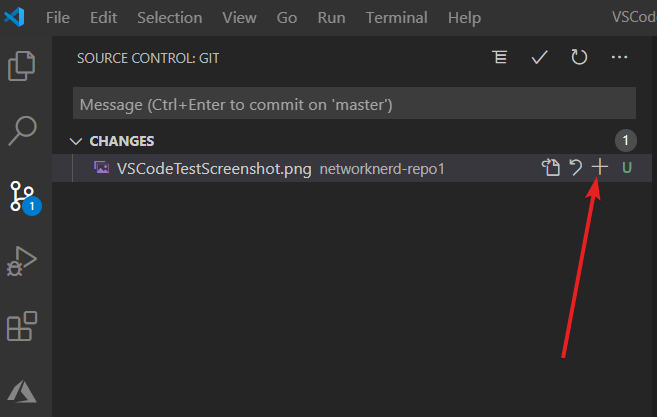
The move to staging was looks to have been successful. The A indicates an index was added. From here we could choose to commit or unstage the changes.
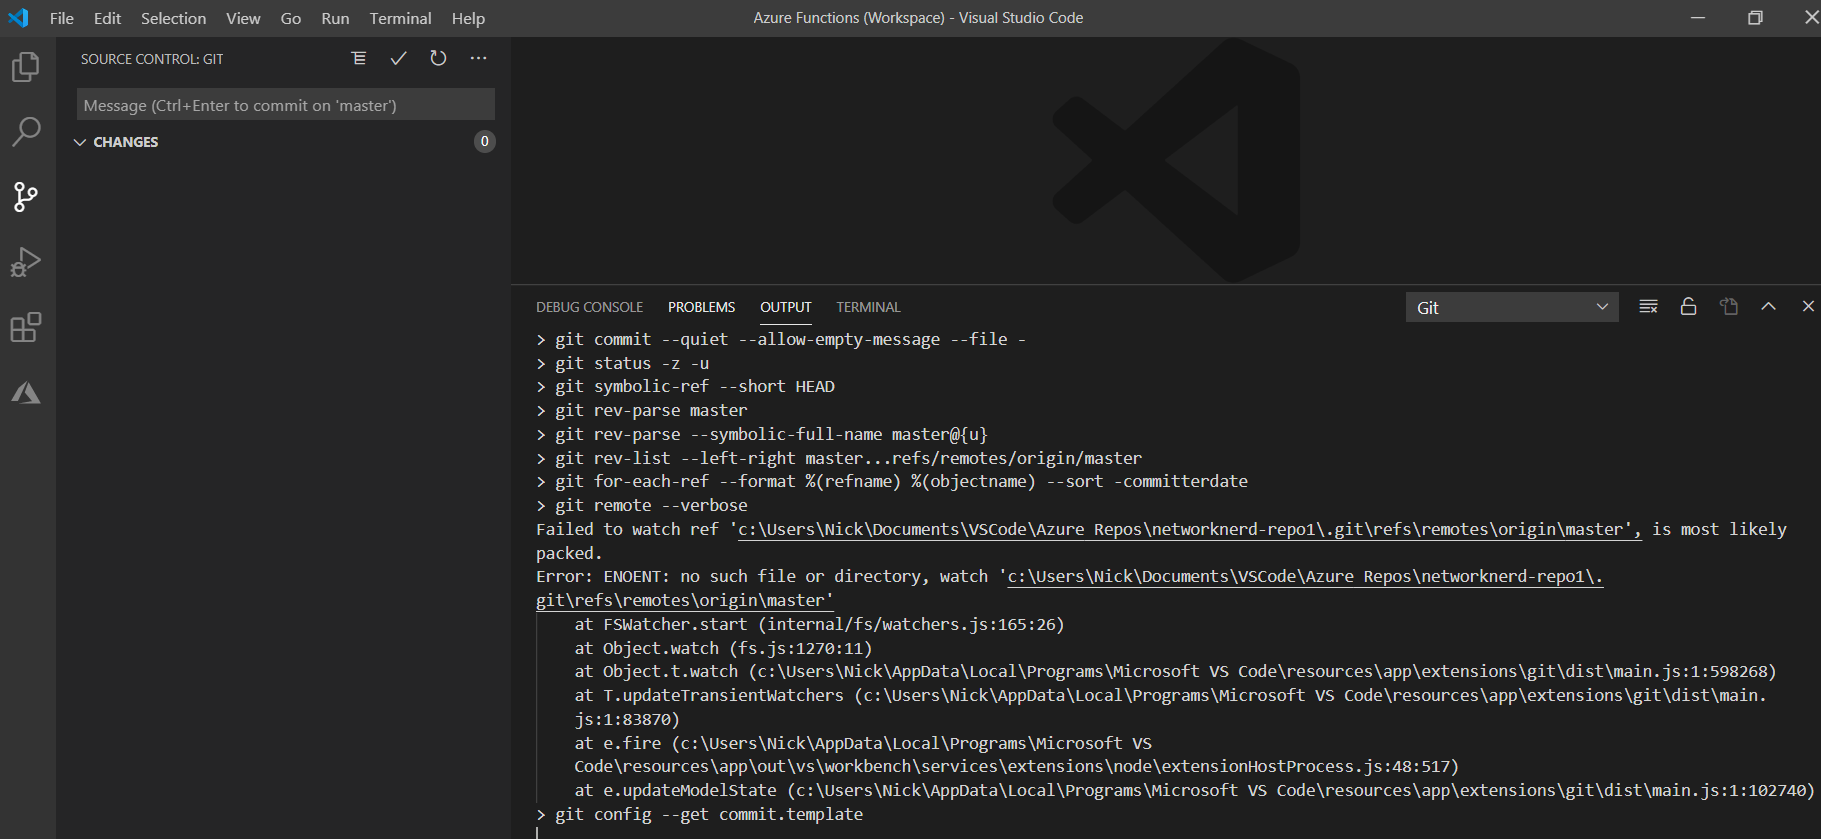
While the staging happened (and looks to have succeeded), the output window for the Git commands shows the following:

Here’s the full text output for searchability:
git.stage 1

git.stage.scmResources 1

> git add -A -- C:\Users\Nick\Documents\VSCode\Azure Repos\networknerd-repo1\VSCodeTestScreenshot.png

> git status -z -u

> git symbolic-ref --short HEAD

> git rev-parse master

> git rev-parse --symbolic-full-name master@{u}

> git rev-list --left-right master...refs/remotes/origin/master

> git for-each-ref --format %(refname) %(objectname) --sort -committerdate

> git remote --verbose

Failed to watch ref 'c:\Users\Nick\Documents\VSCode\Azure Repos\networknerd-repo1\.git\refs\remotes\origin\master', is most likely packed.

Error: ENOENT: no such file or directory, watch 'c:\Users\Nick\Documents\VSCode\Azure Repos\networknerd-repo1\.git\refs\remotes\origin\master'

at FSWatcher.start (internal/fs/watchers.js:165:26)

at Object.watch (fs.js:1270:11)

at Object.t.watch (c:\Users\Nick\AppData\Local\Programs\Microsoft VS Code\resources\app\extensions\git\dist\main.js:1:598268)

at T.updateTransientWatchers (c:\Users\Nick\AppData\Local\Programs\Microsoft VS Code\resources\app\extensions\git\dist\main.js:1:83870)

at e.fire (c:\Users\Nick\AppData\Local\Programs\Microsoft VS Code\resources\app\out\vs\workbench\services\extensions\node\extensionHostProcess.js:48:517)

at e.updateModelState (c:\Users\Nick\AppData\Local\Programs\Microsoft VS Code\resources\app\extensions\git\dist\main.js:1:102740)

> git config --get commit.template
This post indicates file watcher errors are ok, so let’s press forward. We can see in the lower left corner of VS code that we are working with the master branch in the local repo right now. This is clickable and will allow you to choose another branch to work with or add a branch if needed before committing. We’ll commit to the master branch for now.

Click the commit button (or use Ctrl + Enter) to attempt to commit the change back to the master branch of the repository in Azure.

When we click commit, we’re asked to add a comment and then press Enter to confirm.

Those seem like the proper steps, but something is awry with our Git configuration.
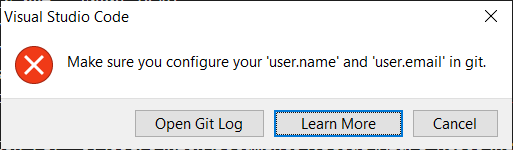
Click Learn More to continue on to this site. Apparently there were some first time configurations missed after installing Git.
If we click Open Git Log from the prompt above, we are greeted with the following messages. The blurred area defaulted to username@mycomputername as the user. email parameter, which is not what we want.

Clicking on the TERMINAL window in VS Code, run the commands to set user.name and user.email. Notice user.email does not need quotation marks since there will be no spaces by default. Each of those commands looks to have succeeded. This e-mail address should be the one that has access to commit to the Azure Repo we’re working with (networknerd-repo1).

The default editor for Git has already been set to VS Code per the .gitconfig file inside C:\Users\Nick (seems to have been done automatically for us based on previous steps).

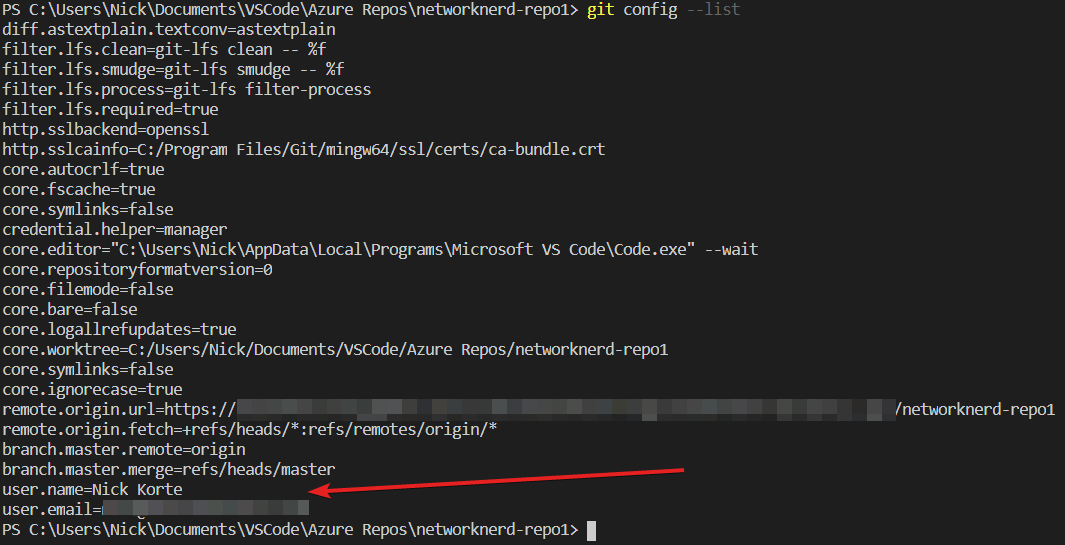
If we check our work and run git config –list, we see the following proof that the name and e-mail parameters are set as we specified.
It looks like we’re a go to try another commit. Following the same process as before with the same comment, here’s what happens. There are no pending changes, and we see the OUTPUT window has the same messages as earlier, which we can ignore. So the real question is…does that mean what we did worked?
Let’s look inside our repo in Azure and see if the test file VSCodeTestScreentshot.png exists. Hmm…there’s no file in our Azure repo even though it looked like the commit worked from VS Code.

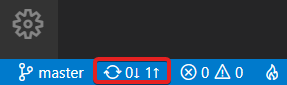
At this point, take a look at the bottom left corner of VS Code. This area tells us that there is a pending commit to the master branch, but the changes have not yet been synchronized. The sync is a manual operation per this article. Click the Sync icon highlighted below, or select it from the ellipsis menu in the SOURCE CONTROL area.
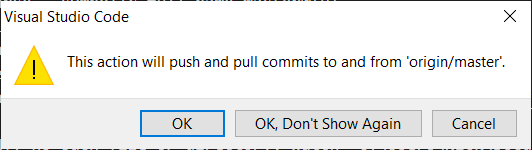
Think of this as a fair warning for what is about to happen. We want to push and pull commits, so click OK to continue.
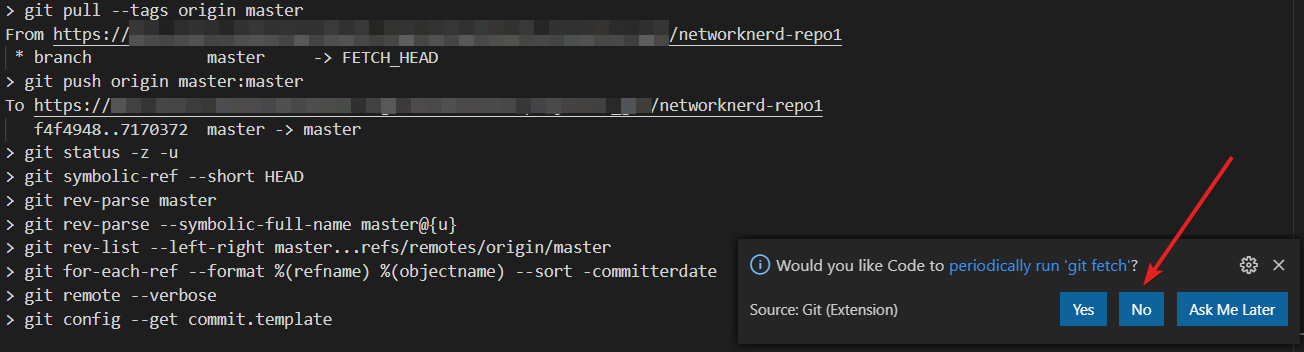
After clicking OK, here’s the output from Git inside VS Code. It appears the pull and push operations worked. For now we’ll say no to periodically fetching.
So if we go back to the Azure side, does our test file exist now? Yes! Our file is at the root of the master branch and shows it was committed with the proper comment. Be sure to refresh your browser if you had the Azure repo open in a browser tab previously. It did not appear to auto-refresh due to the change.

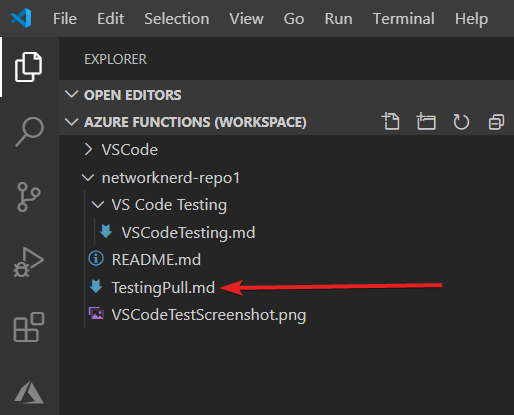
That means a push from VS Code worked. What if we add a new file to the repo called TestingPull.md on the Azure side, commit the changes, and confirm it can be pulled down also? Here’s what we see after the file is created and committed on the Azure side.
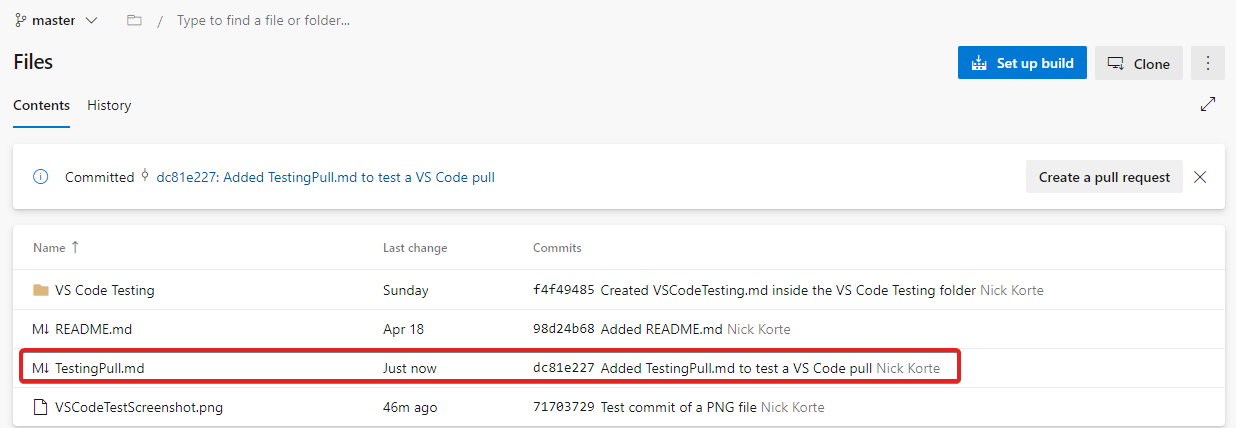
If we then do a Sync on the VS Code side, will the file now show up as expected? Yes! In this case, since we did not fetch the repo with Git, there were no pending pulls shown in the lower left of VS Code. But running a Sync did exactly what we expected (same steps as before).
And that is where our post will end. We’ve confirmed VS Code can pull from and commit to the Azure repo in question (networknerd-repo1). At this point we’re not ready to configure the Deployment Center parameters from the beginning of this post. First, we’ll need to setup Azure Pipelines. Until next time….
Other Posts in This Series
- Part 1 – A First Voyage into Azure Functions and Function Apps
- Part 2 – Deploying Azure Functions with Visual Studio Code
- Part 3 – This post
- Part 4 – Azure Functions and C# Code Intricacies – An Azure Pipelines Prequel
- Part 5 – From VS Code to Azure Pipelines – Basic CI/CD with Azure Functions
- Part 6 – The Next Wave: Exploring Tanzu Observability’s Integration with Azure Functions
- Part 7 – Introduction to Distributed Tracing with Tanzu Observability and Azure Functions
- Part 8 – Coming soon!