Have you ever had a fun idea for a project but didn’t quite know how to get from beginning to end? That’s exactly where I find myself while writing this post. All it takes is one idea to get the mental gears going. Let’s see if I can step through my idea without giving away too much at a time.
In my opinion, Wavefront is one of the most interesting products VMware sells (if not the most interesting). To this point I have only tinkered with it a little bit. Sure, I explored the GCP integration with Wavefront in this post, but I wanted to take a project to that next level of nerdiness this time.
To start, Wavefront is a time-series metrics analysis platform. Interestingly enough, metrics can be ingested in to Wavefront based on log files. So if something has / generates log files, it is likely you can send the data to Wavefront and translate it into metrics. Based on what I have read, the level of effort may vary. The built-in integrations with Wavefront auto-deploy a proxy to help get data into Wavefront. Think of a proxy as a data ingestion point that will forward metrics to Wavefront quickly, securely, and reliably. The proxy can absorb data from multiple sources, and as you might have guessed, we can have multiple proxies as the amount of data scales.
The first part of my project is to successfully deploy a Wavefront proxy. Since I knew little to nothing about AWS, why not learn multiple things at once? Actually, I need to give a shout out to Bill Roth for making the suggestion to deploy the proxy in the free tier of EC2 rather than on my home network. According to this document, several flavors of Linux will work to support a Wavefront proxy. I decided to go with Ubuntu 18.04. I’m also no Linux expert either, so this should be educational.
Installing the Proxy
At this point, assume I have a Ubuntu 18.04 server spun up on the free tier of EC2 reachable via SSH. Before making changes to the Ubuntu server, there are some steps to complete from within Wavefront. After logging into Wavefront, go to Browse -> Proxies. Keep in mind we are taking this route because the data I want to send to Wavefront (which I have yet to reveal) is not something for which there is a built-in integration. It’s time to dive down the do-it-yourself path.
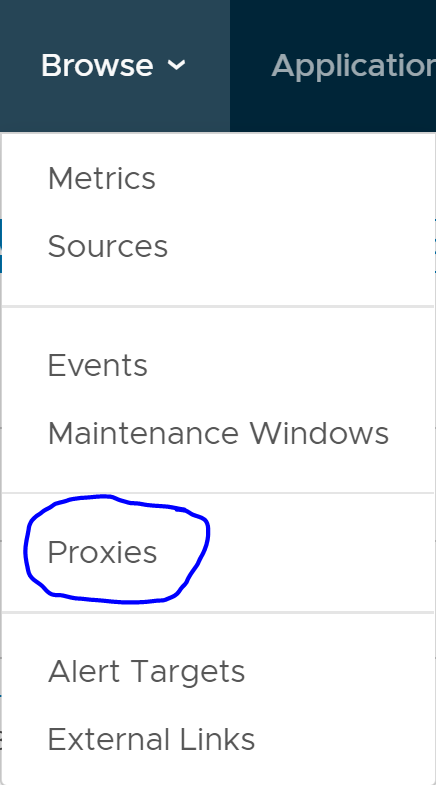
From the Proxies page, click the button marked “ADD NEW PROXY.”

Now we’re getting somewhere. We are immediately met with some instructions for getting a proxy installed. The script shown below (minus the API token) is supposed to work in Ubuntu, so we shall see.
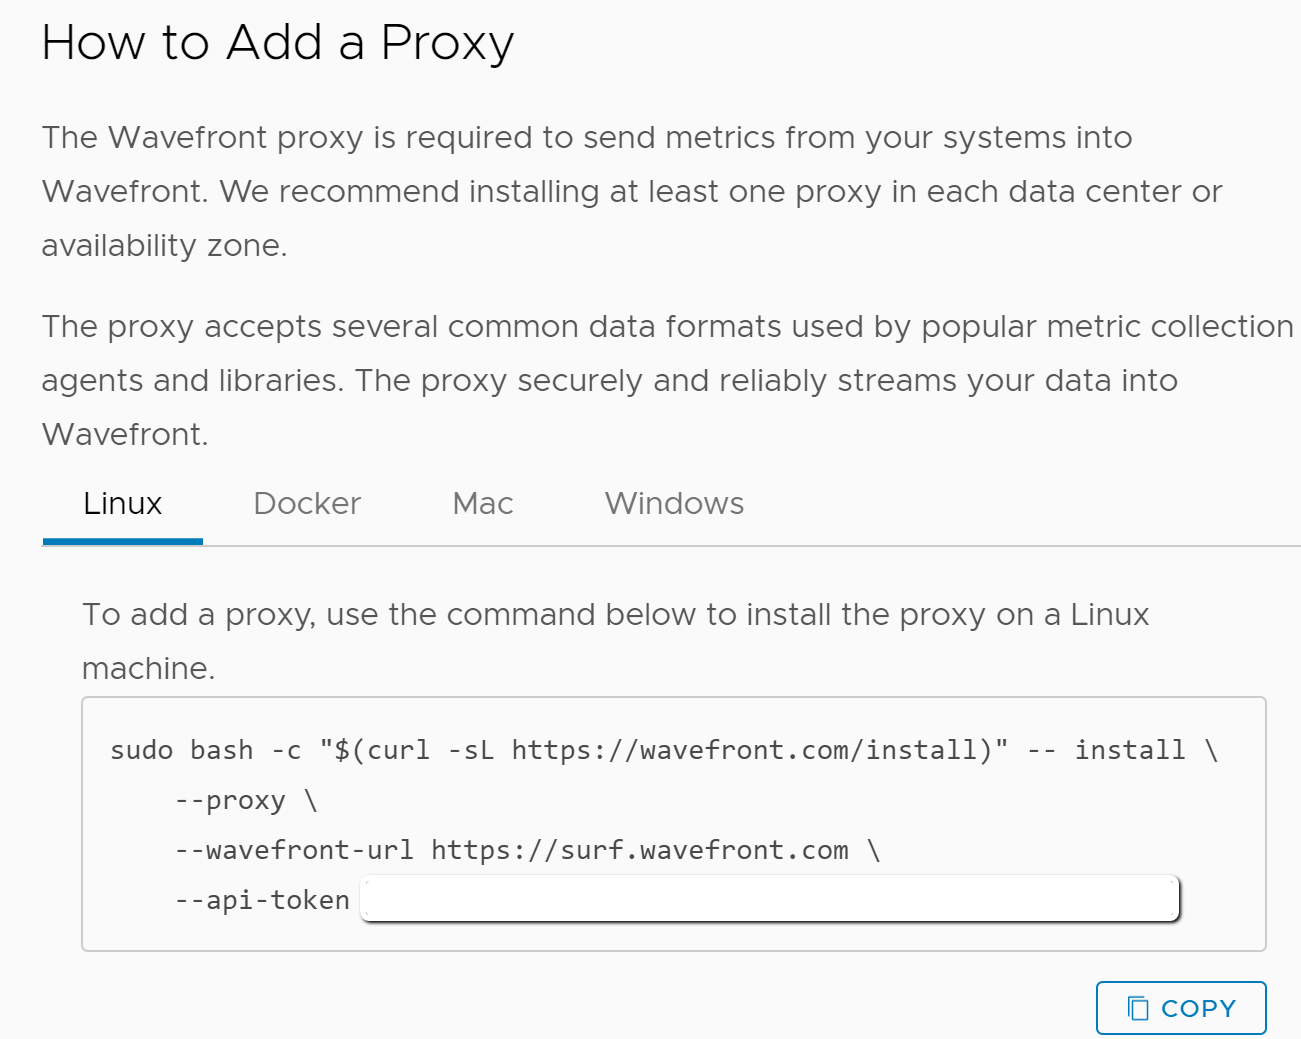
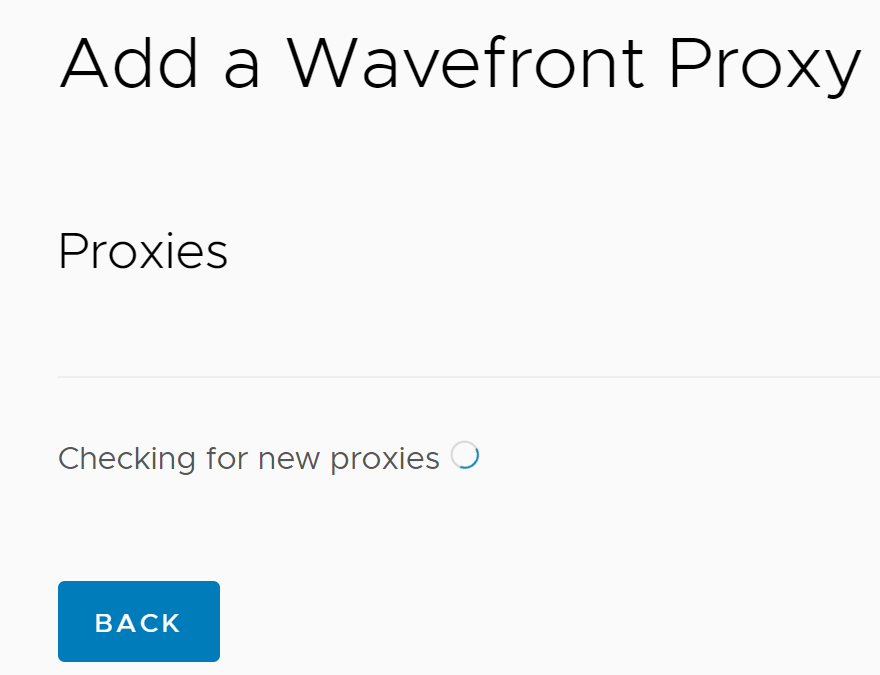
Before proceeding, don’t close the browser tab with Wavefront open. This page is checking for proxies to connect back to Wavefront using the API token from the script above and will provide a nice way to check our work as we continue the proxy install and configuration process.
At this point, I’ve used Putty to open a SSH session to the Ubuntu server in EC2. The code above is written properly to span multiple lines in a terminal session and can be pasted and executed without an issue. I made the mistake of taking out the carriage returns to put the code on a single line before pasting into Putty but forgot to remove the “\” characters (oops). The command failed as you might imagine, so I got to reboot the Ubuntu server and follow the directions properly to get things working. Here’s what the install process looks like once the command is executed successfully. The screenshots look better than just a text dump and code tags.
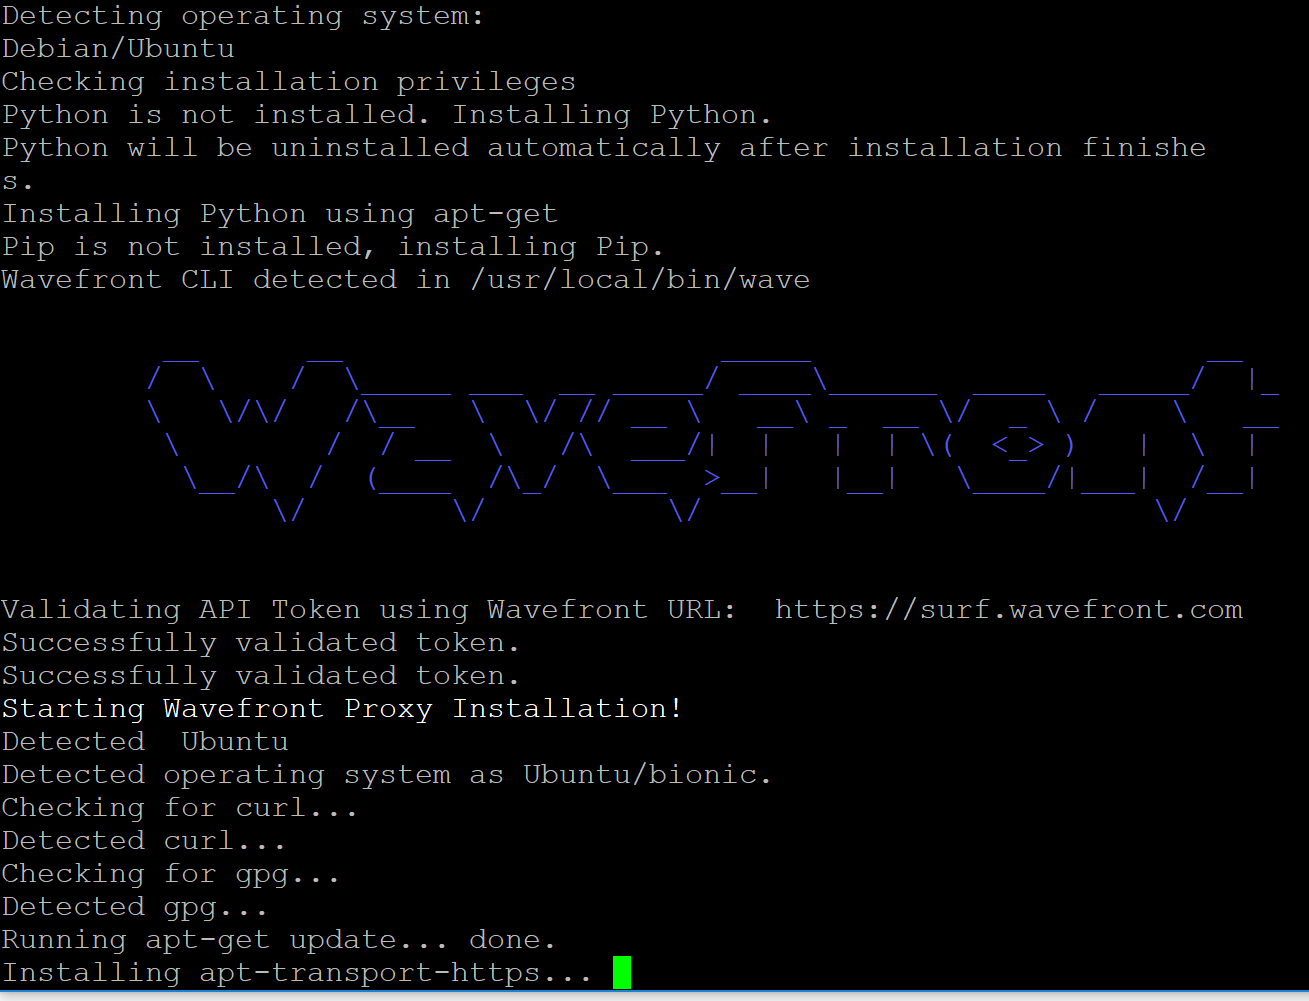
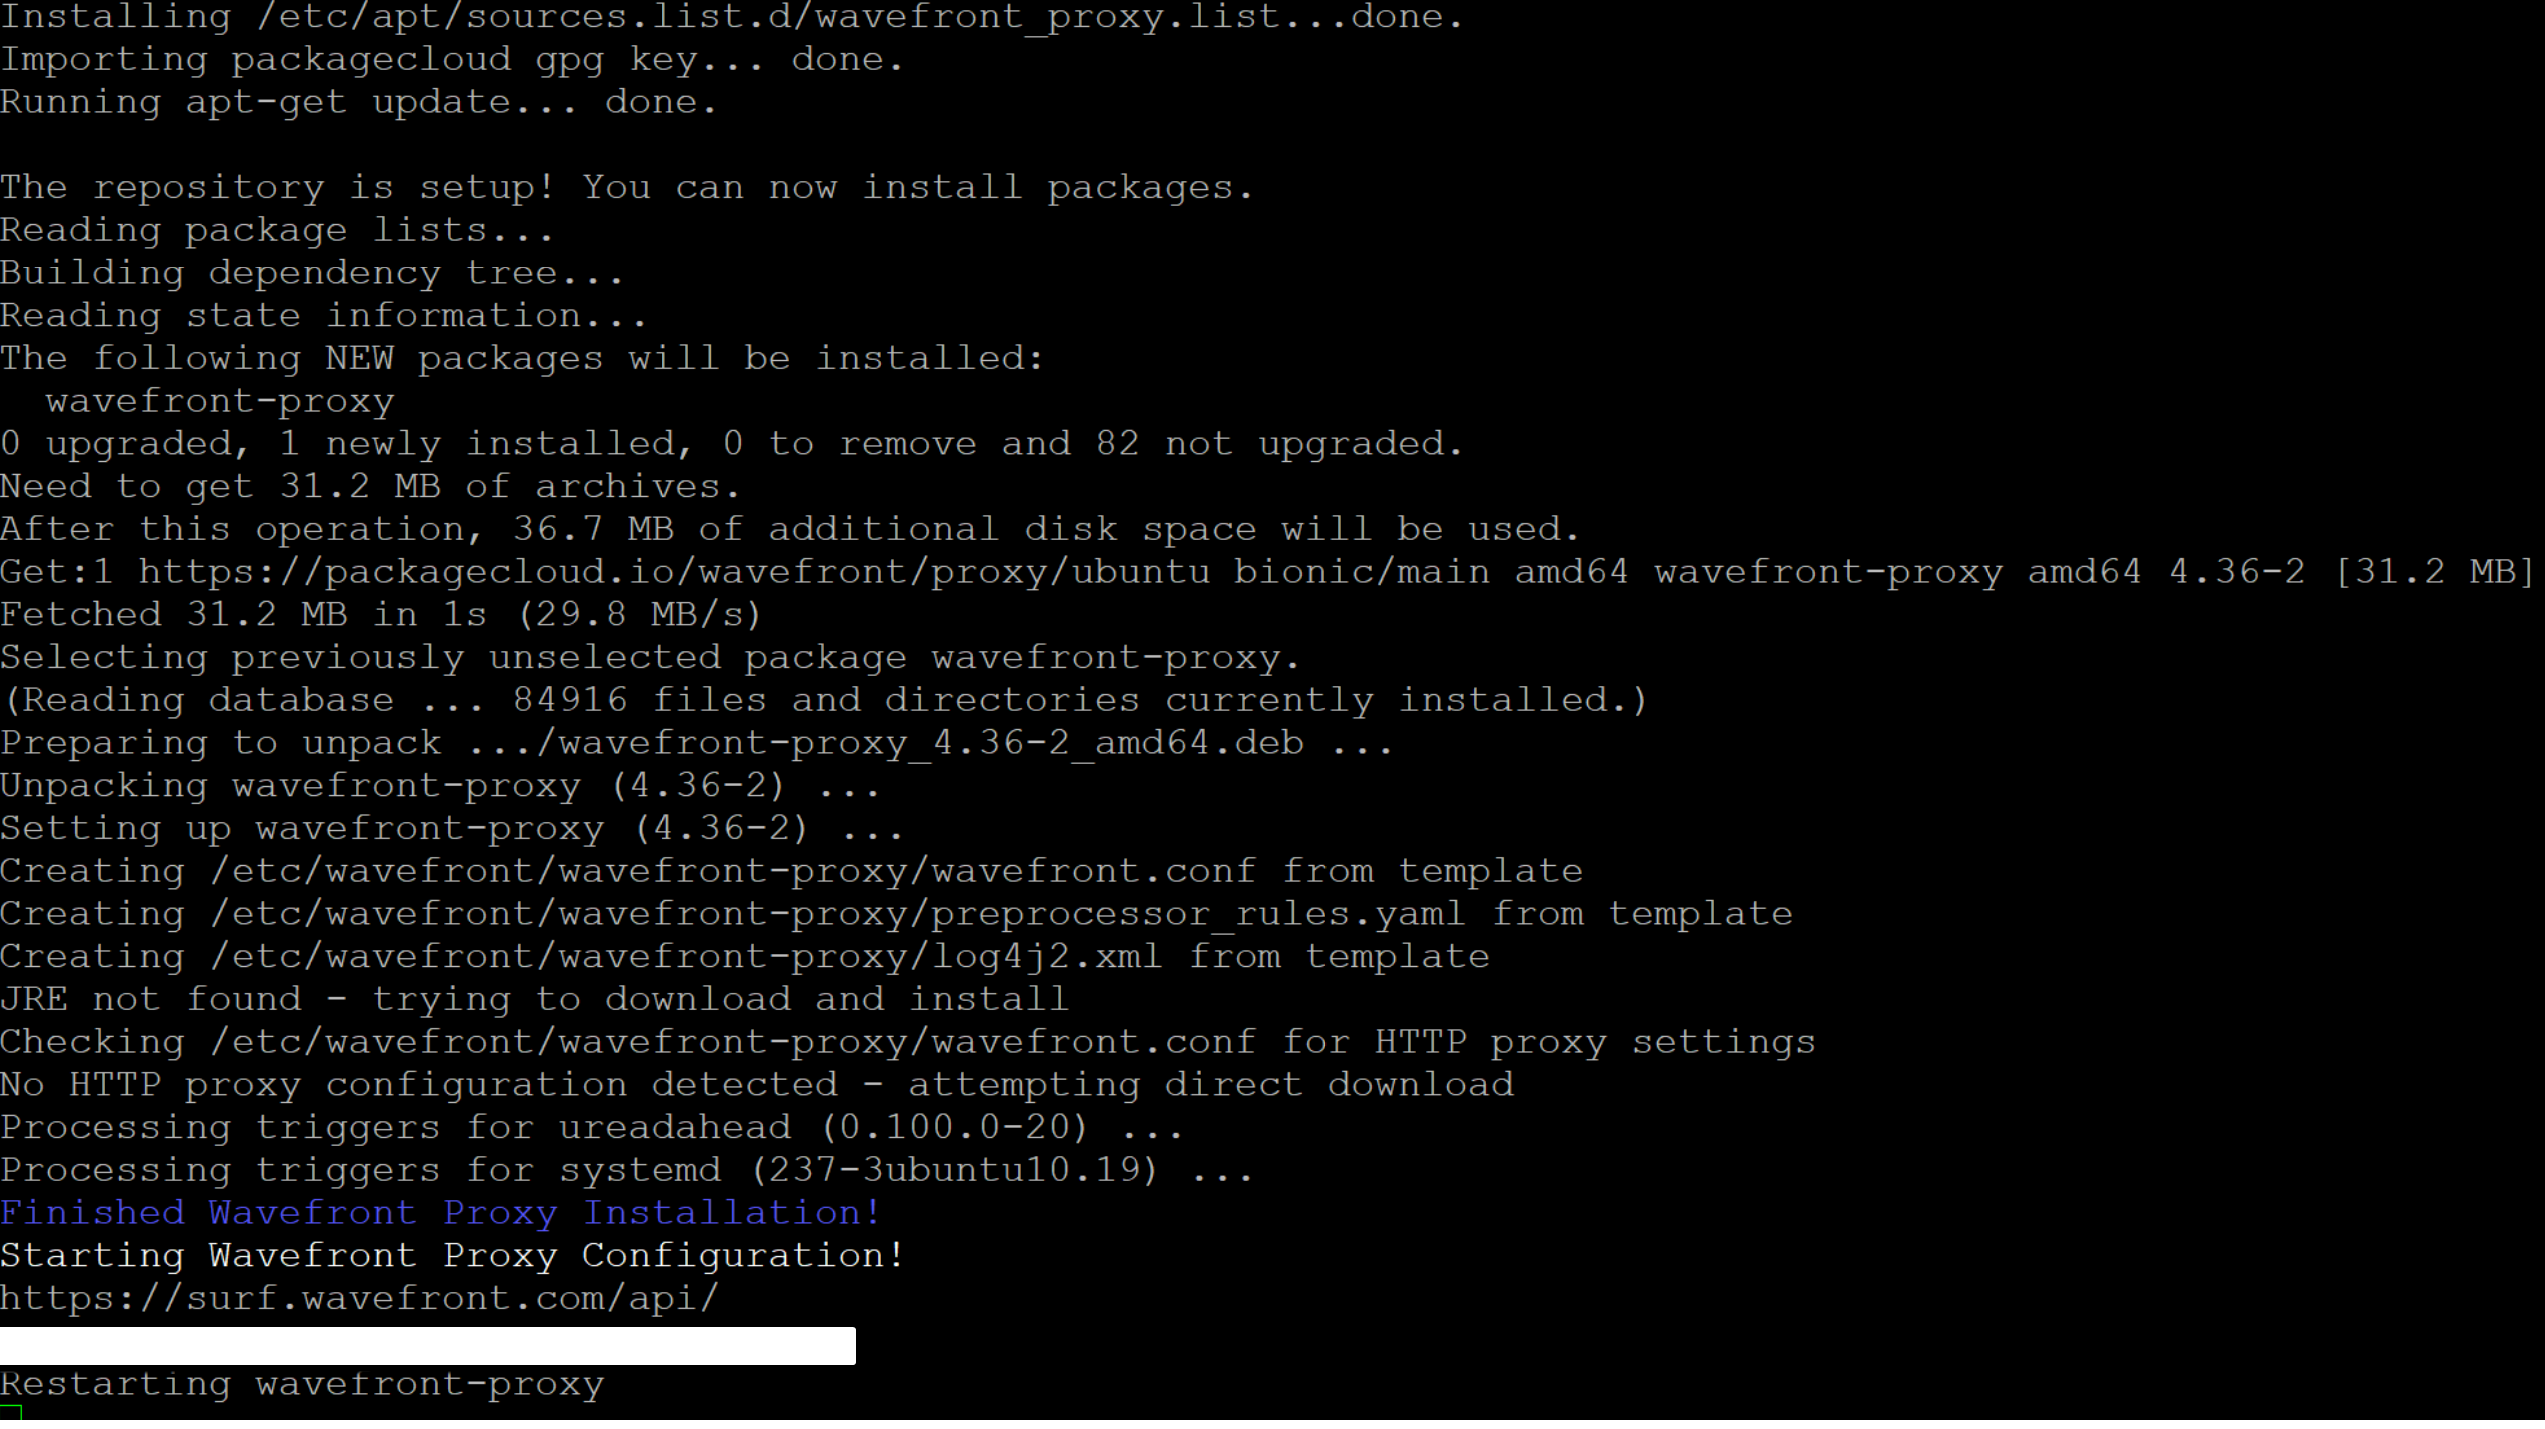
The white box near the bottom of the screenshot above should be the API token from the script you executed.

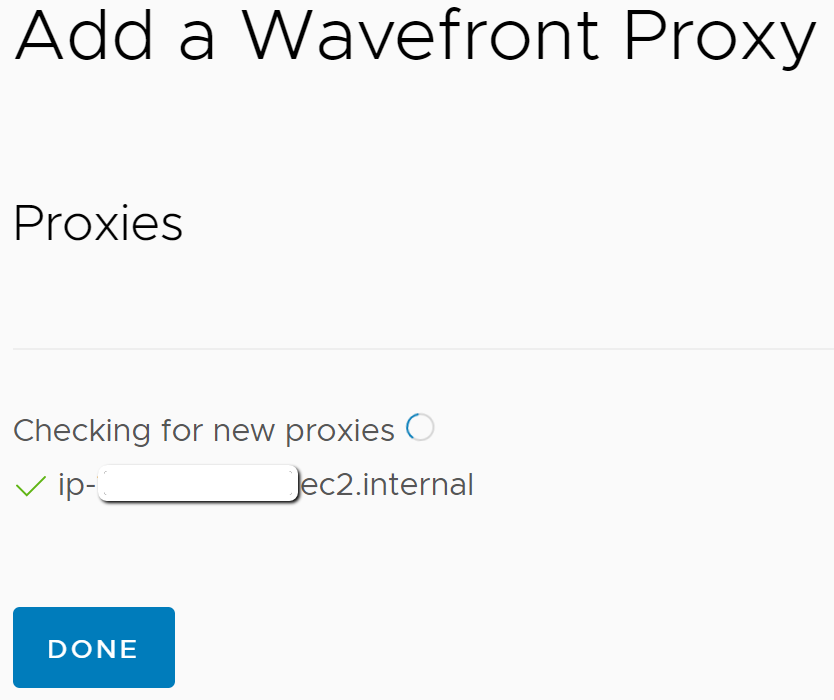
Now that the install appears to have succeeded, go back to that Wavefront page left open from earlier. The screenshot below shows our proxy was successfully detected. Notice that Wavefront picked up the private DNS (internal host name) of my Ubuntu server. Go ahead and click “DONE.”
Post-Installation Observations
At this point, we’ve returned to the main Proxies page and can see our proxy in the list. Any other configured proxies would be listed here along with status (shows to be Active). From the looks of things, the proxy is ready to collect data and send to Wavefront.
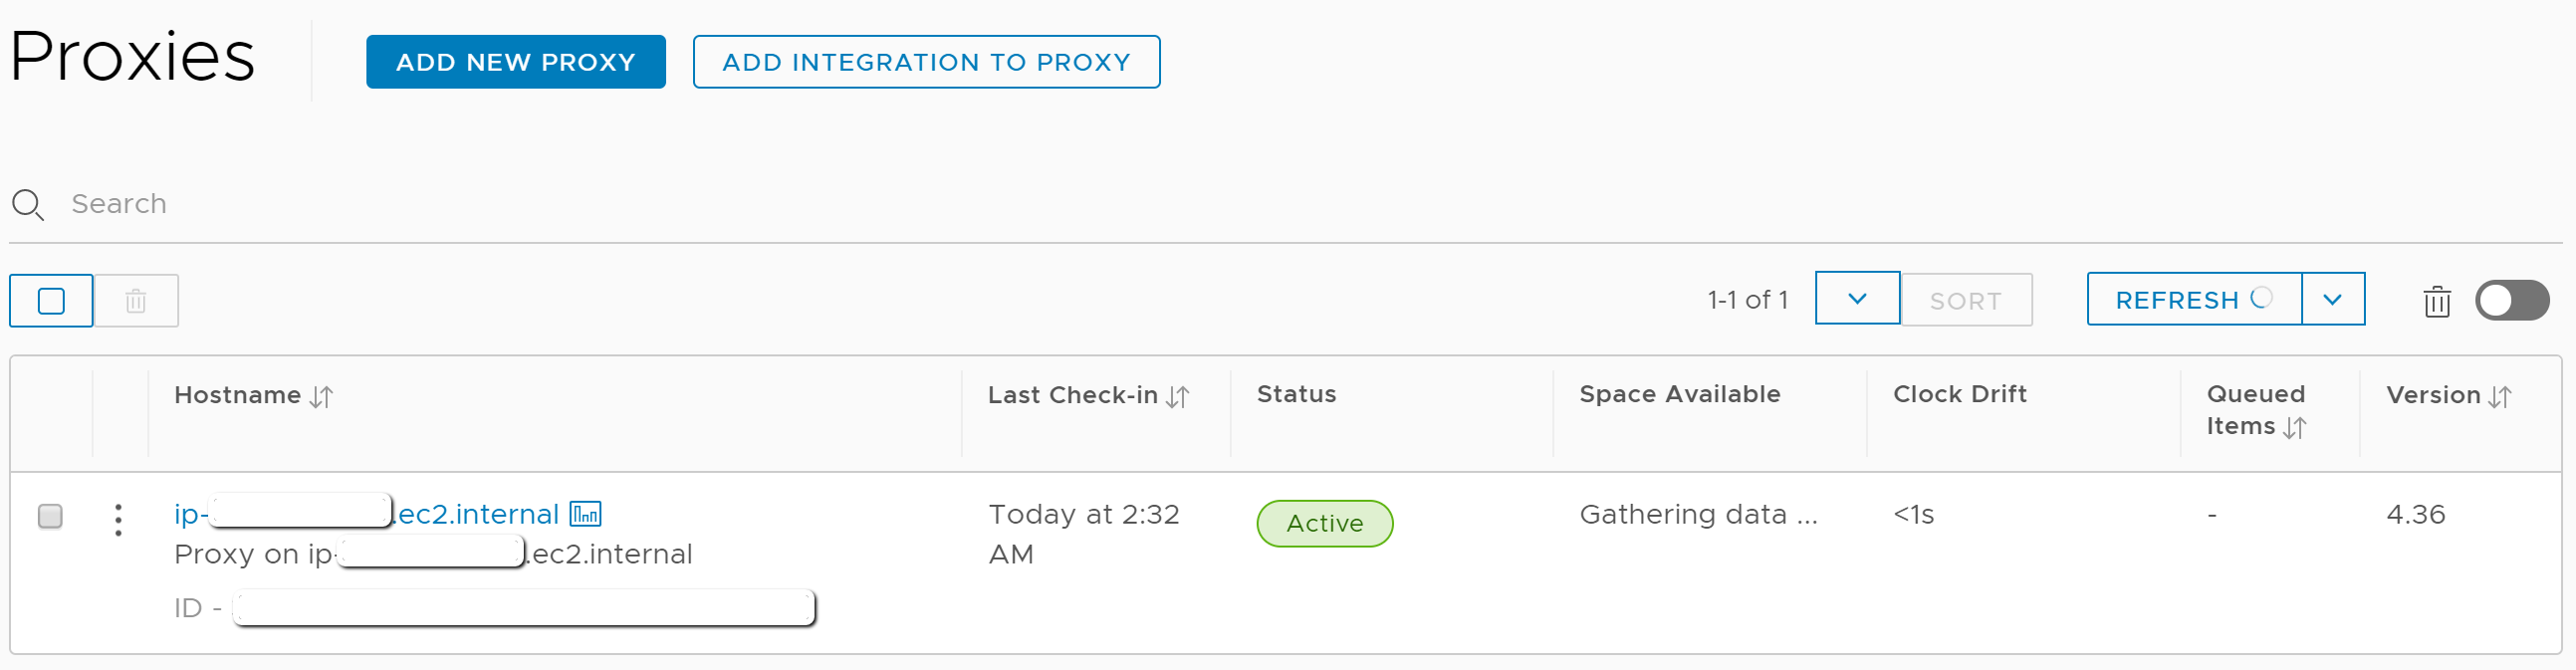
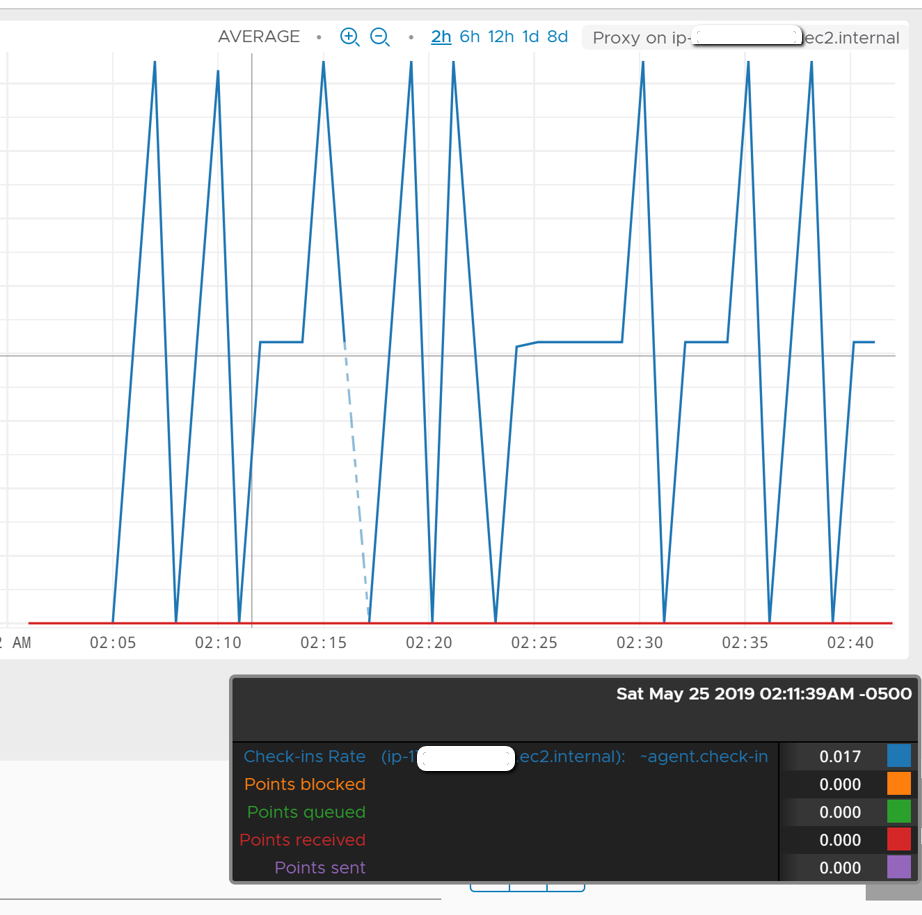
It may not be extremely clear from the screenshot above, but the host name of our proxy is a clickable link. There is a small chart icon next to it. What does that mean exactly, and what happens if we click the link?
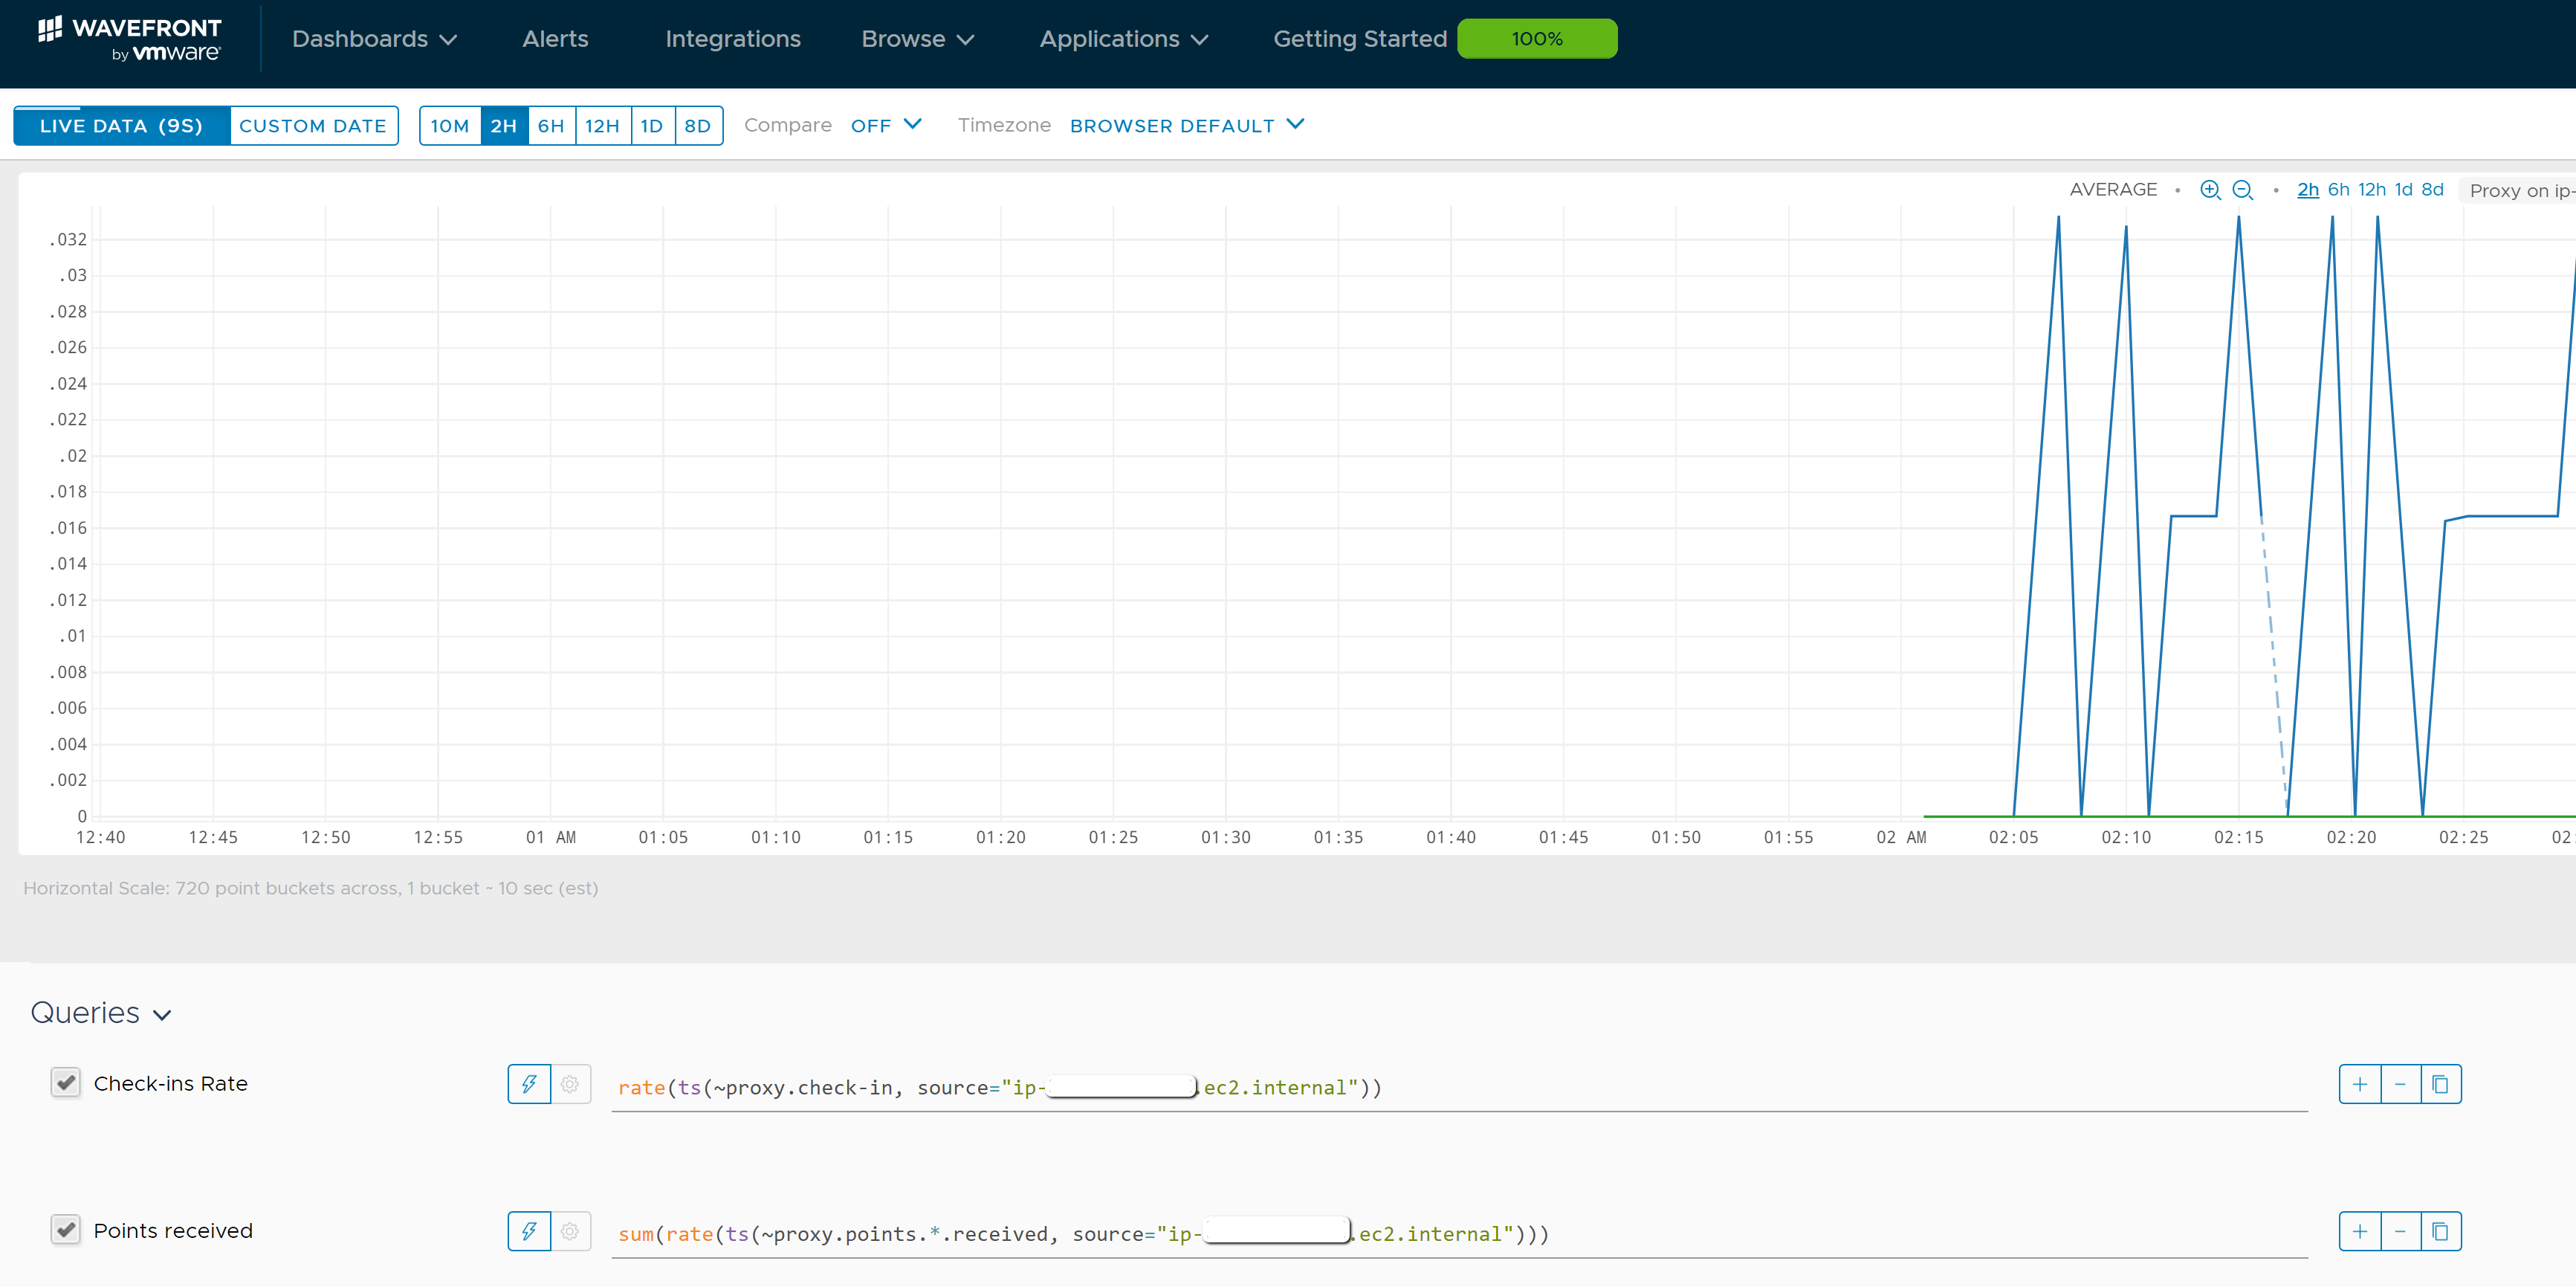
Whoa! Wavefront is actually collecting metrics for the proxy. Hold your cursor over any point on the line plot to see all of the data points being collected for the proxy (5 of them, each one marked as active in the Queries area below the chart). If something was not working properly, this would be a good place to visit for some additional troubleshooting. The chart type can be changed as can many other things, but we won’t make any changes at this time.
What Next?
At this point there is a Wavefront proxy deployed on a Ubuntu server in AWS EC2 connected and ready to send data to Wavefront. So what data should I send to the proxy? Well, I did recently setup Pi-hole for my home network. I wonder what would happen if I sent the Pi-hole logs to Wavefront for analysis? Stay tuned for the next blog as I continue my work on this project.
Further Reading
This blog is part 1 in a series on analyzing Pi-hole log data with Wavefront. Check out the other posts in the series:
- Part 1 – This post
- Part 2 – Shipping Pi-hole Logs to a Wavefront Proxy
- Part 3 – Verifying Wavefront Proxy Log Ingestion
- Part 4 – Fishing for Wavefront Metrics with Grok Patterns
- Part 5 – Pi in the Sky: Using Wavefront to Analyze Pi-Hole Data
- Part 6 – Coming soon!