This is part 4 of my quest to explore Azure Functions for self-education in functions-as-a-service. The goal of this post is to explore some differences in C# and C# script code that pop up when creating / editing Azure Functions in the Azure portal compared to leveraging VS Code which are foundational for getting Azure Pipeline settings correct.
Back in part 1, we explored Azure Functions and Function Apps via the Azure portal. In part 2 we explored deploying function code to Azure directly from VS Code. In part 3 we wired up VS Code with source control using Azure Repos but didn’t make it to Azure Pipelines. Now that we’ve reviewed, let’s get to work!
In my last post we started down the path of configuring Azure Repos and Azure Pipelines for the purpose of deploying Azure functions from VS Code using these services. In this post, we pick up the process just after having tested and confirmed our Azure repo networknerd-repo1 is properly integrated with VS Code. I had intended to document all steps in the same way as in previous posts (all steps, including hurdles to jump), but since Azure Pipelines got the best of me for the better part of a couple of weeks, I’ll do my best to help readers avoid banging their head against the wall as long as I did. Consider this my attempt at an Azure Pipelines prequel.
Back at the Repo
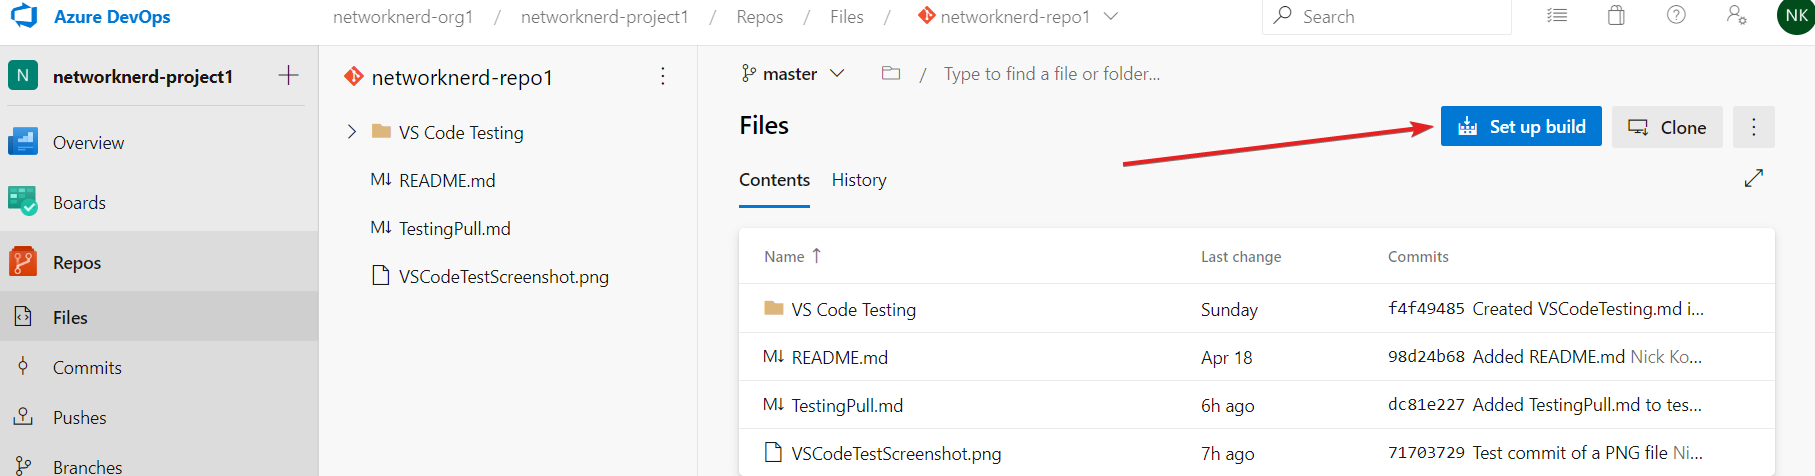
If we look back at the repo networknerd-repo1 that was cloned to my laptop and properly wired into VS Code, there’s a Set up build option. This can be used to setup a build pipeline for the repository / a specific folder within the repository (pipeline would exist inside the current Azure DevOps project). Let me caution you against taking this path at the moment as there is a better way. If needed for some endeavor down the road, at least we know the option exists.
A New Function App and a Step Back
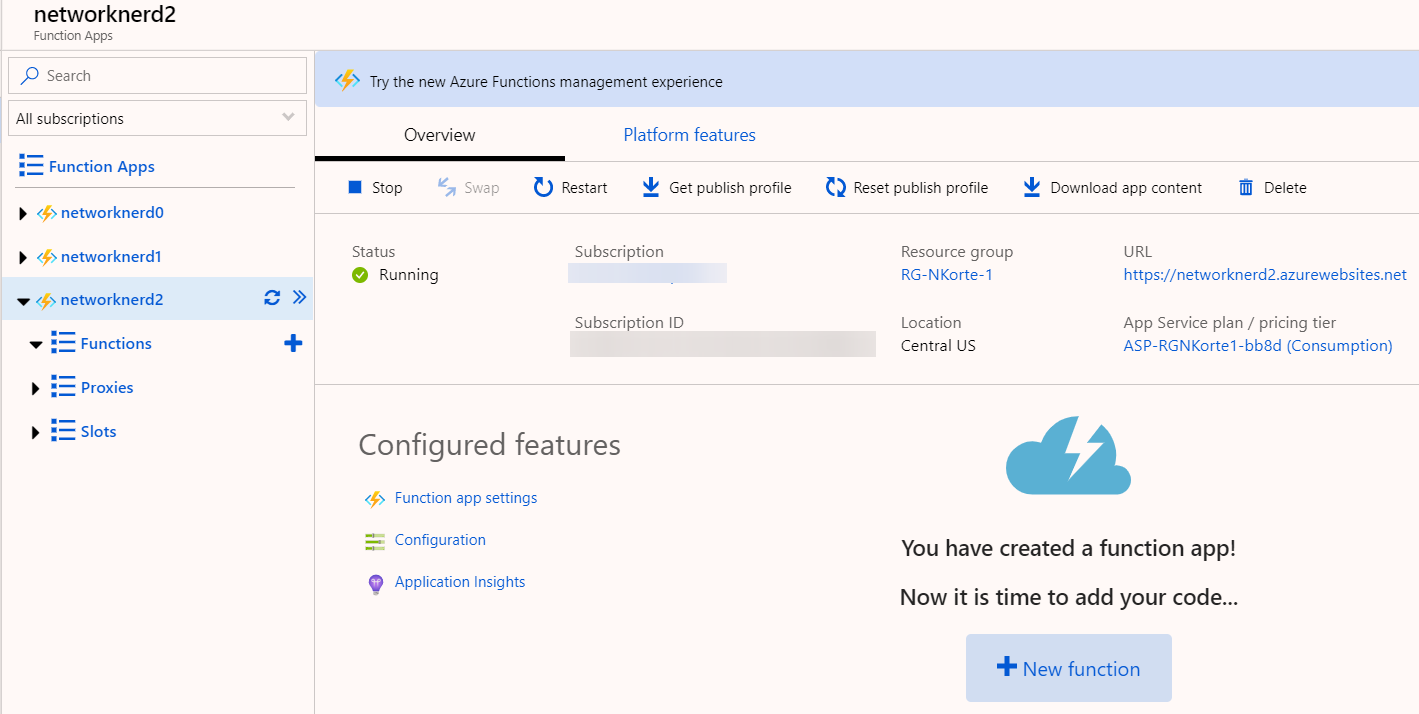
Before we journey along too far, let’s stop to do a quick comparison of the way code files look after functions are created using different methods. Using the same steps in the Azure portal and naming conventions described in this post, create a new Function App called networknerd2 (steps not shown here). Once complete, the Function App networknerd2 is a blank slate ready for functions to be added.
Method 1 – Create a New Function in the Azure Portal
First, follow the steps in this post to create a new function within the Function App networknerd2. Name it FN1-HTTP1-AzurePortal, use HTTP Trigger as the template, and select Function for the Authorization level. As we see below, the function was created successfully. Notice on the far right under View files that we have a function.json file and a run.csx file stored inside a folder named the same as our function’s name. The run.csx file is a C# script file. We’ll go into that a bit later.

Method 2 – Create a New Function in VS Code and Push Directly to Azure
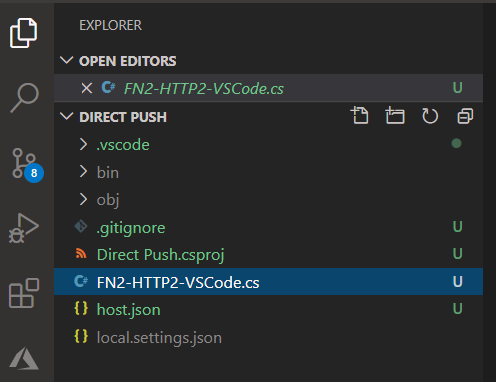
Go back to this post for reference. Inside VS Code, use the Azure Functions extension, and create a new project. I chose to store mine in C:\Users\Nick\Documents\Direct Push so it is outside the local repository we’ve been syncing to Azure Repos in previous posts (changes made here for illustration and will not be moved to that repo). Create a new function within networknerd2, and name it FN2-HTTP2-VSCode. Use NetworkNerd.Functions as the namespace, and choose Function for the access rights. I chose to open the project in a new window instead of adding to the current workspace. Feel free to run a local build and make sure everything works as expected at this point. You’ll notice Git is picking up changes, but we won’t be syncing them to any repo. Also notice there are several files created locally on my laptop in addition to just the .cs file with the function code.
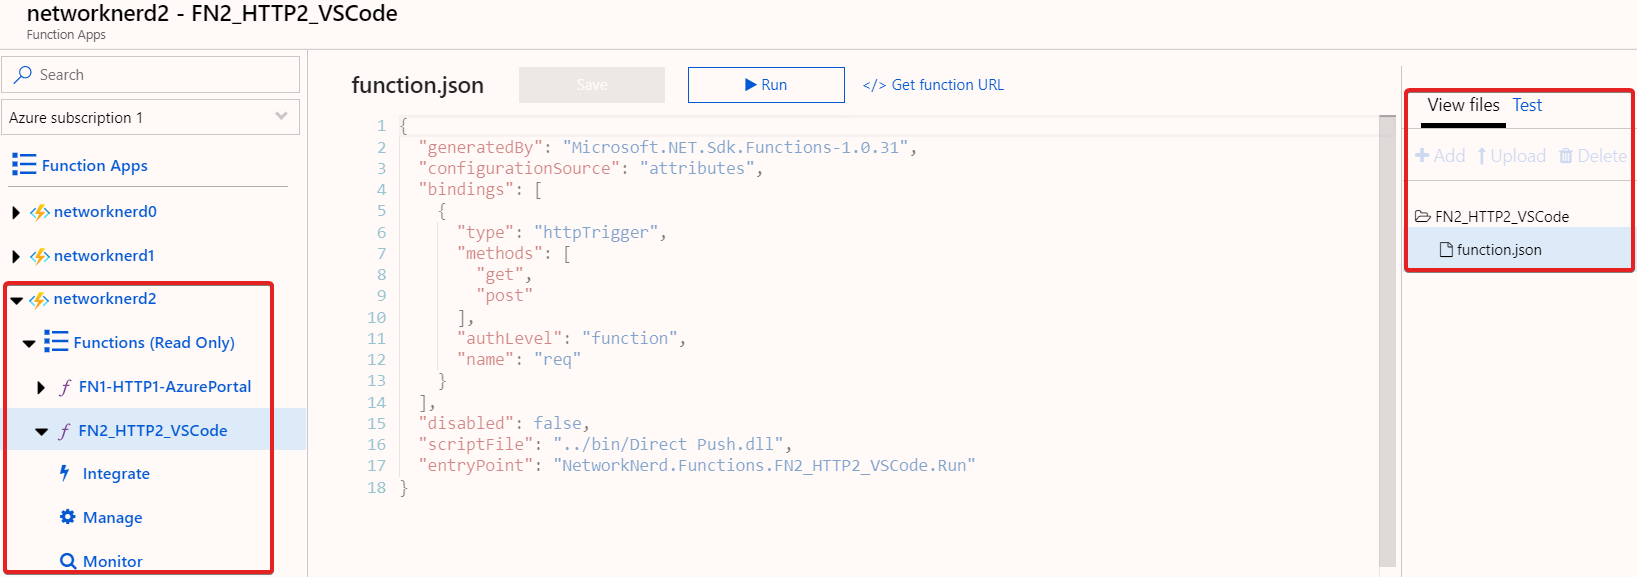
Just as the process in the post linked above mentions, we’ll edit the settings.json file inside C:\Users\Nick\Documents\Direct Push\.vscode again to use the proper Azure Functions project runtime (~3) and save changes. Then, find the locally built function (FN2-HTTP2-VSCode), and click the option to Deploy to Function App from VS Code. Be sure to select networknerd2 as the Function App. Once the deployment succeeds, go back to the Azure portal and look at the function we deployed. Notice the difference in files stored in Azure. We see only a folder named the same as the function and a function.json file. Is this somehow expected behavior? Let’s investigate.
Looking at the Files in Azure in a Different Way
There’s another way we can look at the files for these specific functions inside the Azure portal which may help us better understand what is happening. Select the Function App networknerd2, and click Platform features.
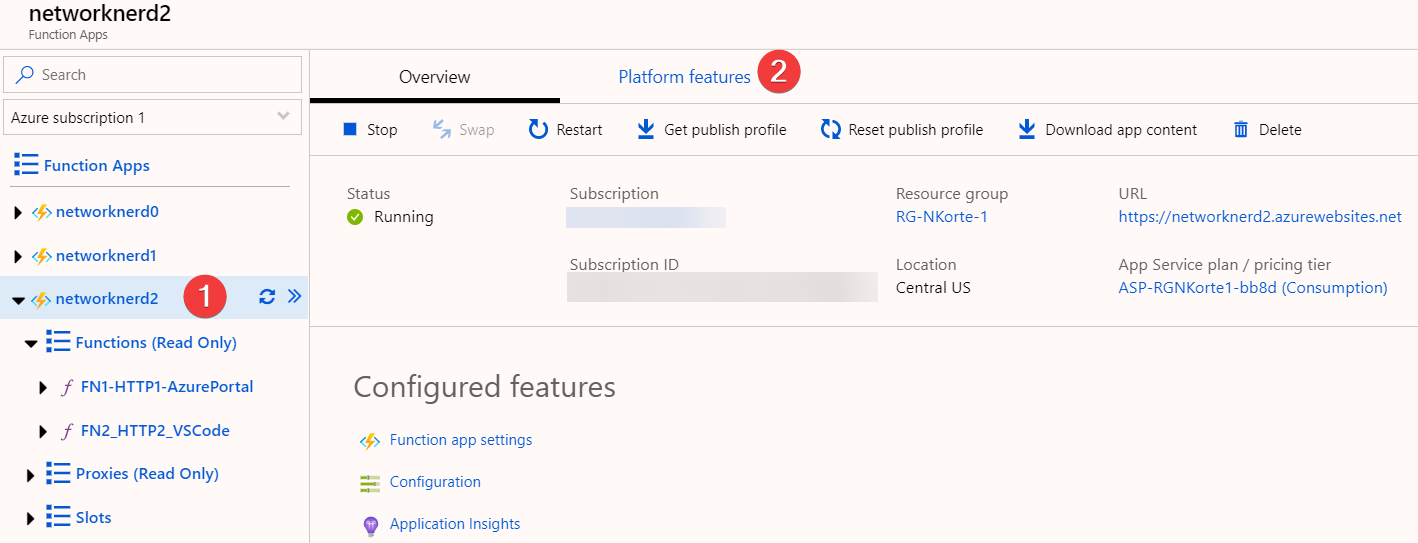
From here, click on App Service Editor.

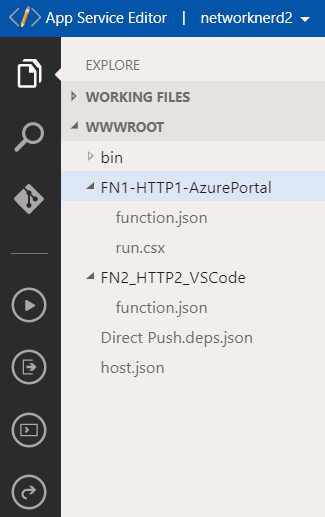
We see the same file structure here too (a run.csx file and a function.json file for the function created in the Azure portal but only a function.json file for our function deployed directly to Azure from VS Code). A folder with each function name is placed into the WWROOT directory on the back-end Windows server that will execute the functions. And we also see that the dashes from when the second function was created locally in VS Code were converted to underscores. But there’s no .cs file like we saw in the VS Code tree and no .csproj file. Hmm….
According to the Azure Functions developer guide, the file structure we see above for our Function App (networknerd2) must match the following structure, and it does…for the most part. But how do we explain the difference in files present?
FunctionApp

| - host.json

| - MyFirstFunction

| | - function.json

| | - ...

| - MySecondFunction

| | - function.json

| | - ...

| - SharedCode

| - bin
Well, a .csx file is a C# script file. By default, this is the format used when you create a function in the Azure portal. According to the C# script developer reference, the folder structure for a C# script project is shown in the following code block. So, for our first function (FN1-HTTP1-AzurePortal), the proper files show up as expected (a run.csx file and a function.json file inside a folder with the function name). The .proj file is a C# class library (not something we can create in the Azure portal).
FunctionsProject

| - MyFirstFunction

| | - run.csx

| | - function.json

| | - function.proj

| - MySecondFunction

| | - run.csx

| | - function.json

| | - function.proj

| - host.json

| - extensions.csproj

| - bin
Now, the second function (FN2-HTTP2-VSCode) is a little different. There was no .csx file in VS Code (only a .cs file) because we chose C# as the default language for a new project with the Azure Functions extension (step not shown here but detailed in this post). After doing a local build of this function in VS Code, the function.json file gets created as does an entire bin directory (also a directory named bin created inside the Debug folder structure as well as the Release folder structure).
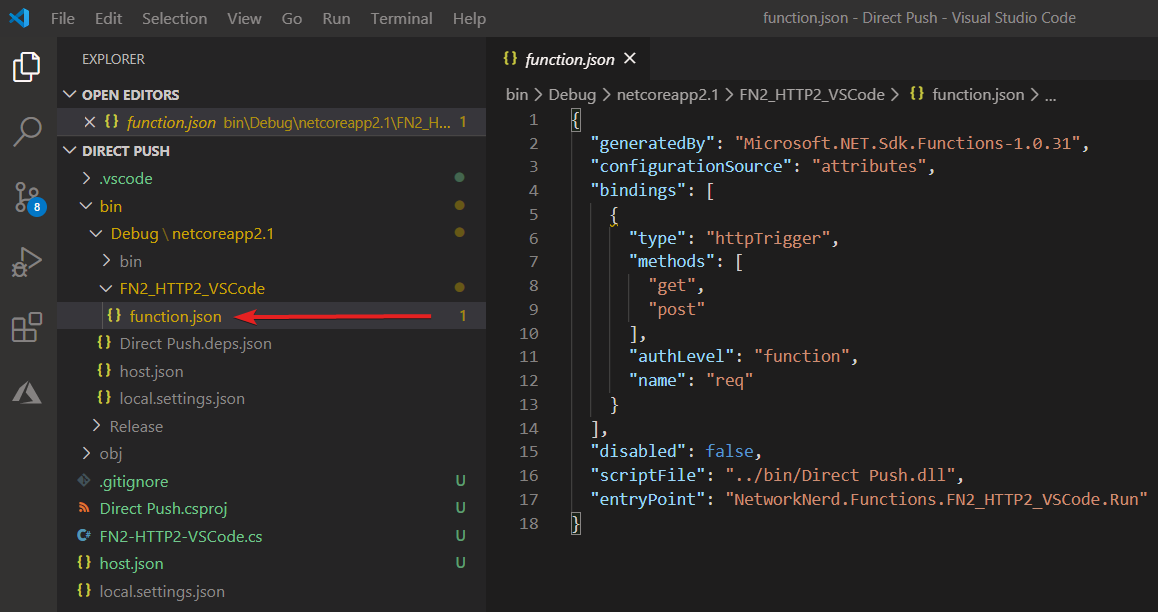
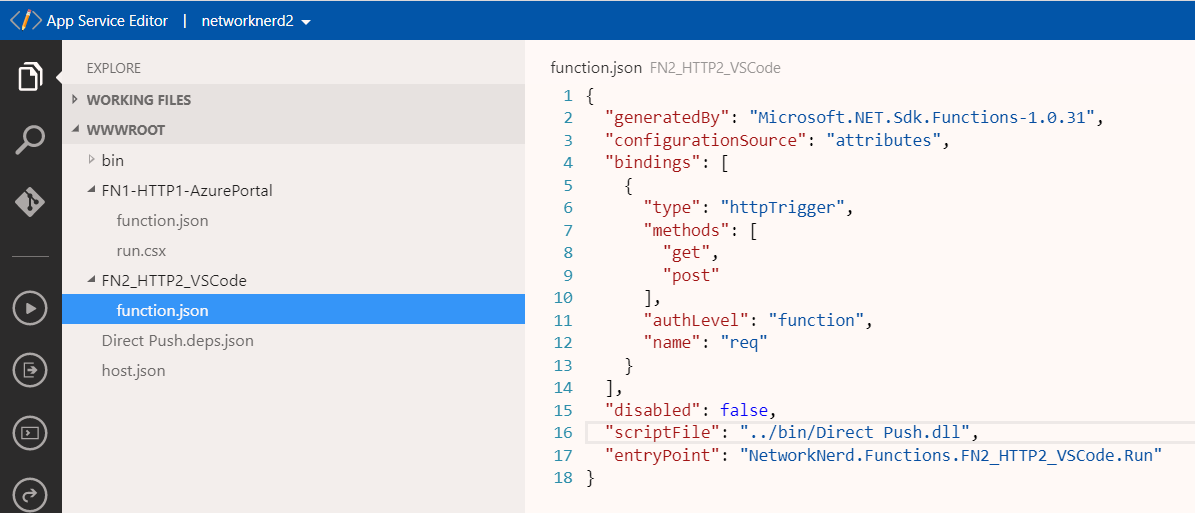
If we compare function.json as shown above to the function.json file we see in the the App Service Editor, it is easy to see the two are identical.
According to the Azure Functions C# developer reference, the folder structure in Azure for a C# project should look like the code block below, and for FN2-HTTP2-VSCODE, it certainly does.
framework.version

| - bin

| - MyFirstFunction

| | - function.json

| - MySecondFunction

| | - function.json

| - host.json
When Curiosity Peaks, Dig Deeper
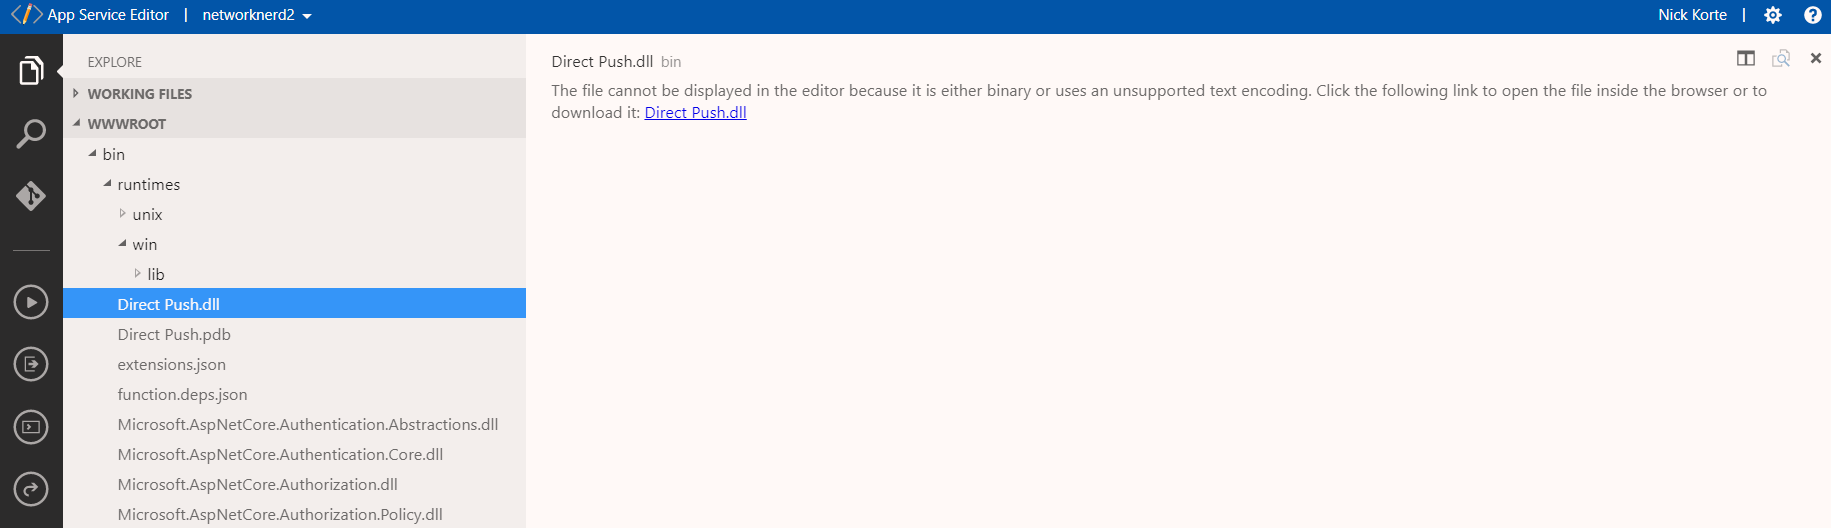
When we deploy a C# function from VS Code to an Azure Function App, we are sending compiled code to Azure. Look again at the scriptFile parameter in the function.json file for FN2-HTTP2-VSCode. Maybe that is where the actual function code might be (inside Direct Push.dll)? Is there a way to look at it to verify our code made it successfully? Sure, we could just test by executing the function on the Azure side, but my concern at present is finding the actual code. As shown below, we can’t see the DLL contents in the App Service Editor in Azure.
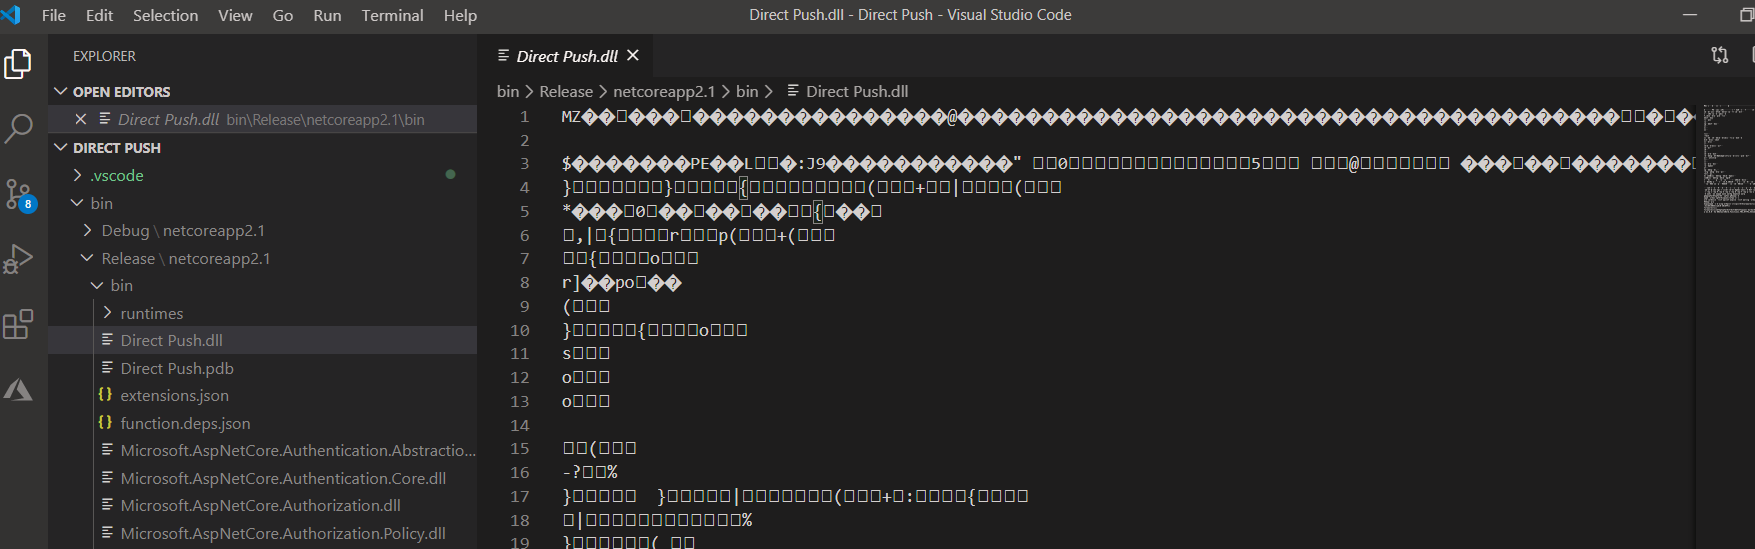
What if we try finding the same DLL in VS Code to see if we can view its contents? I’m afraid this will not help, even if we click the open it anyway link shown below.
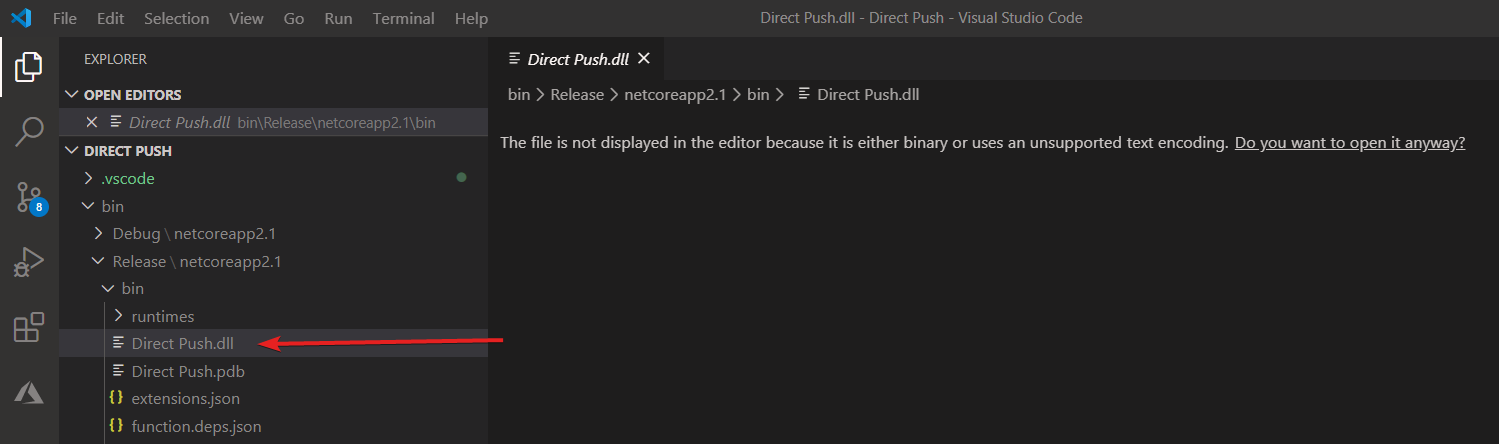
Well that’s not readable….
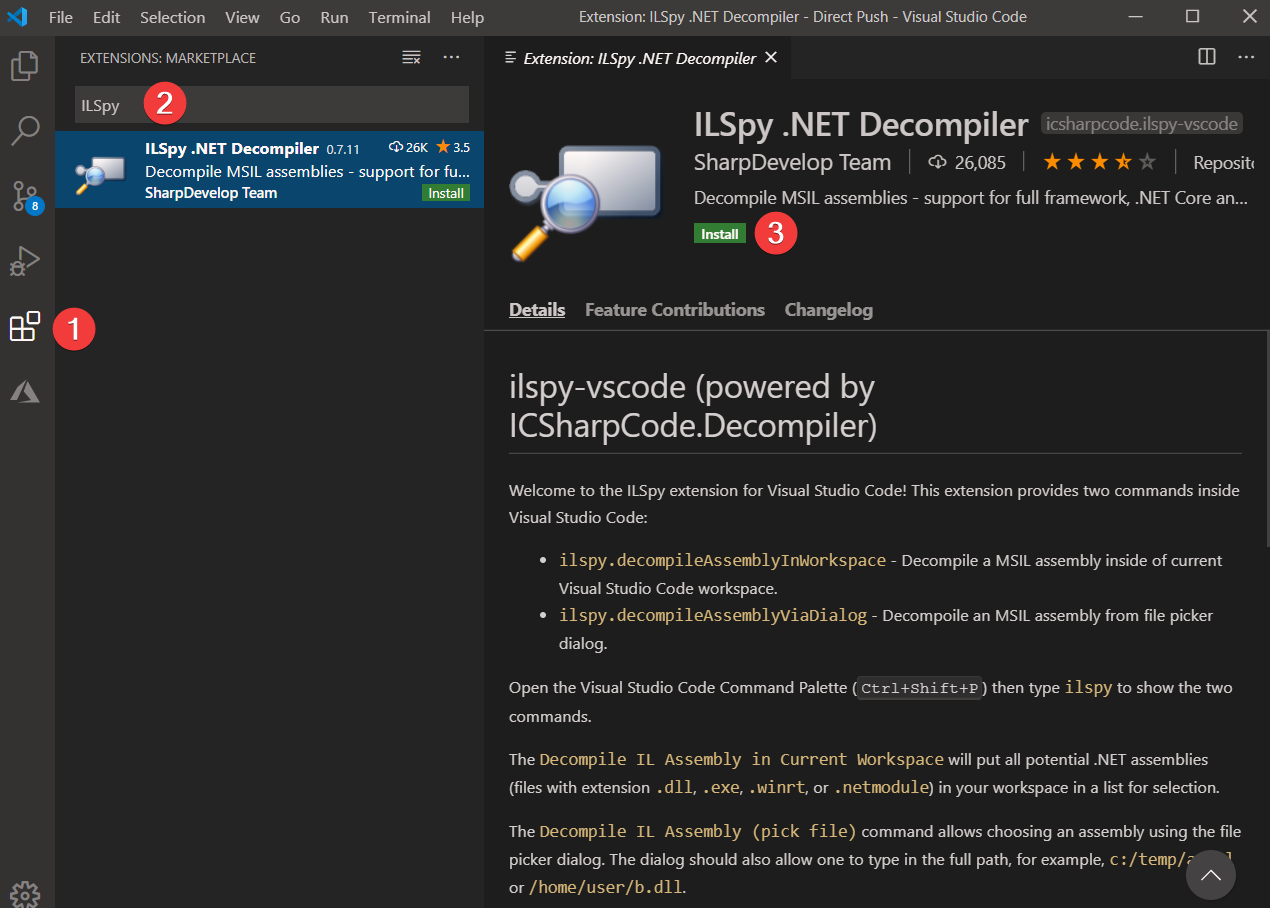
After a little searching, I stumbled upon a VS Code extension called ILSpy .NET Decompiler that should allow us to view the contents of that DLL by decompiling it. Search for the extension from the Extensions Marketplace area in VS Code, and install it.
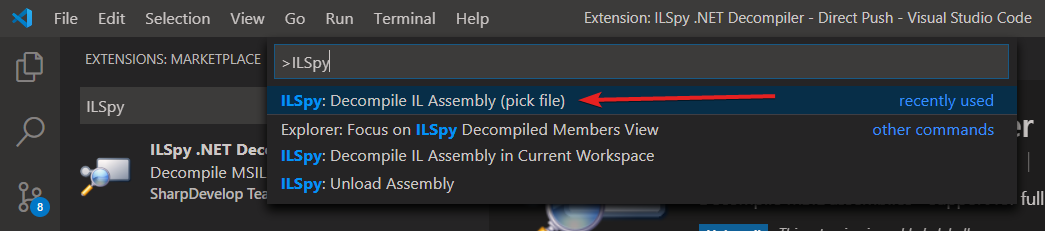
Once the extension is installed and enabled (should be a quick install and should be auto-enabled), press CTRL + SHIFT + P to open the VS Code command pallete. Search for ILSpy, and select the option to Decompile IL Assembly (pick file).
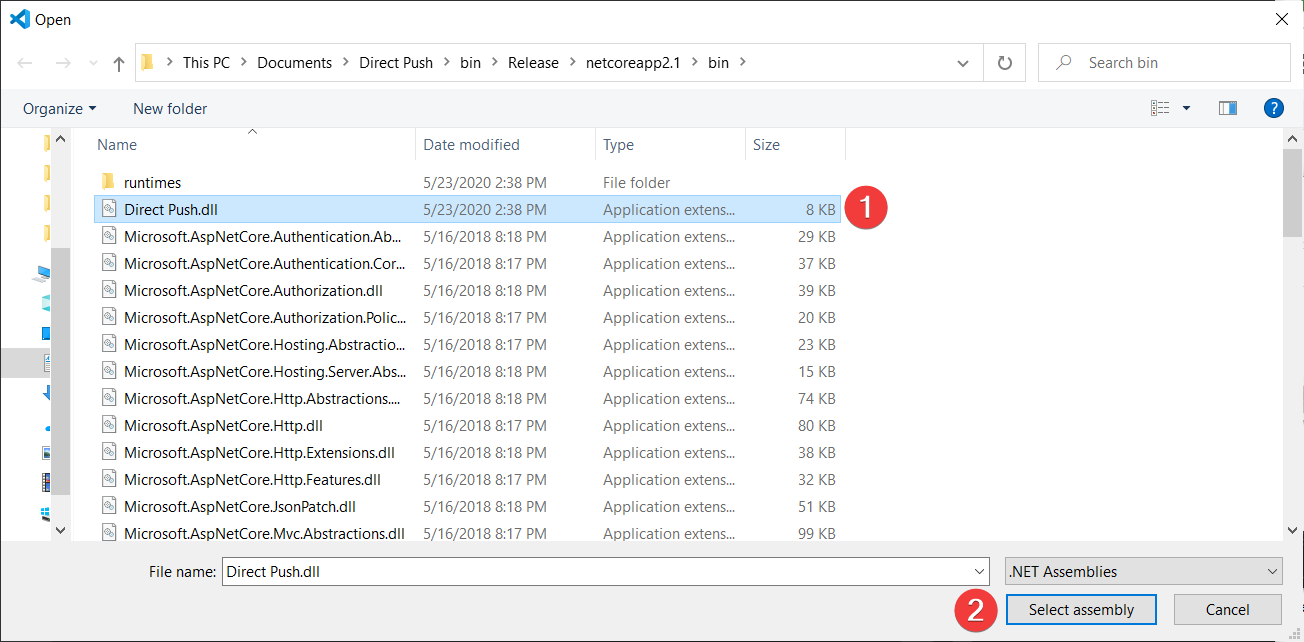
This opens a file picker window. One location of “Direct Push.dll” is inside C:\Users\Nick\Documents\Direct Push\bin\Release\netcoreapp2.1\bin. Once the file picker window opens, select the correct DLL file, and click Select Assembly.
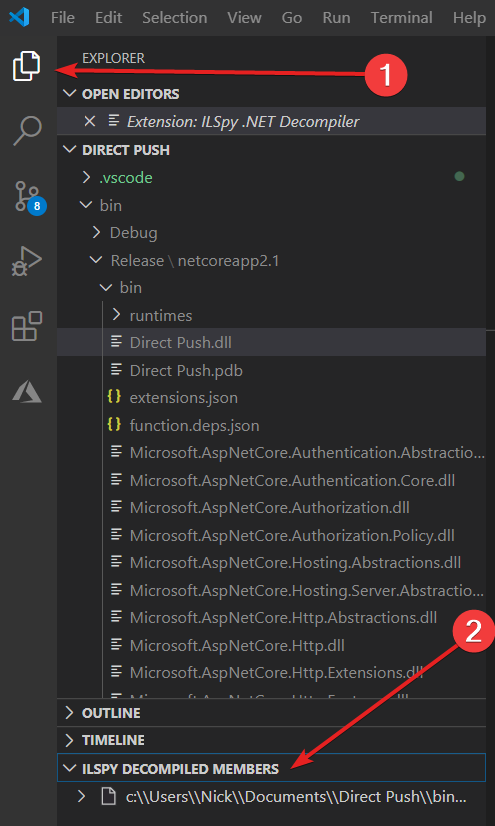
At this point you might think nothing happened, but if we go to the Explorer area in VS Code, there is something listed under ILSPY DECOMPILED MEMBERS.
If we select the decompiled DLL and drill down, we can see the code for our function FN2-HTTP2-VSCode. It looks similar to the original .cs file created at the beginning but is not quite the same. Notice the file opened does have a .cs extension but is given a randomized file name.
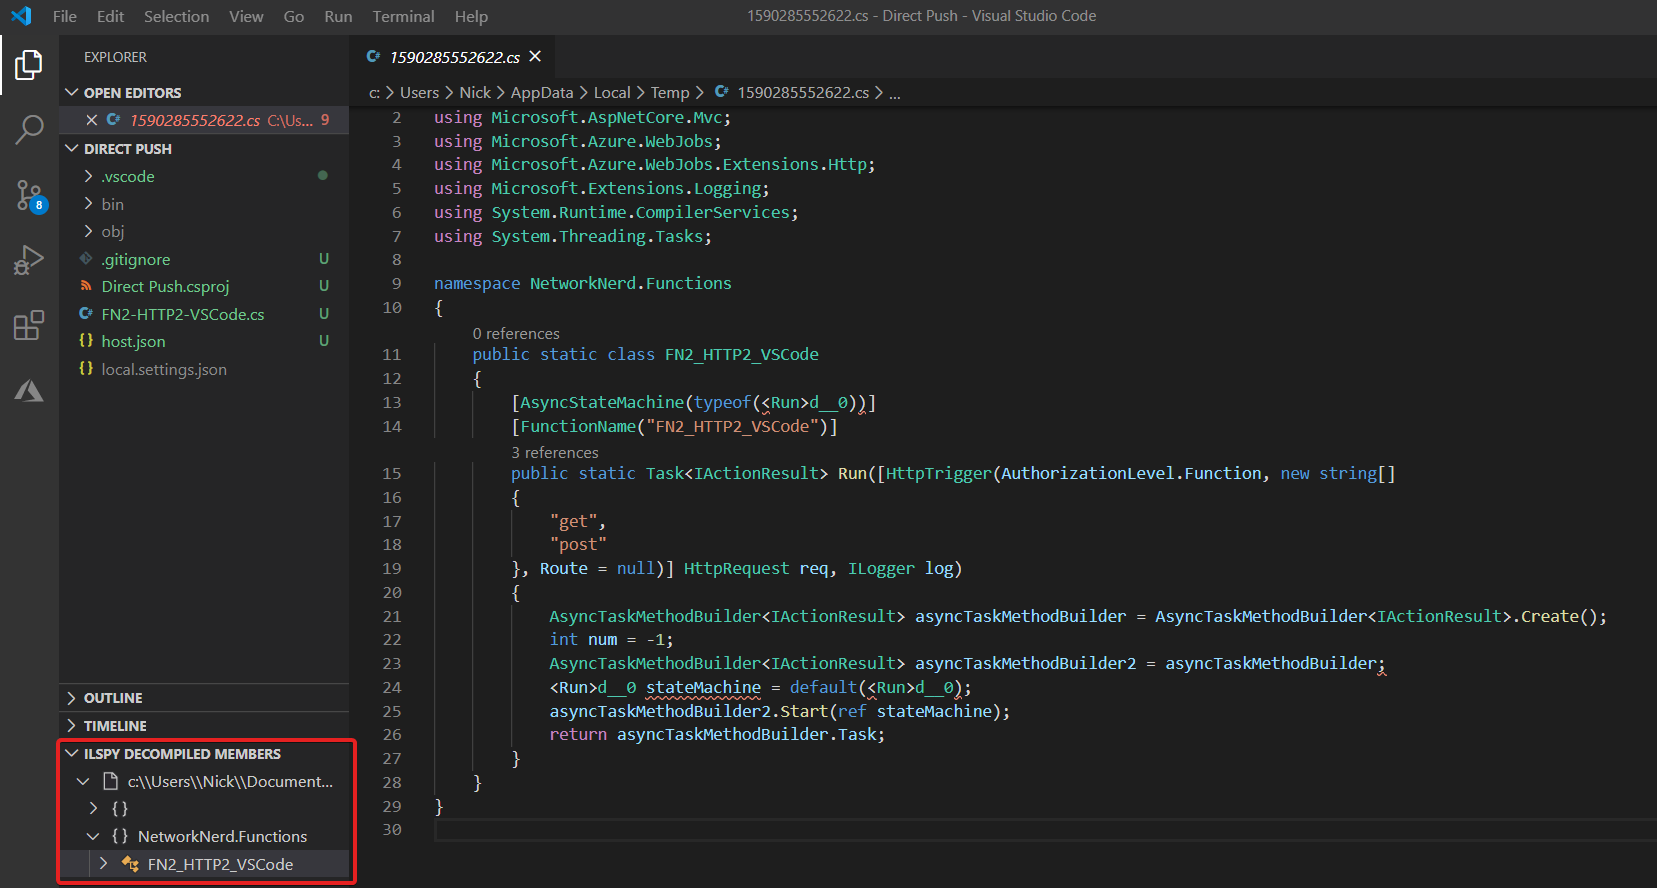
The entry point from our function.json file references the custom namespace we used (NetworkNerd.Functions) when the function was created followed by the function name and then a .Run (full text shown directly below).
"scriptFile": "../bin/Direct Push.dll",

"entryPoint": "NetworkNerd.Functions.FN2_HTTP2_VSCode.Run"
Here’s a fun fact. Inside VS Code, press F5 when the .cs file for FN2_HTTP2_VSCode is open to test function code execution on your local machine. Additionally, we could drill down several levels below what the file tree above shows for FN2_HTTP2_VSCode. Here’s an example screenshot of how things would look after cracking open “C:\Users\Nick\Documents\Direct Push\bin\Release\netcoreapp2.1\publish\bin\Direct Push.dll” with ILSPY and fully expanding the tree. I can only attribute the structure to the way VS Code runs its C# compiler to create DLL files for Azure Functions.

Did we have to dig into that DLL file at all? No. More than anything, this exercise was to show you that even though the code was compiled in VS Code and then pushed up to Azure, it exists in a slightly different form and with a different file structure (that, and it cannot be edited anywhere but inside VS Code). And if I’m being honest, my curiosity got the best of me.
When Two Roads Diverge
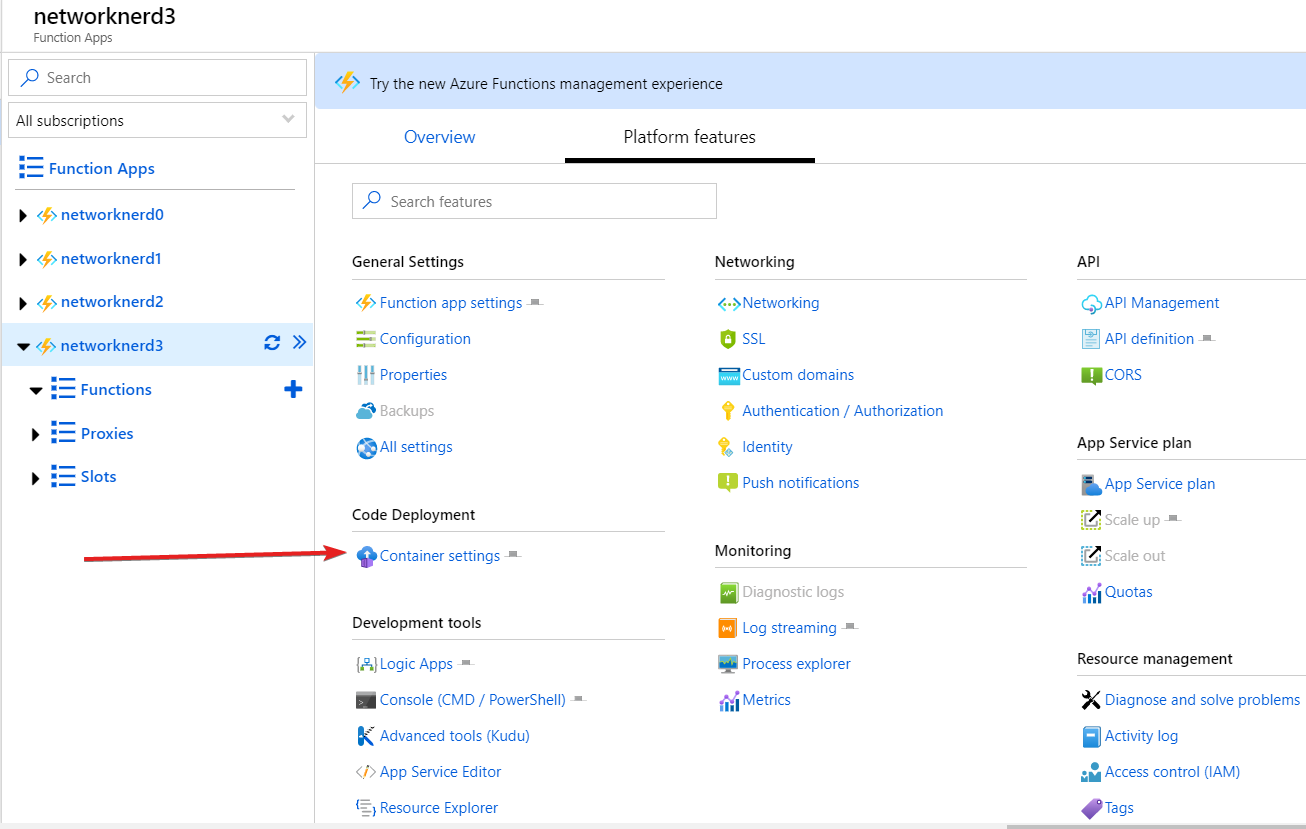
Now that we’ve illustrated some interesting differences in C# scripts and C# pre-compiled code, let’s press forward. In order to automate builds and deployment of functions to Function Apps once we deploy code to our Azure Repo, we need to wire up everything in the Deployment Center properly. If you recall, we hit a snag trying that in this post. Hopefully we can advance the process this time. Before we do, let’s create one more Function App called networknerd3 that is a blank slate (same process as used earlier in this post). After doing this, go to the Platform features tab for our new Function App, and click on Container settings.
The process you’re about to see must be configured on a per Function App basis. We’re configuring the Deployment Center settings for networknerd3. As before, we will select Azure Repos as our source control and then click Continue.

As the build provider, we will choose Azure Pipelines. Then click Continue.

This time we actually have information that can be used to populate the various fields. We have an Azure DevOps Organization (networknerd-org1) and a project within that organization (networknerd-project1). As for Repository, that would be our Azure Repo (networknerd-repo1). The only branch that exists is master. That takes care of all the fields in the Code section. In the Build section is where we have the potential to make a mistake (and I made many here). The Function App Type field will create different build and release pipelines depending on what you choose.
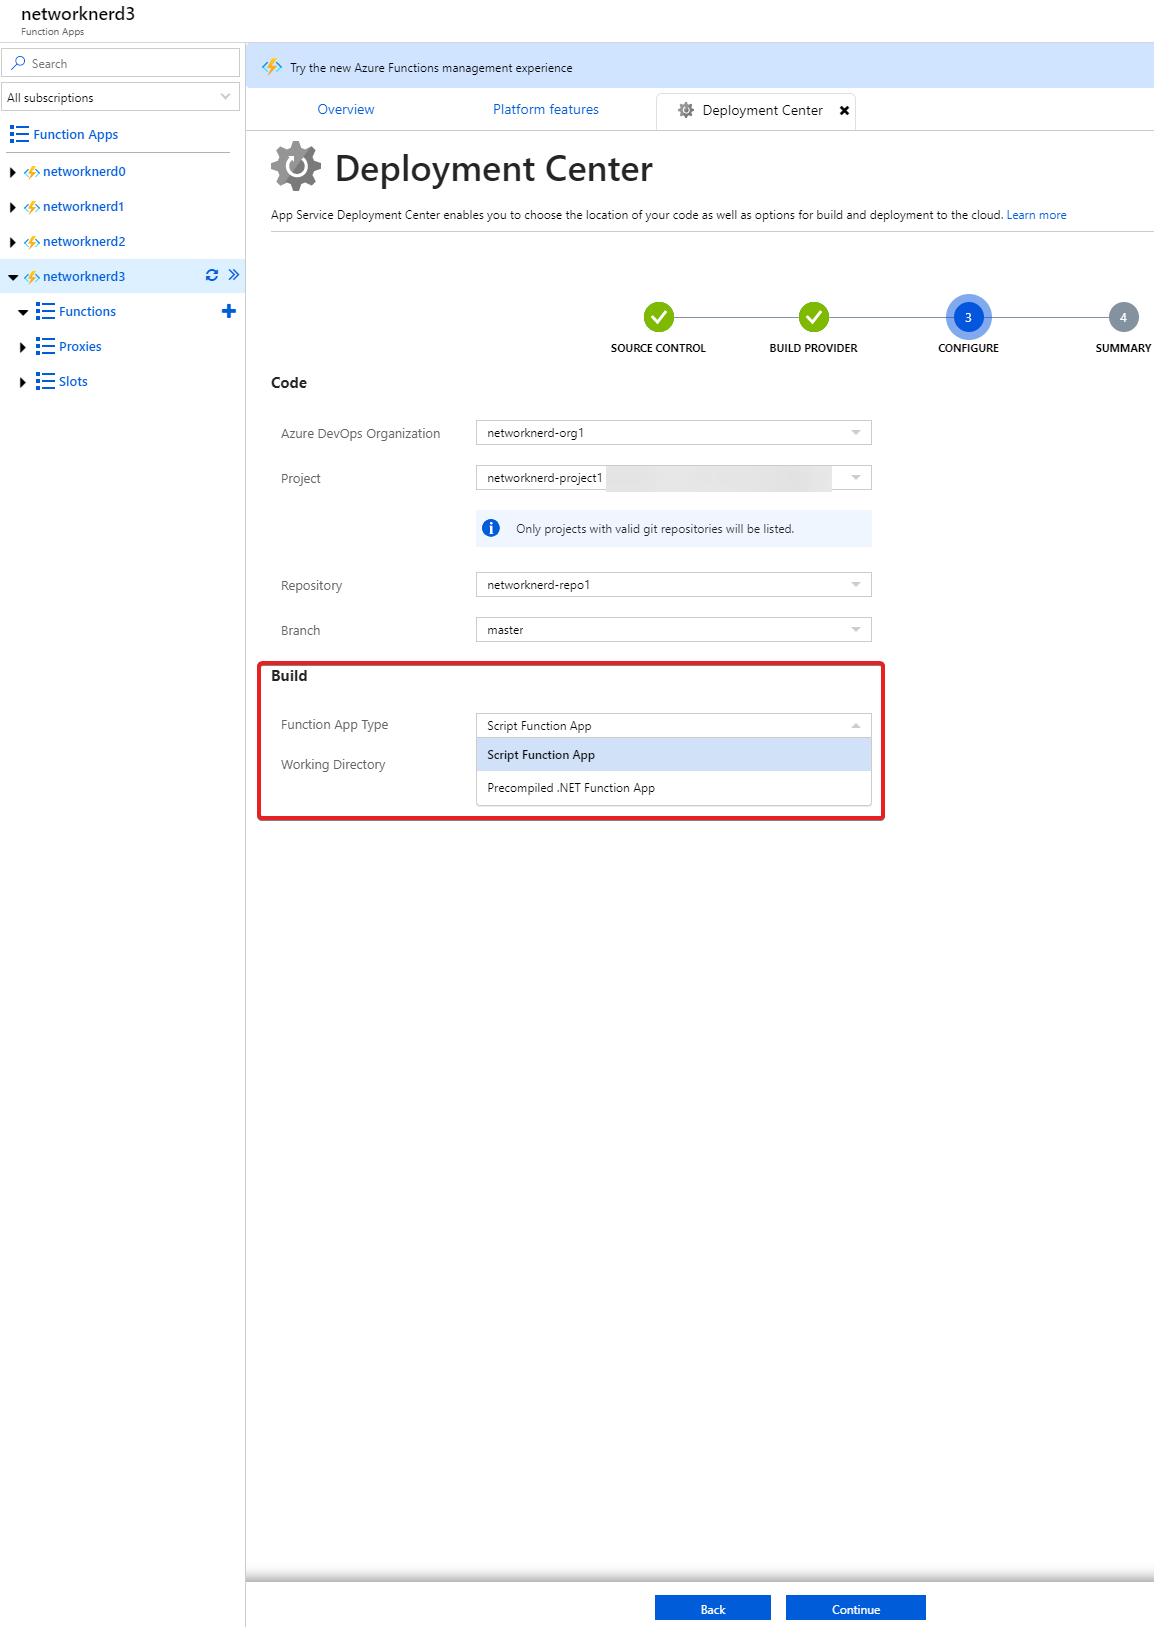
A Script Function App means you’re planning to use code that is in the form of a C# script (same format and structure as we saw when creating functions in the Azure portal). Precompiled .NET Function App means exactly what you might guess – pre-compiled C# code from VS Code in a format matching what we saw earlier in this post. It’s difficult to see because of the expanded dropdown box, but Working Directory is the directory in the repo mentioned previously that should be used for building and releasing function code based on changes detected from a commit.
Forget Working Directory for a second. What’s the best selection for Function App Type? The answer is not a short one, and because of this, we will look to tackle it in my next post(s). All I will say for now is that this one dropdown box and its settings plagued me for hours before finally getting things straight. But we’ll save the details for next time. Hopefully you needed the background in this post as much as I did.
Other Posts in This Series
- Part 1 – A First Voyage into Azure Functions and Function Apps
- Part 2 – Deploying Azure Functions with Visual Studio Code
- Part 3 – Push and Pull – Using VS Code with Azure Repos
- Part 4 – This post
- Part 5 – From VS Code to Azure Pipelines – Basic CI/CD with Azure Functions
- Part 6 – The Next Wave: Exploring Tanzu Observability’s Integration with Azure Functions
- Part 7 – Introduction to Distributed Tracing with Tanzu Observability and Azure Functions
- Part 8 – Coming soon!