I recently learned VMware has an open source project for chaos engineering called Mangle, and I thought it would be fun to do a little exploring. After all, the name sounds pretty cool, and I know almost nothing about chaos engineering. So let’s create a little chaos, shall we? This will be the first in a series of posts exploring VMware Mangle.
The main Mangle site describes what Mangle does, where it can be deployed, and has documentation on the deployment and use of the product as well as how you can contribute. The start of the official documentation can be found here.
Being a former vSphere administrator, I figured the fastest path to stand up Mangle would be to deploy the OVA on vSphere. Keep in mind that is the deployment option I’m choosing for this post and not the only option (could be deployed in public cloud somewhere if you like). This post will detail my deployment process, including any errors I run into along the way. I would encourage you to read the whole thing before deciding what steps to replicate for yourself.
Standing up a Small Lab
First, I downloaded one of the latest versions of ESXi (7.0 U2a) as well as the accompanying version of the vCenter appliance. The steps are not shown here (see this doc page for details on downloading ESXi), but you will need a MyVMware (or Customer Connect as we call it now) account to download. My laptop is fairly powerful, so I figured it would be easy to run nested ESXi on VMware Workstation. As a first step, I checked the Interoperability Matrix and found this requires VMware Workstation 16 Pro. I was fortunate to have a license to use it through the vExpert program, but there is an option to do a 30-day trial (download here).
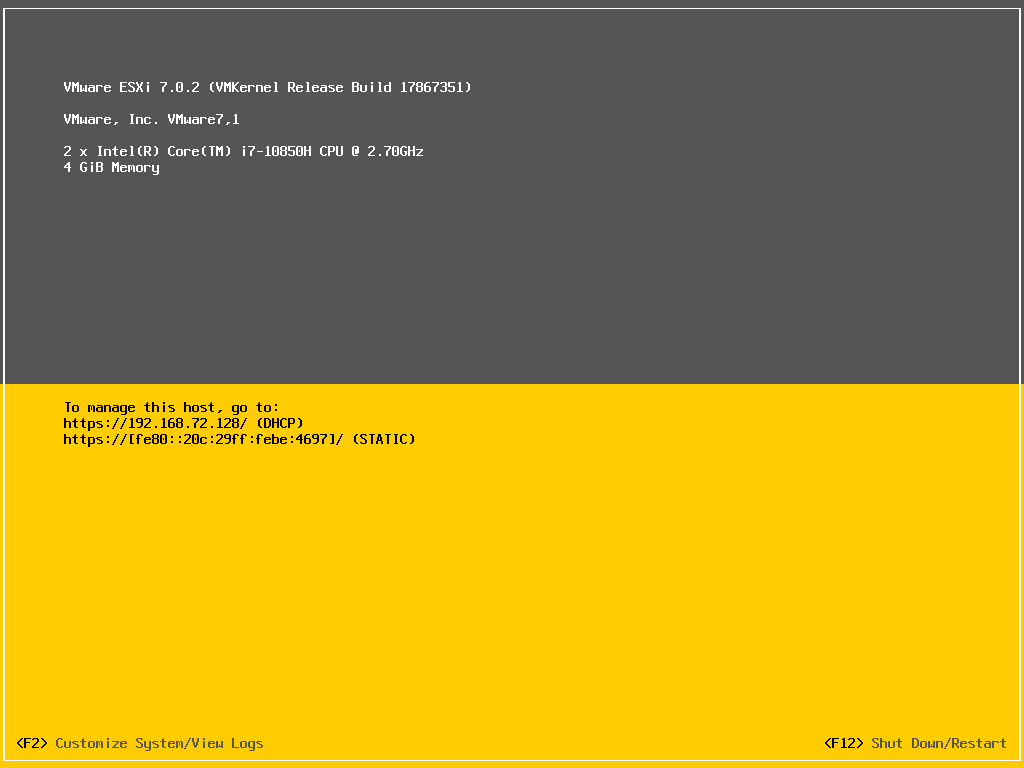
There’s something soothing about the console view of an ESXi host, isn’t there? Maybe it’s just me. In any case, I have a single ESXi 7.0 U2a host deployed using VMware Workstation (steps to get there not shown here). It shows 2 CPU and 4 GB memory, which may or may not be enough for what lies ahead, but I am leaving it for now.
Taking a Shortcut
At this point, I could go ahead and deploy vCenter on my virtual ESXi host, but I’m not going to do that. This is a lab environment, and I want a quick win. I’m going to see if I can deploy the Mangle OVA directly on this ESXi host. I had trouble doing this once with a Hytrust OVA, but maybe things are different with the Mangle OVA and vSphere 7. Most would deploy an OVA through vCenter, but there is an option to deploy OVAs inside the ESXi embedded host client. Why not try it?
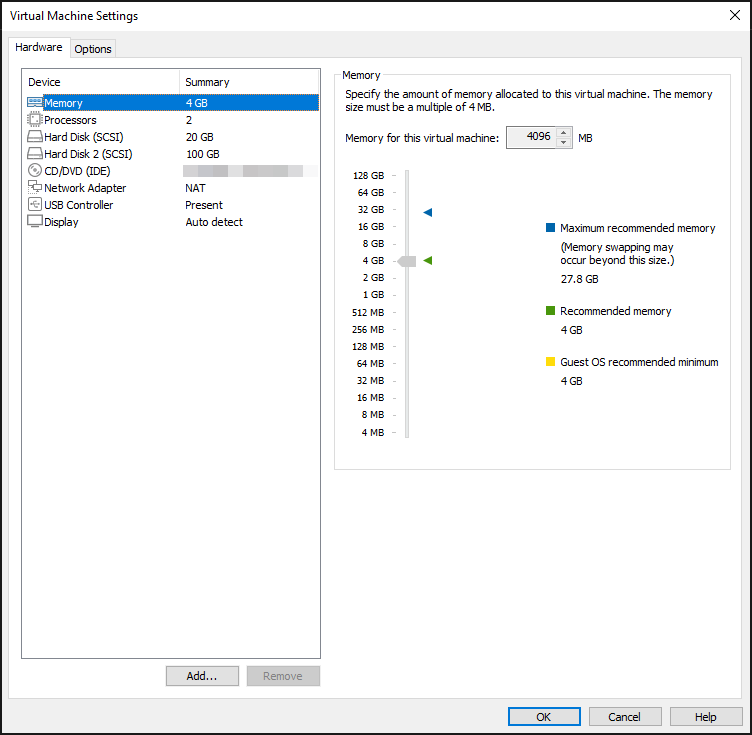
Before we continue, I want to share some background information on my config. The host is a VM that has ESXi installed on a 20 GB thin provisioned virtual disk (VMDK). I’ve also added a second thin provisioned virtual disk (100 GB thin provisioned VMDK) to use as the host’s local VMFS datastore. The datastore will be where we store virtual disk files for any VMs running on the host (i.e. for the Mangle appliance). Here’s what the settings of my ESXi host VM look like at present.
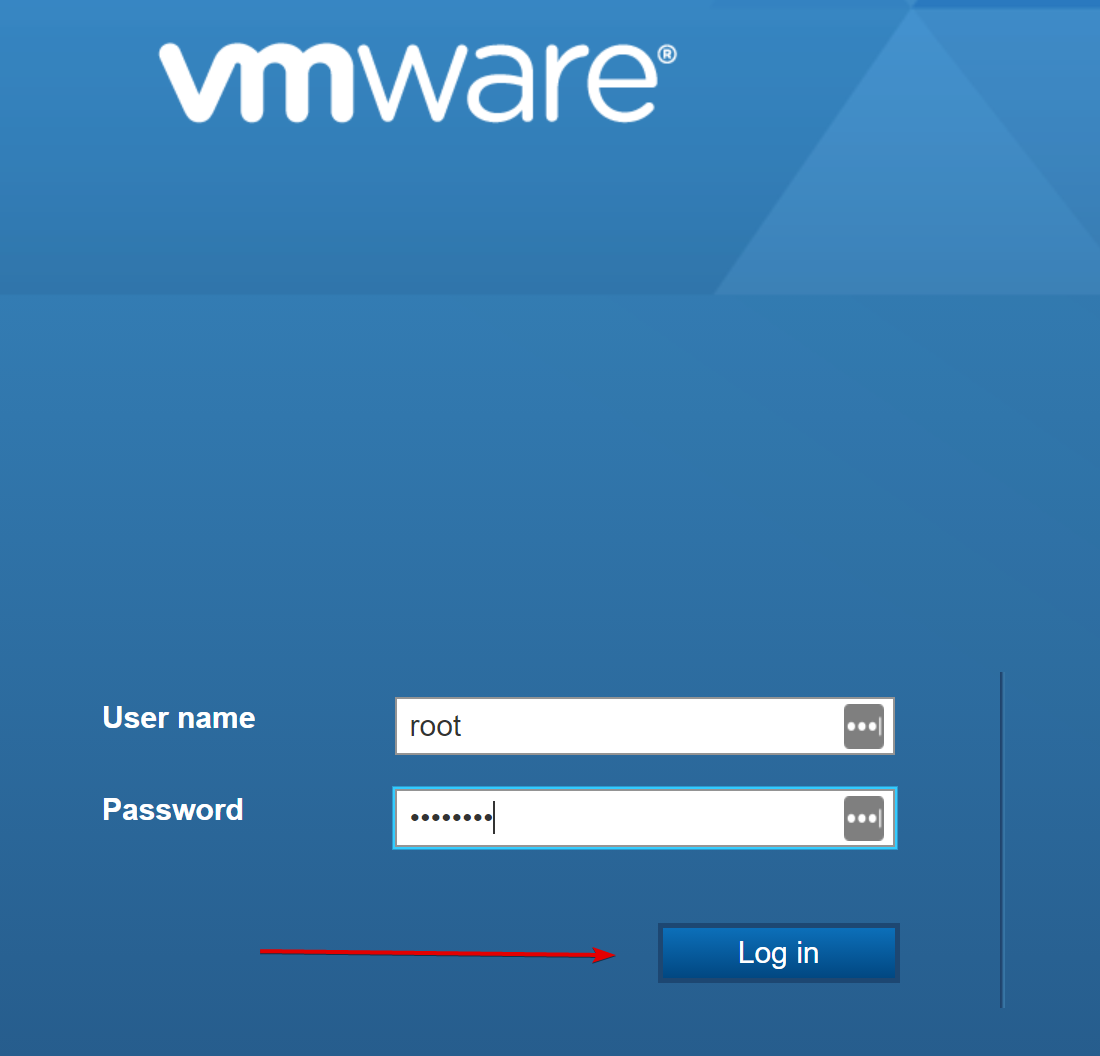
We saw the ip of the host above, so if I visit https://192.168.72.128/ui/#/login in a web browser on my laptop, I can login to the host itself using the ESXi embedded host client interface. I’ll login with the only username and password I have so far (username root and password I created during the ESXi install).
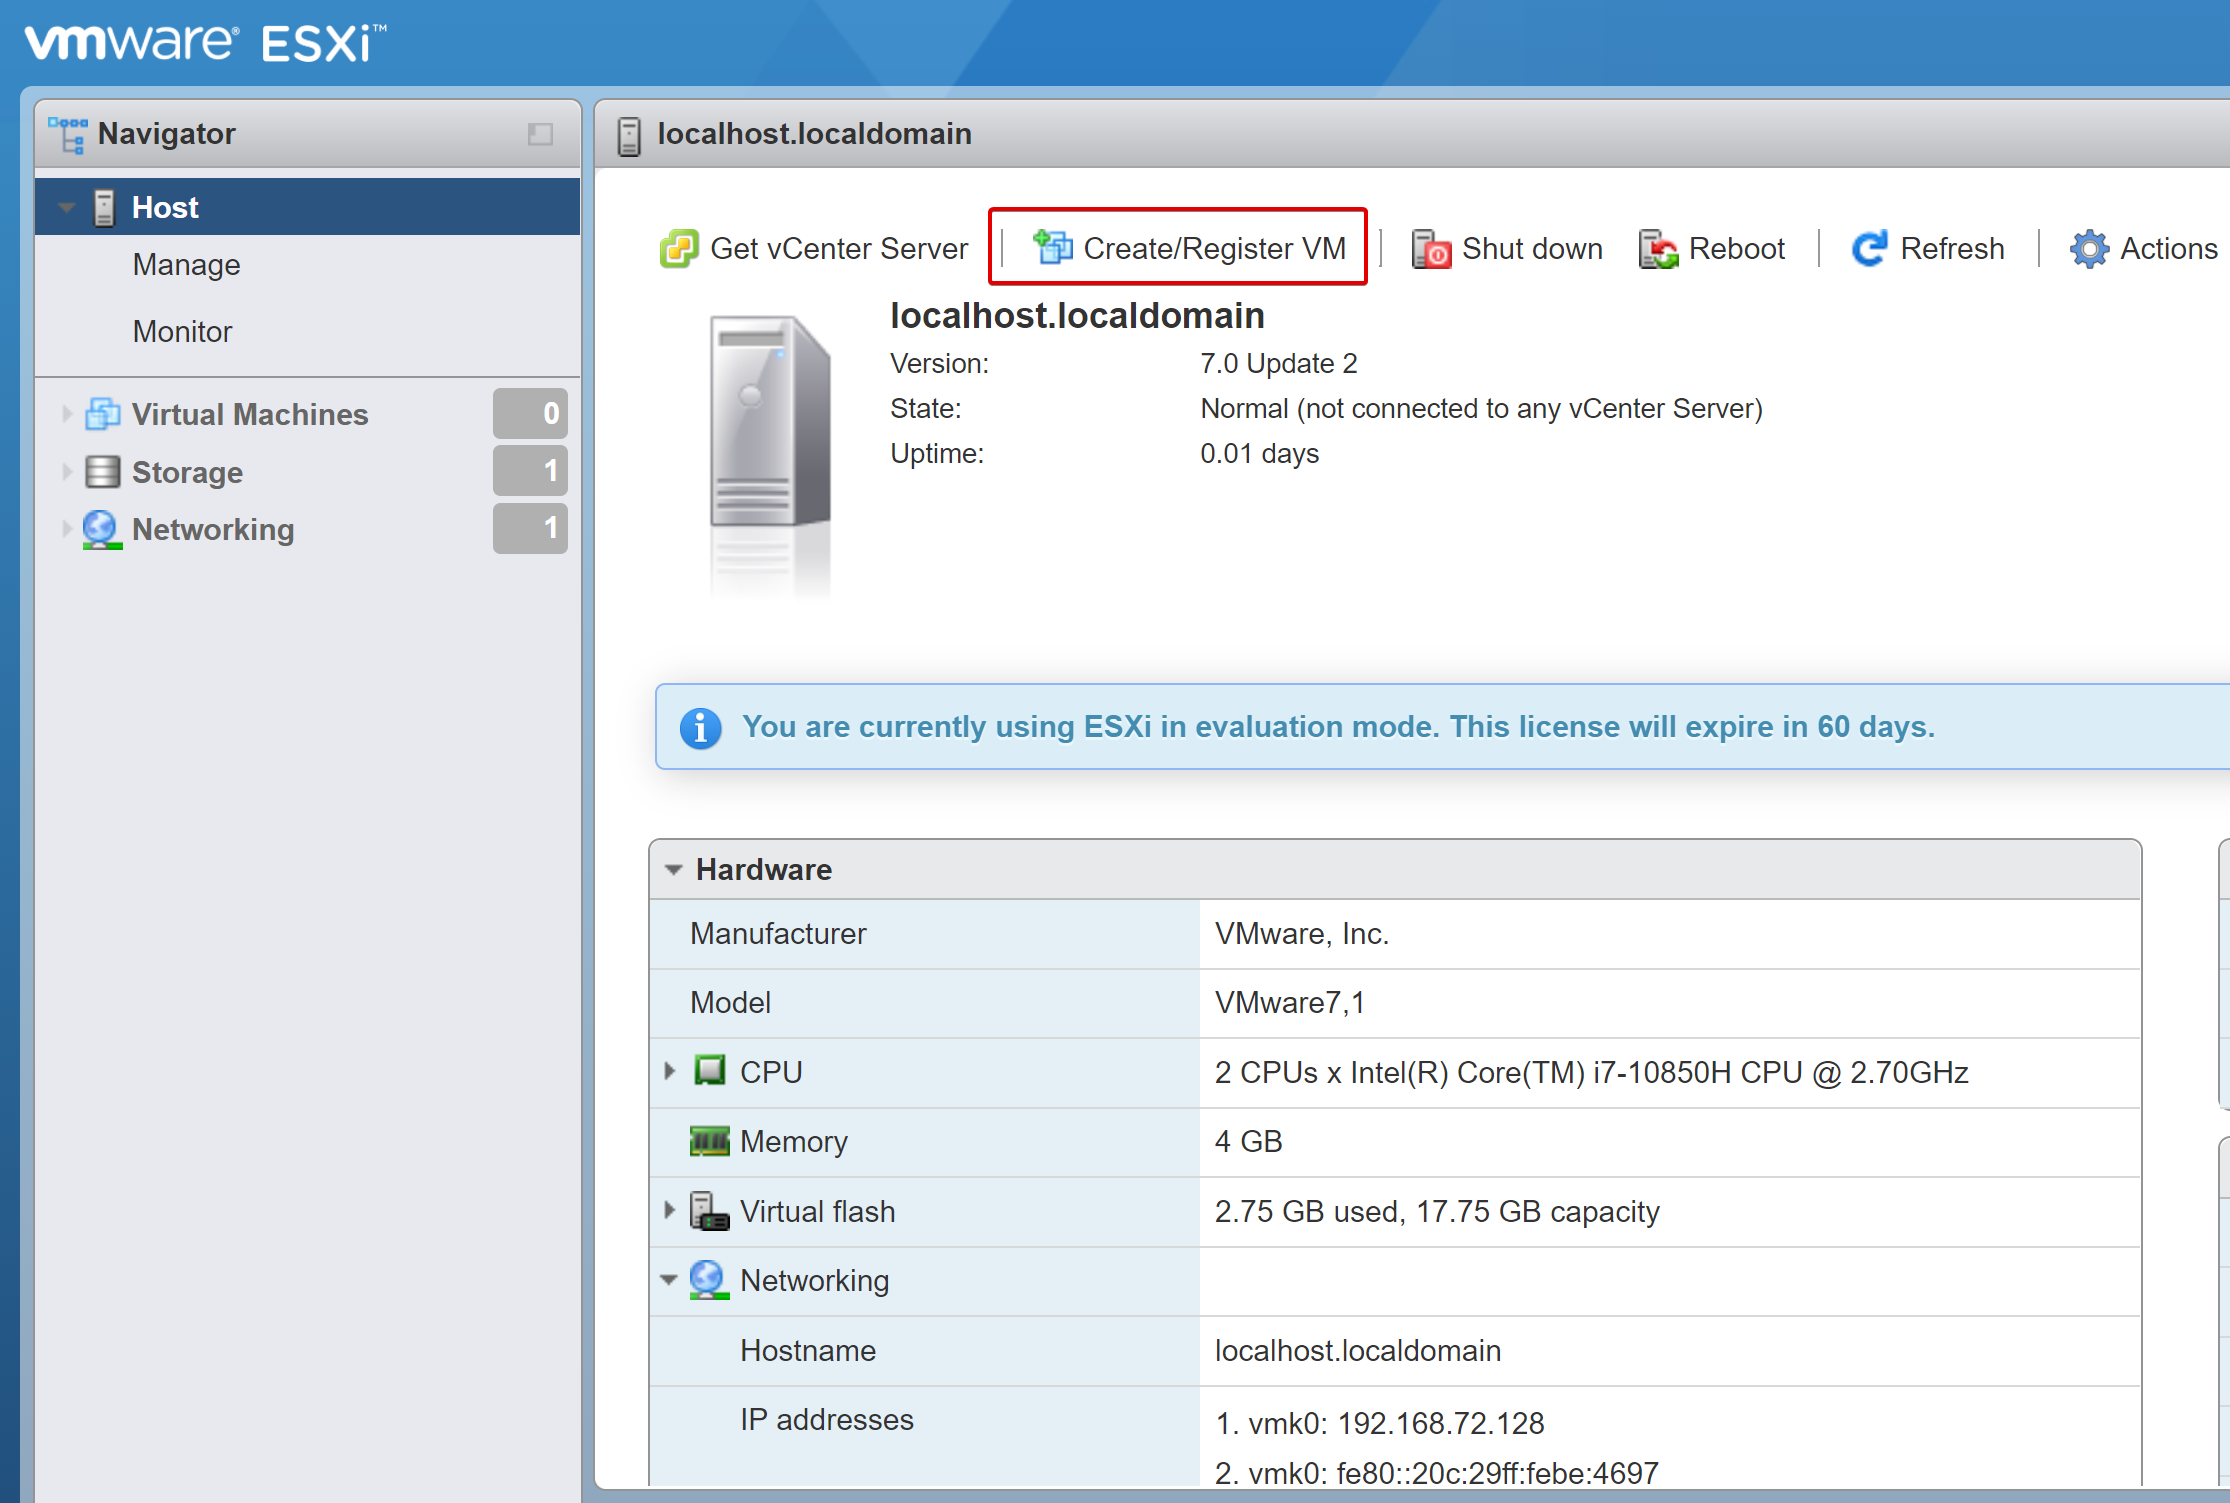
Once logged into the host, we can select the option to Create / Register VM.
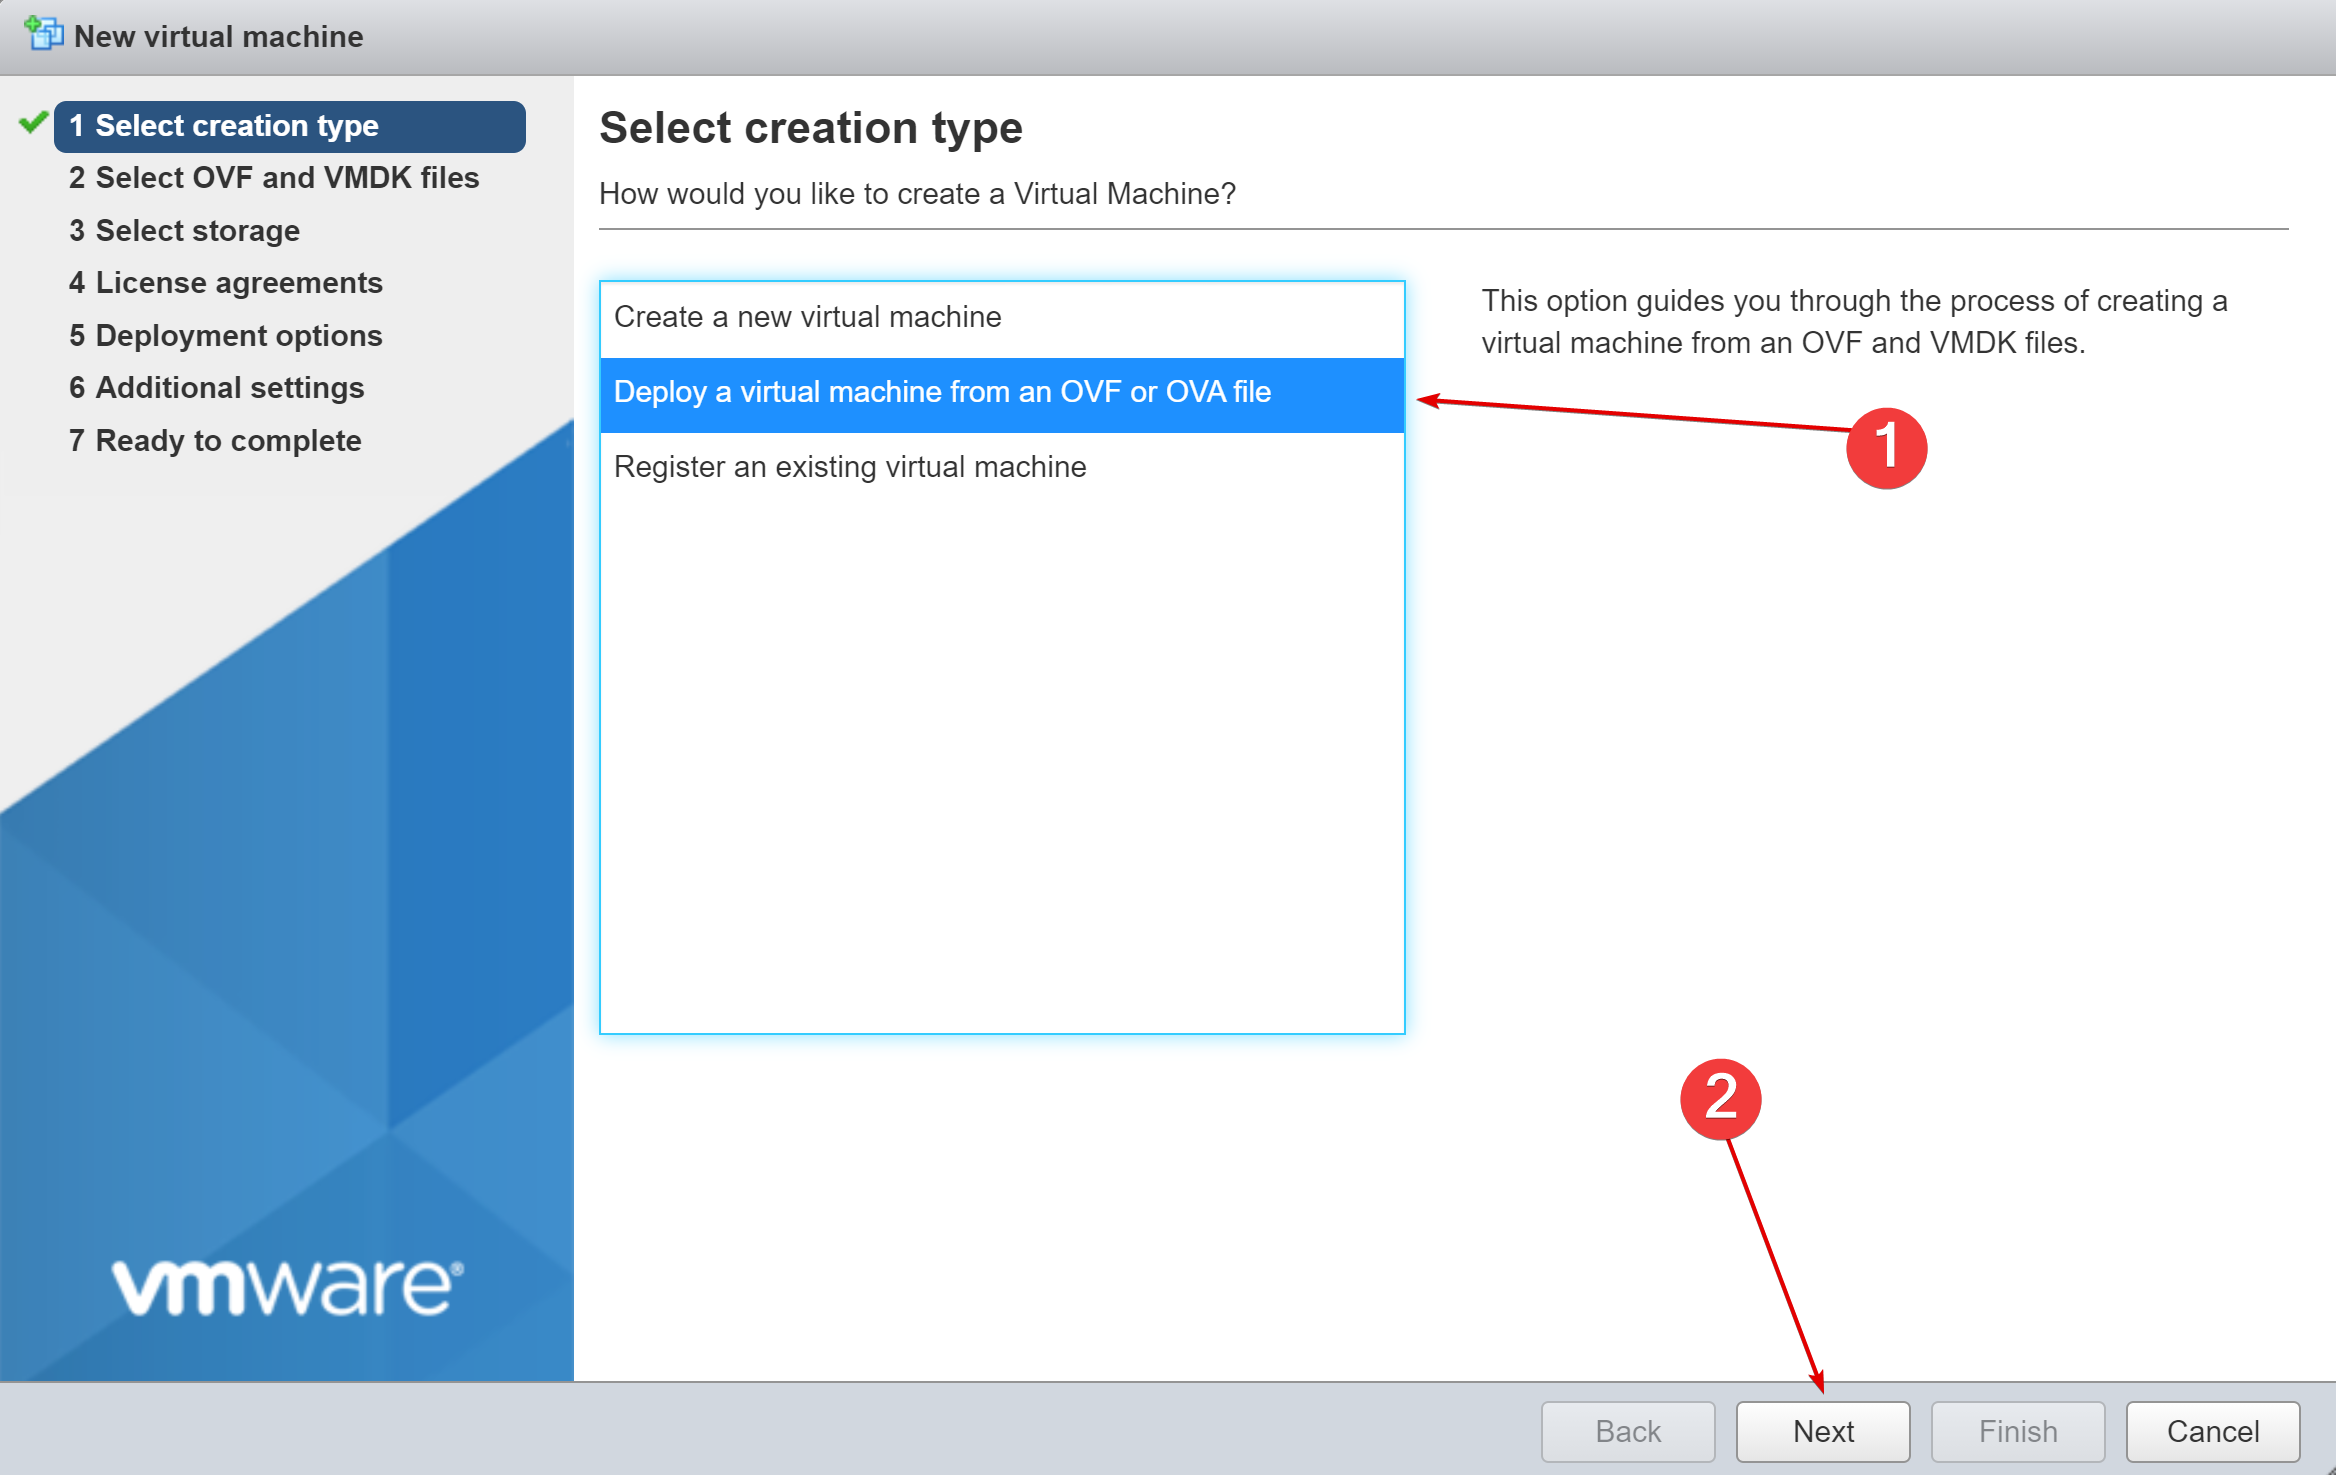
This Mangle documentation page contains the link to download the OVA for the latest version of Mangle and steps to deploy it. I have the OVA downloaded and stored locally on my computer. Follow along with the document mentioned if you like, but I’m going to step through it here. Select the option below to Deploy a virtual machine from an OVF or OVA, and click next.
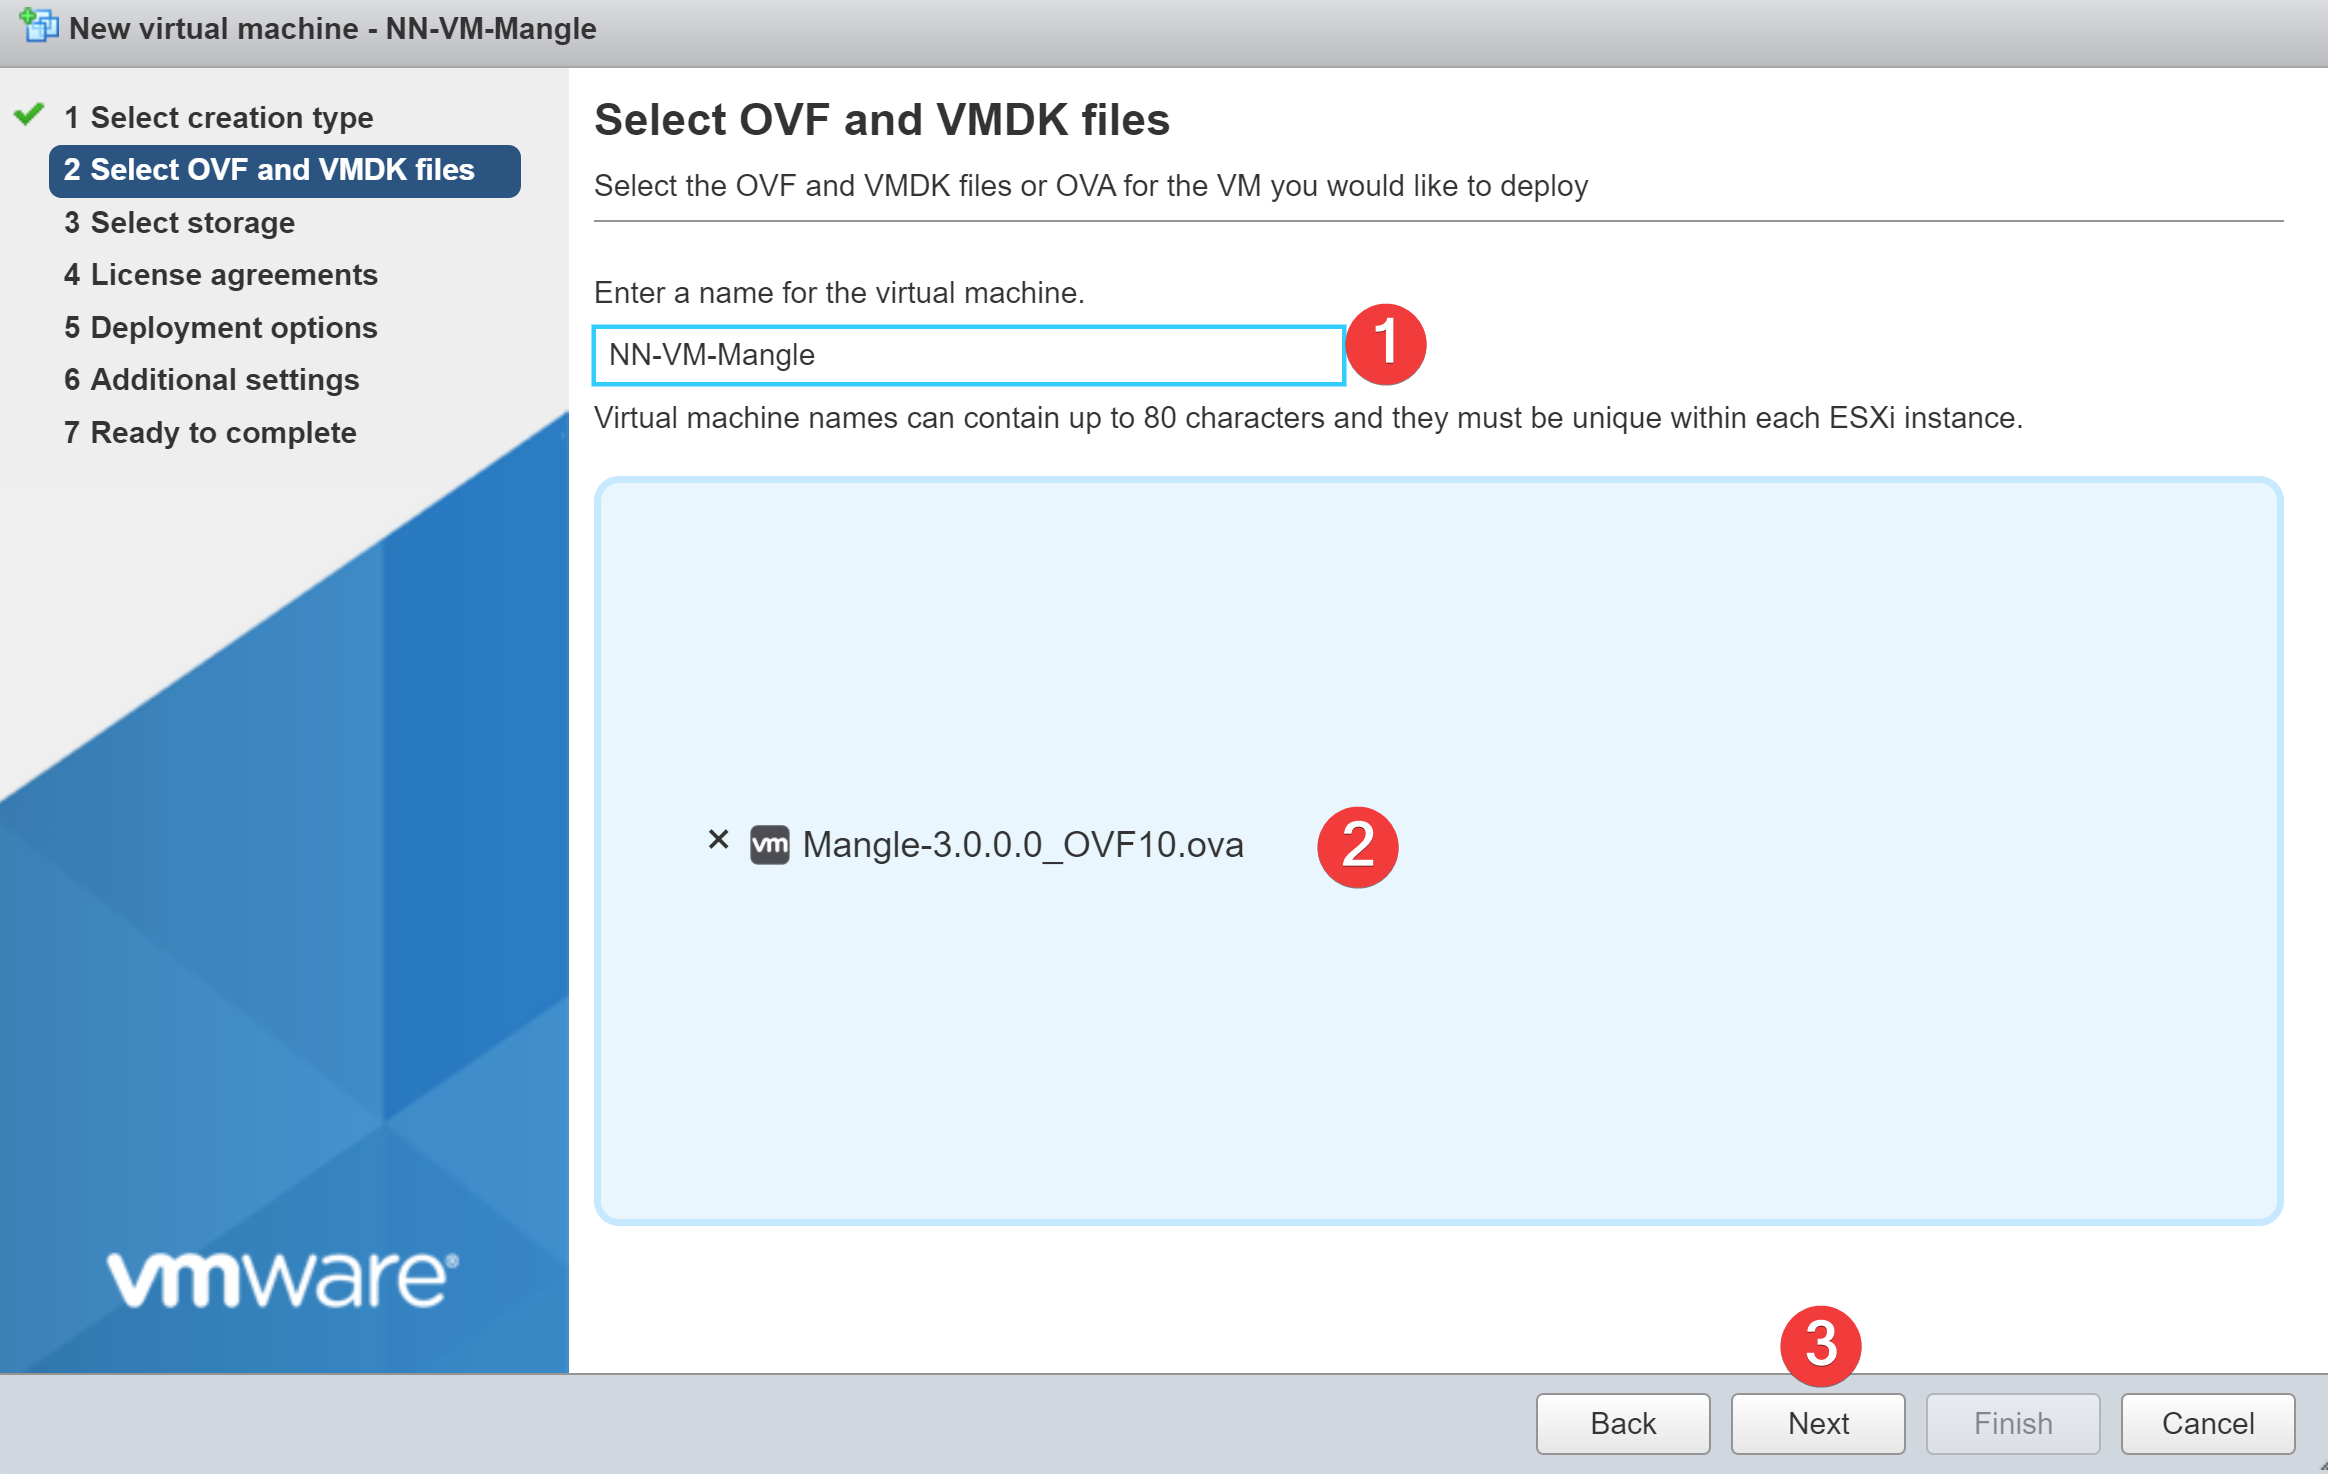
Give the new VM for Mangle a name (NN-VM-Mangle in this case), select the proper OVA to use (the file was downloaded earlier to the local drive of my laptop), and click Next.
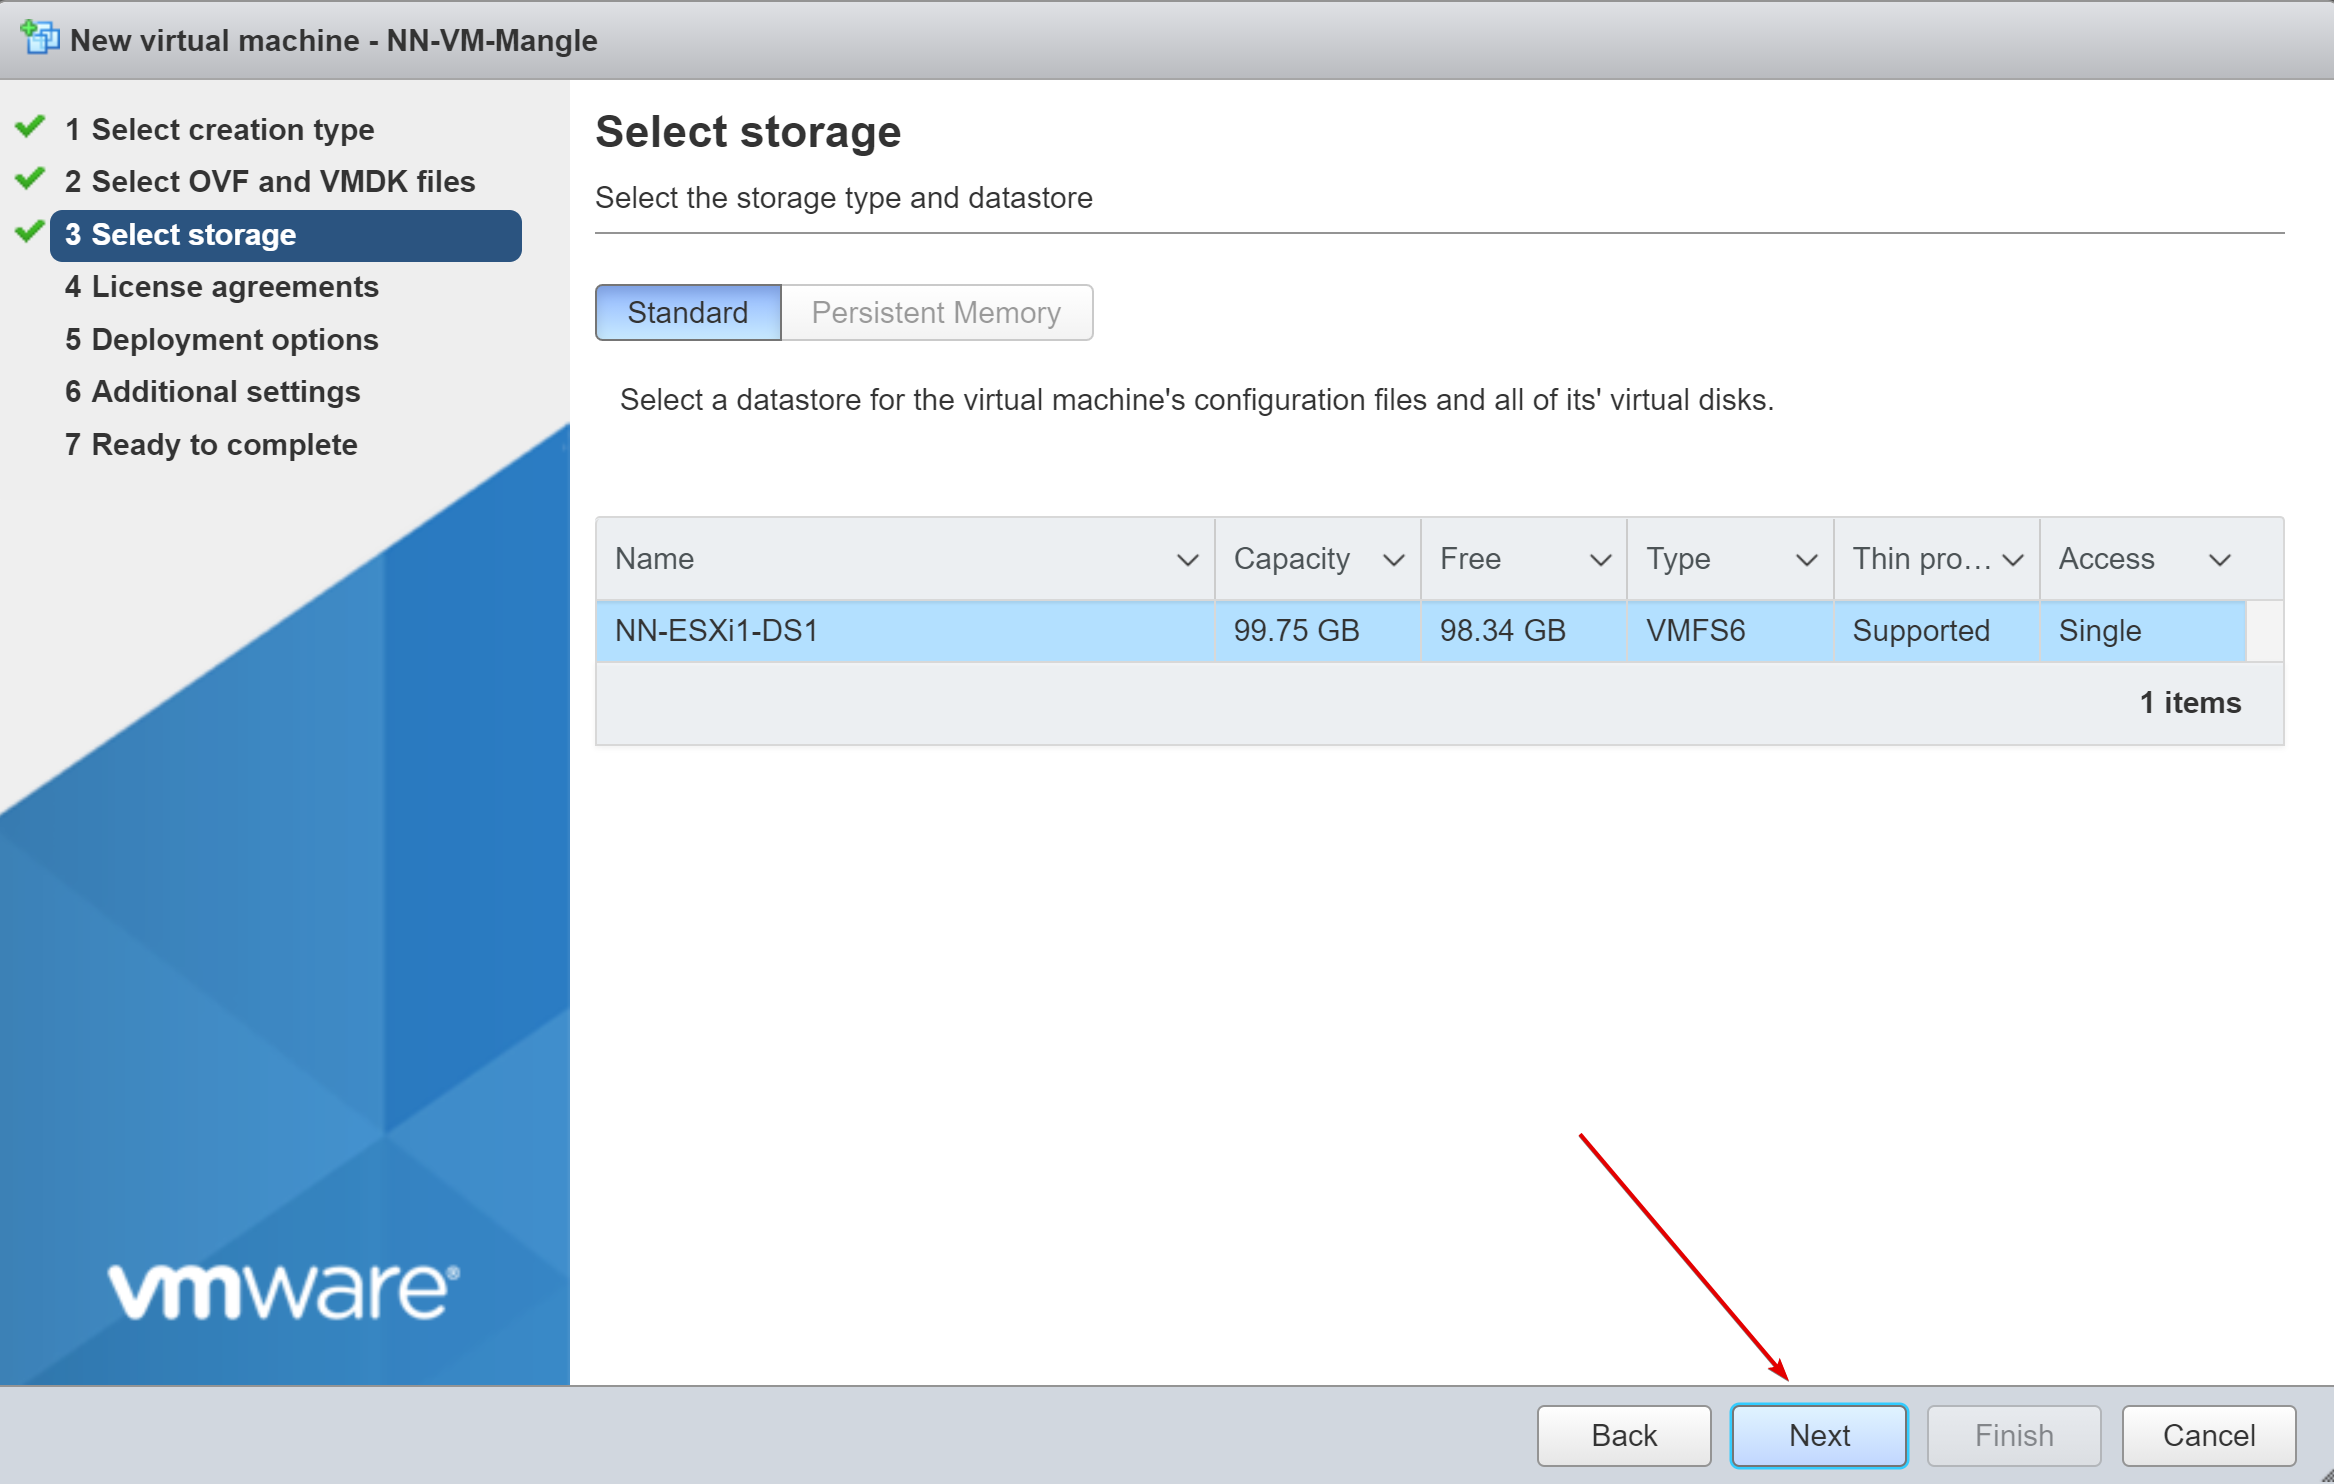
As for selecting where the new VM will be stored, I have only one local datastore on this host named NN-ESXi-DS1, which is already selected. Click Next to continue.
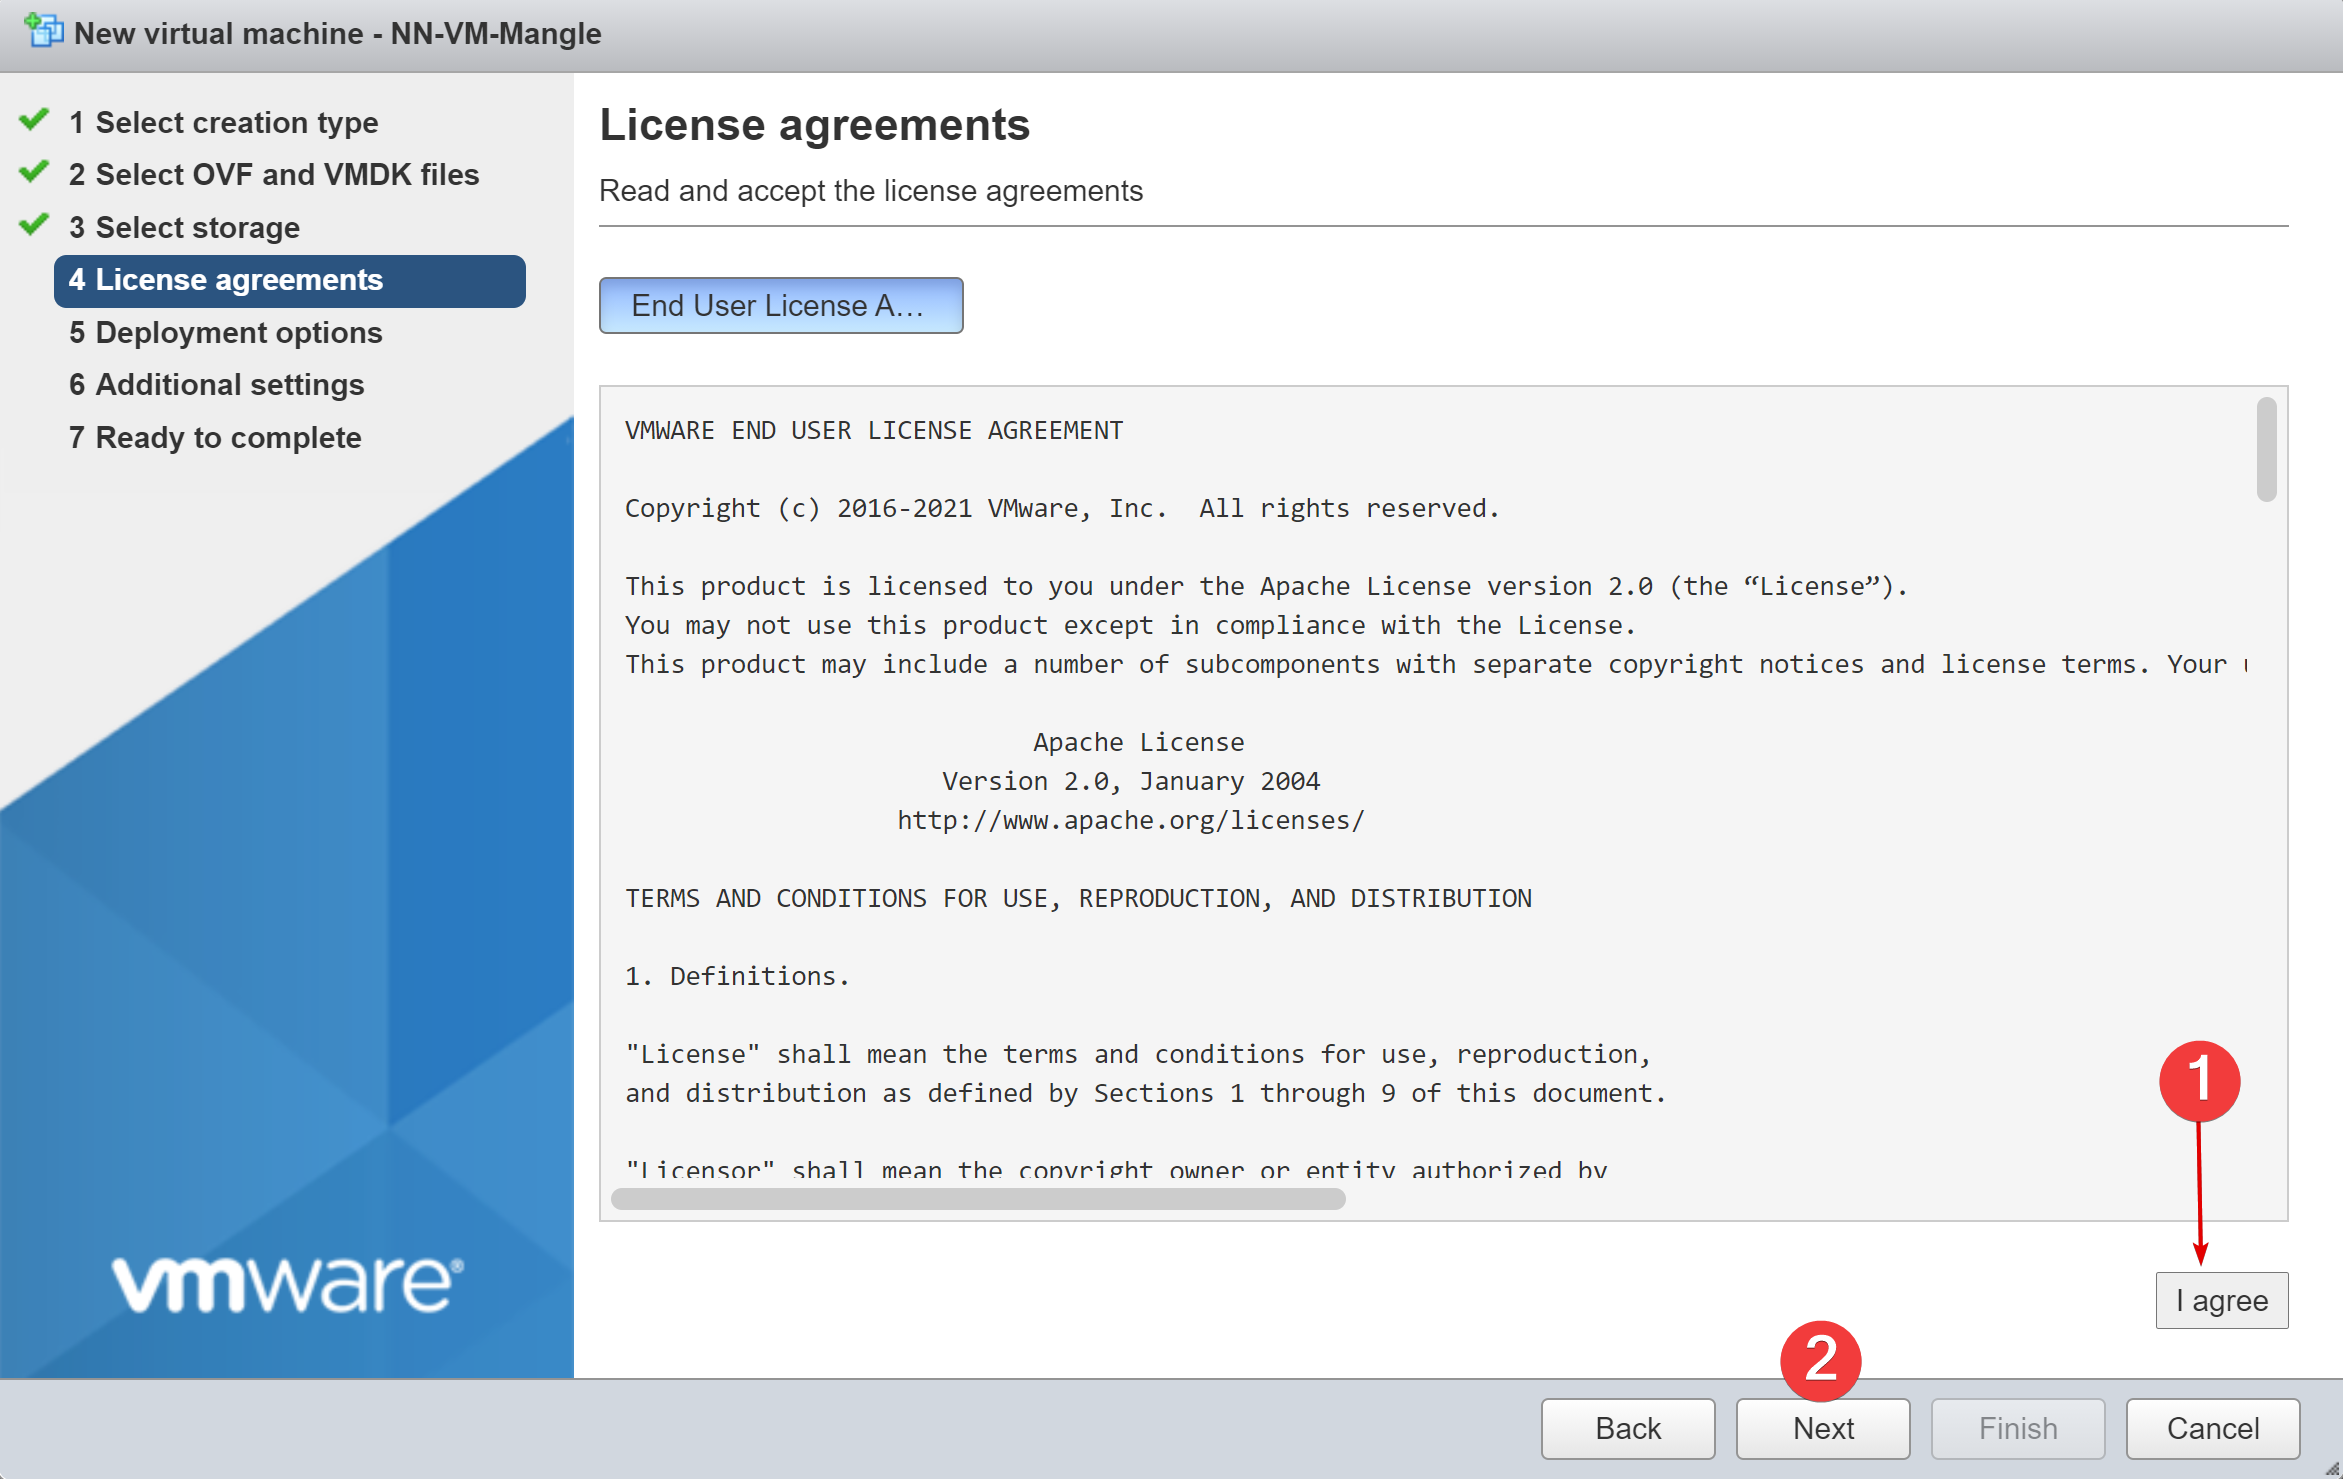
At this point we have to accept the EULA. Click the “I agree” button, and then click Next. An error will pop up if we click Next before clicking “I agree,” and once “I agree” is clicked, it becomes greyed out and is no longer clickable.
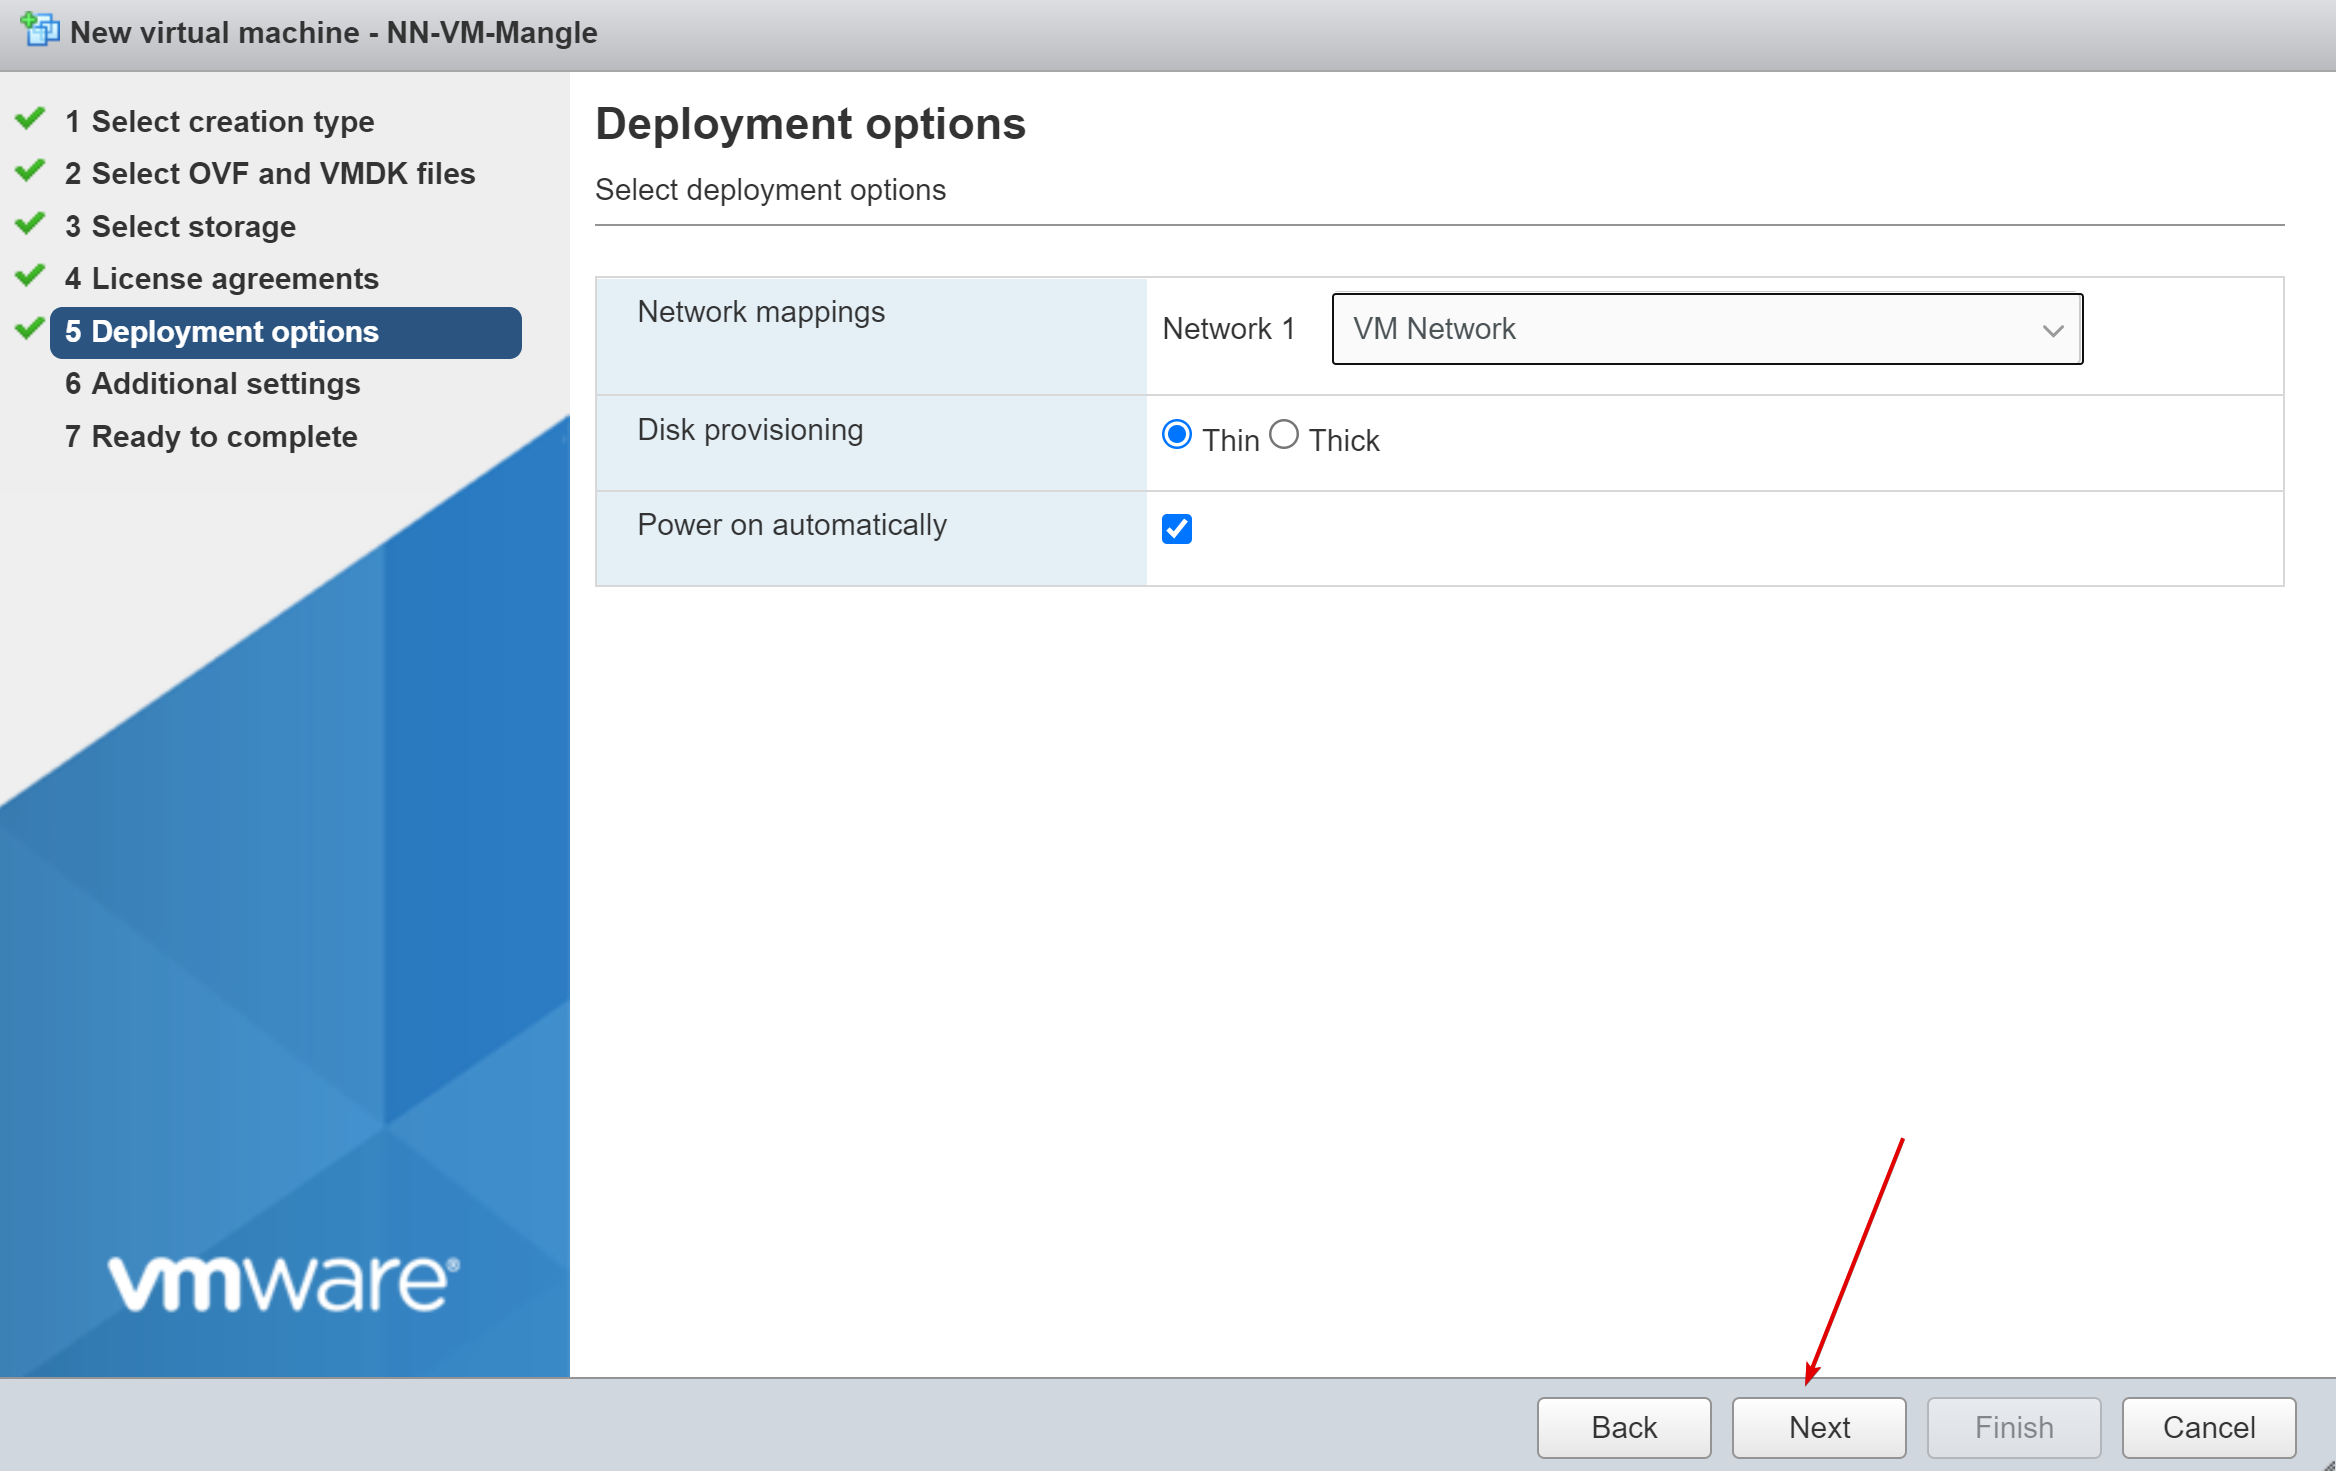
We will keep the default Deployment options (no changes to network mapping, thin provisioning, power on the VM automatically after deployment) and click Next to continue.
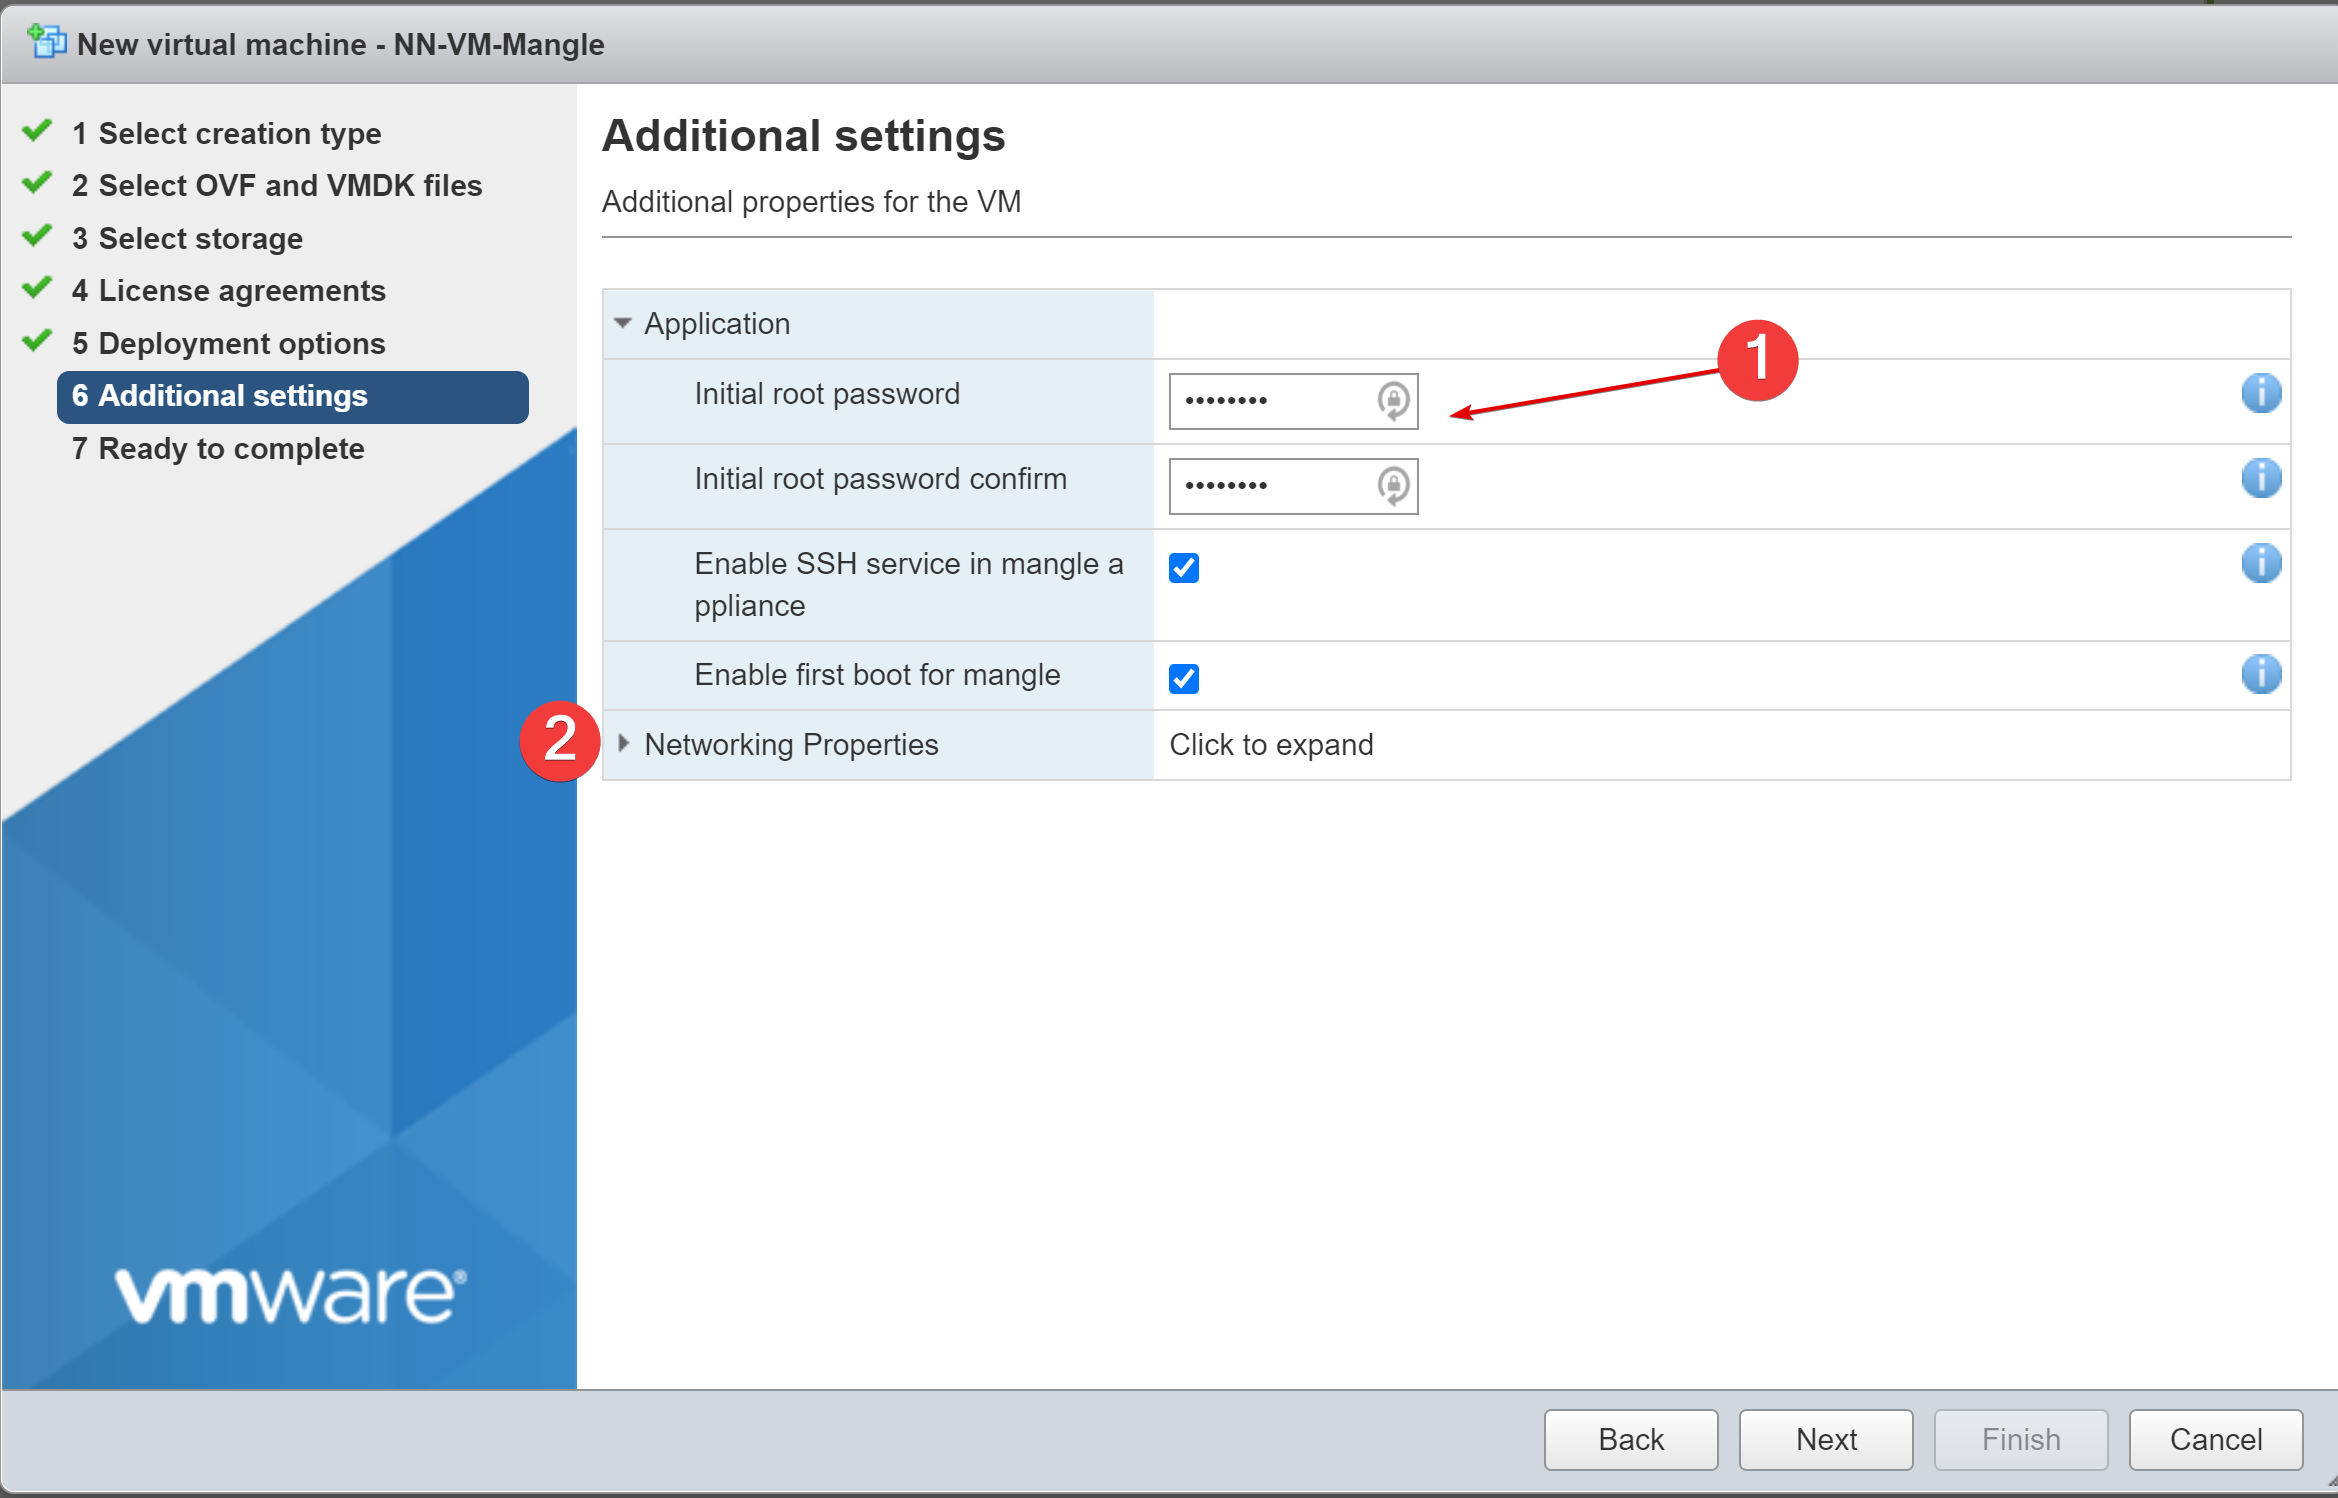
Now we’ve reached some of the Mangle appliance configuration settings. As shown below, we’ve already expanded the Application section and typed in an initial root password. The information buttons on the far right explain the meaning of each field on this screen. We’ll go ahead and leave Enable SSH service in mangle appliance and Enable first boot for mangle selected. Expand Networking Properties to see other information needed on this screen.
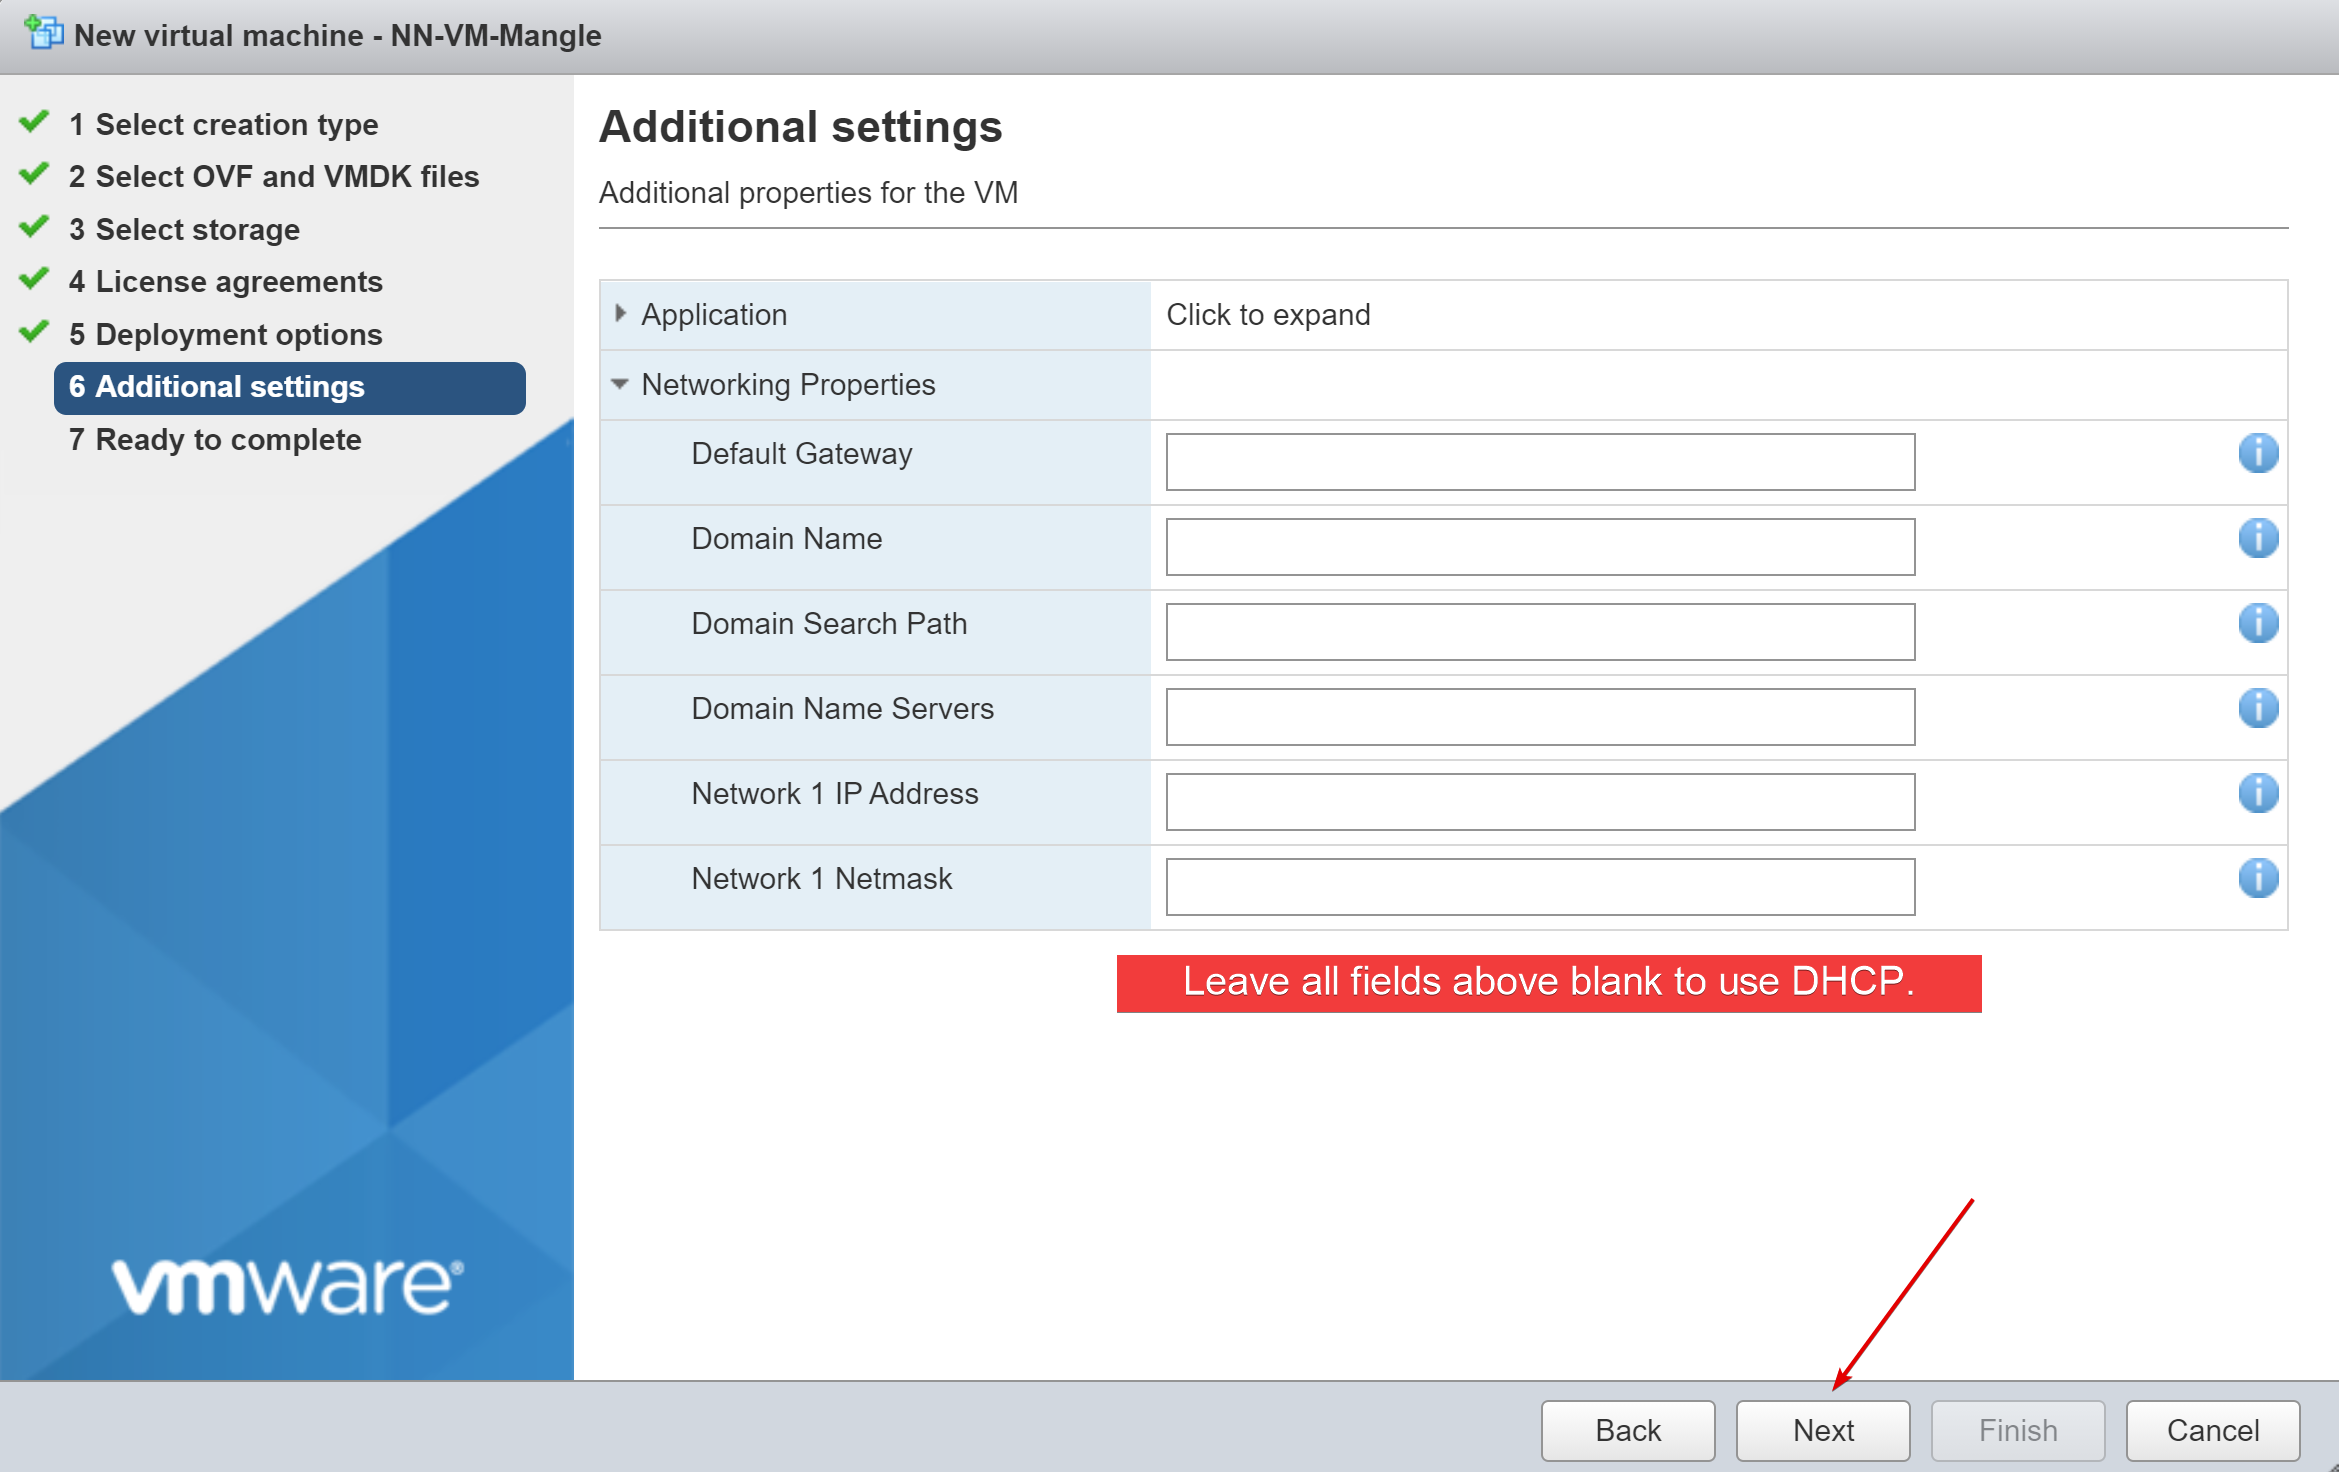
Ah, yes – Networking Properties. We can enter all static ips and domain information here, but I’m choosing to leave all fields blank, which will automatically use DHCP. Click Next to continue.
Just to prove it was not me guessing what would happen if fields were left blank, here’s a shot of one of the information icons from the menu above telling us that if a field is left blank, that setting will default to DHCP.
![]()
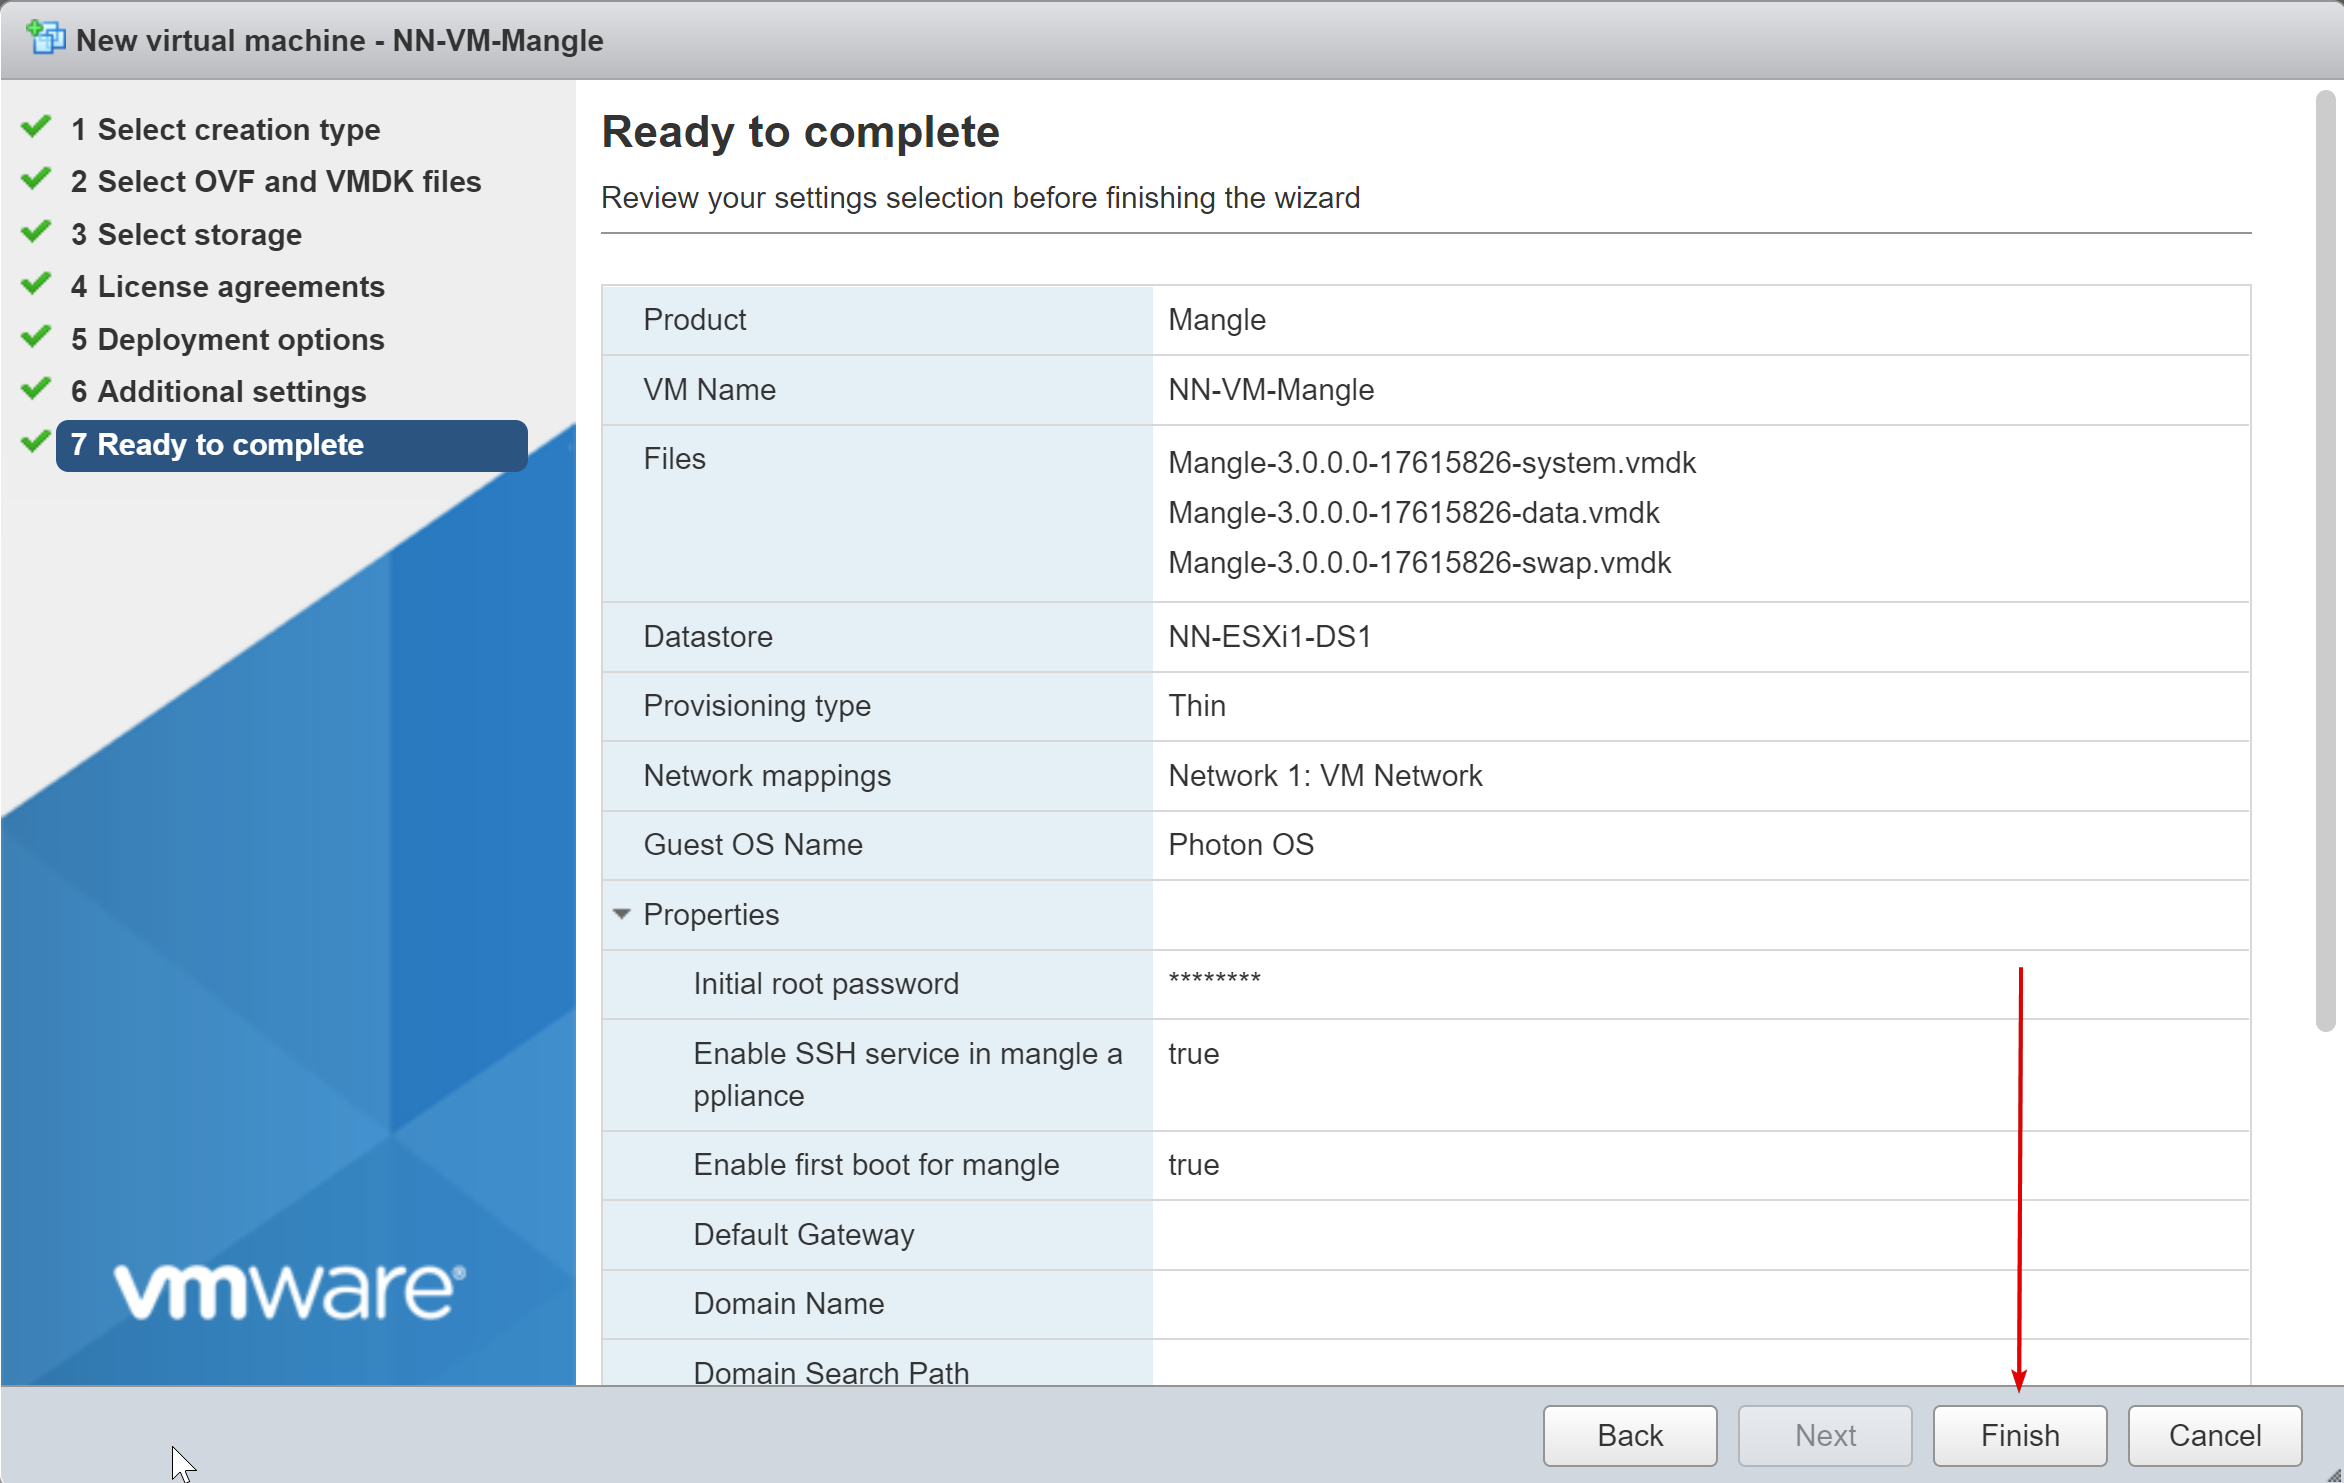
We’ve reached that pinnacle screen right before a VM gets deployed. All of our settings are there, including those left blank so we can use DHCP. Click Finish to see what happens.
Looking at the task pane for this host, we appear to be off to the races!

After just a minute or two, it looks like disks got uploaded and the VApp imported, but there was some kind of error powering on the Mangle appliance. Click the link at the top of the browser window to find out what happened. After clicking the link, you can dismiss the alert.
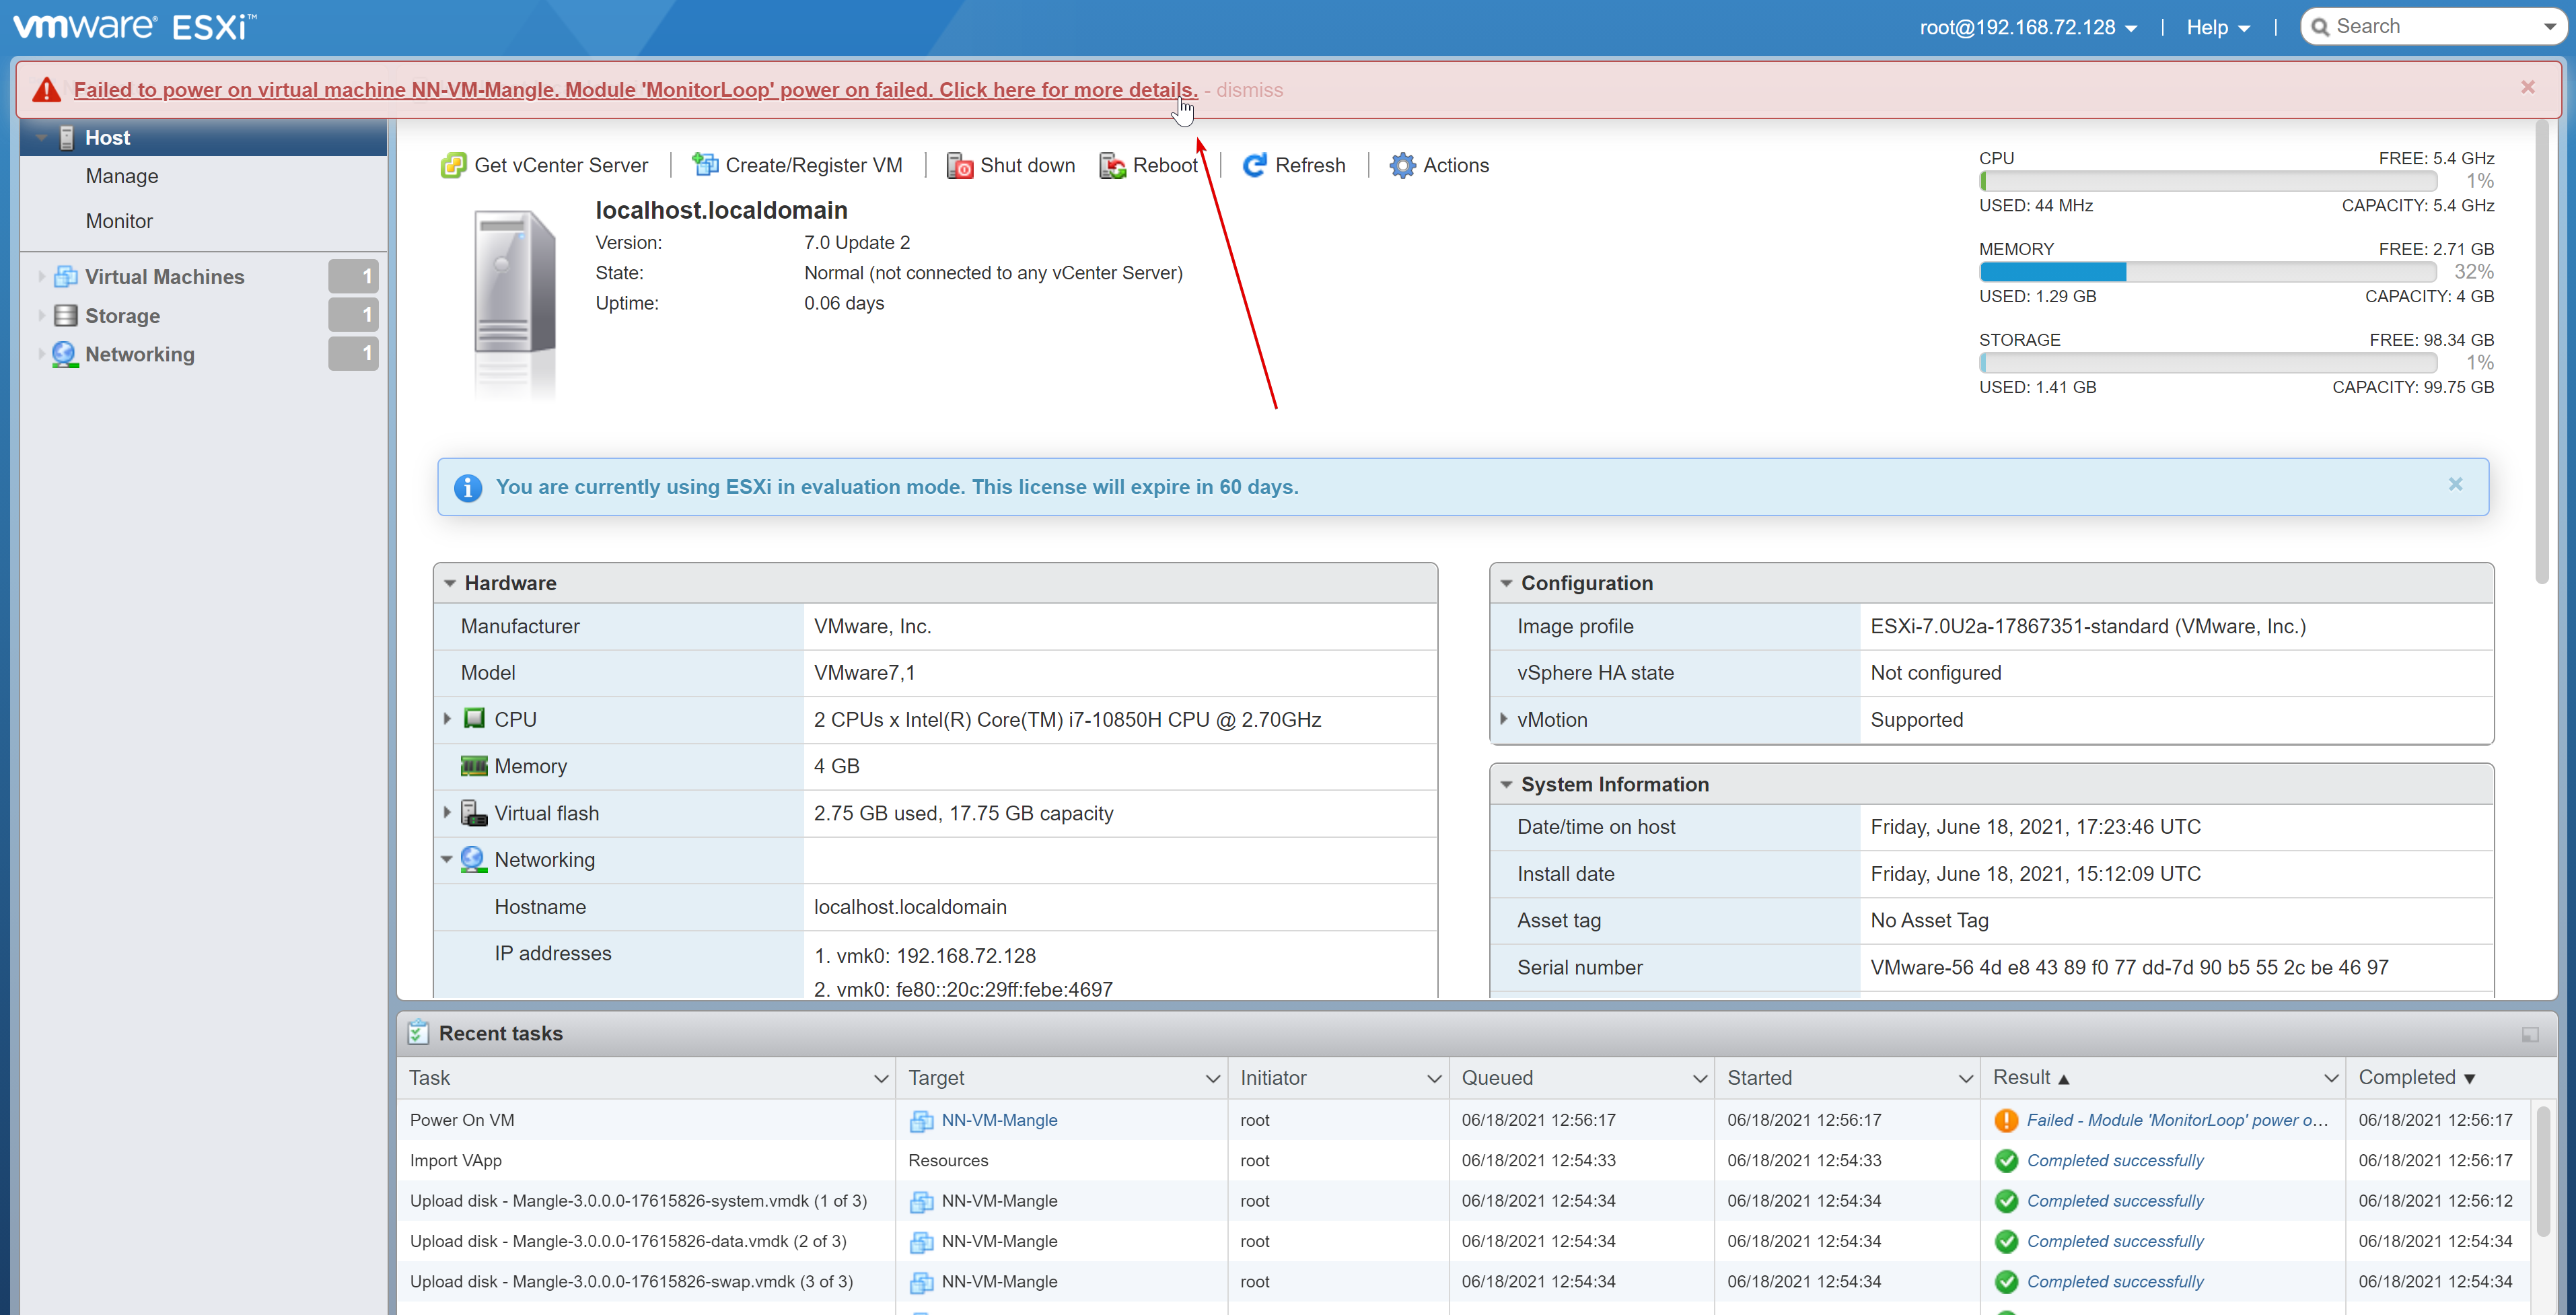
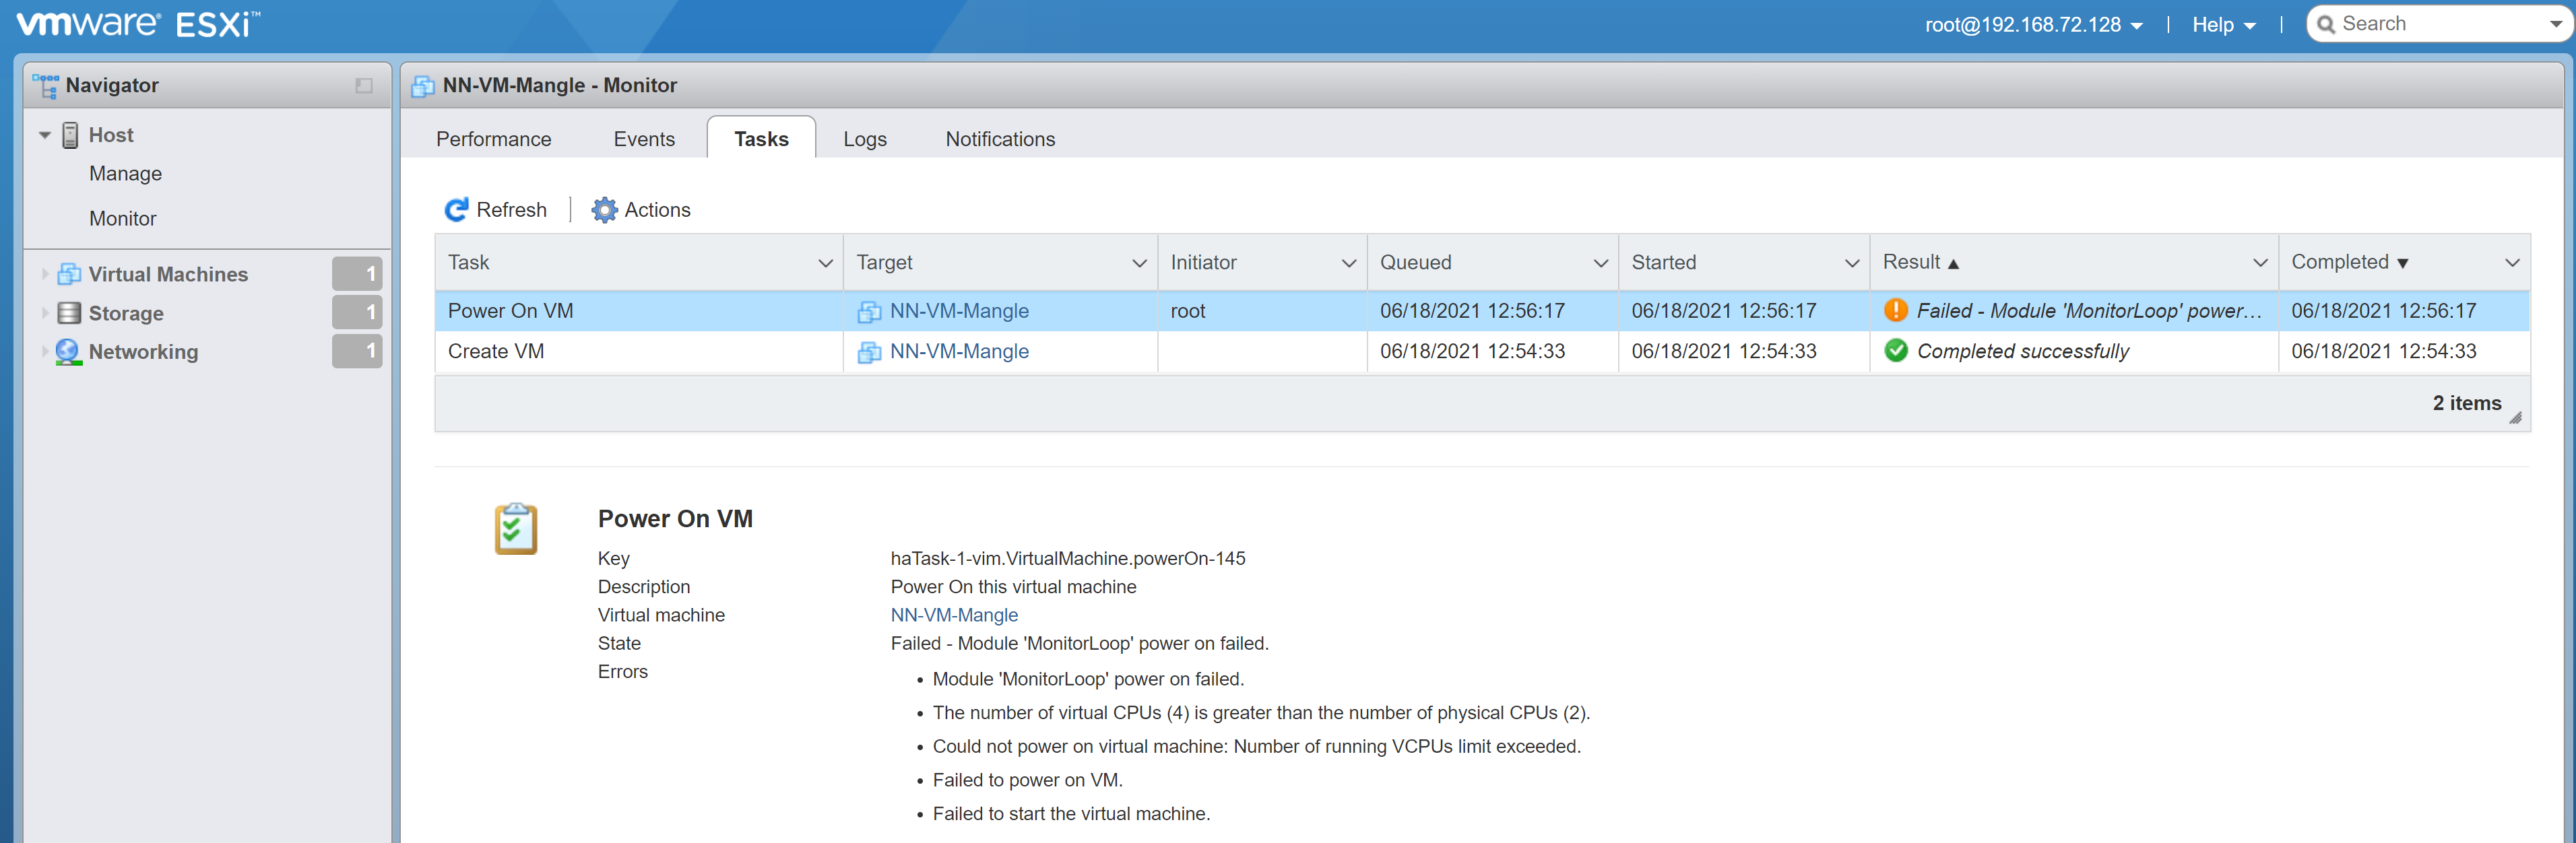
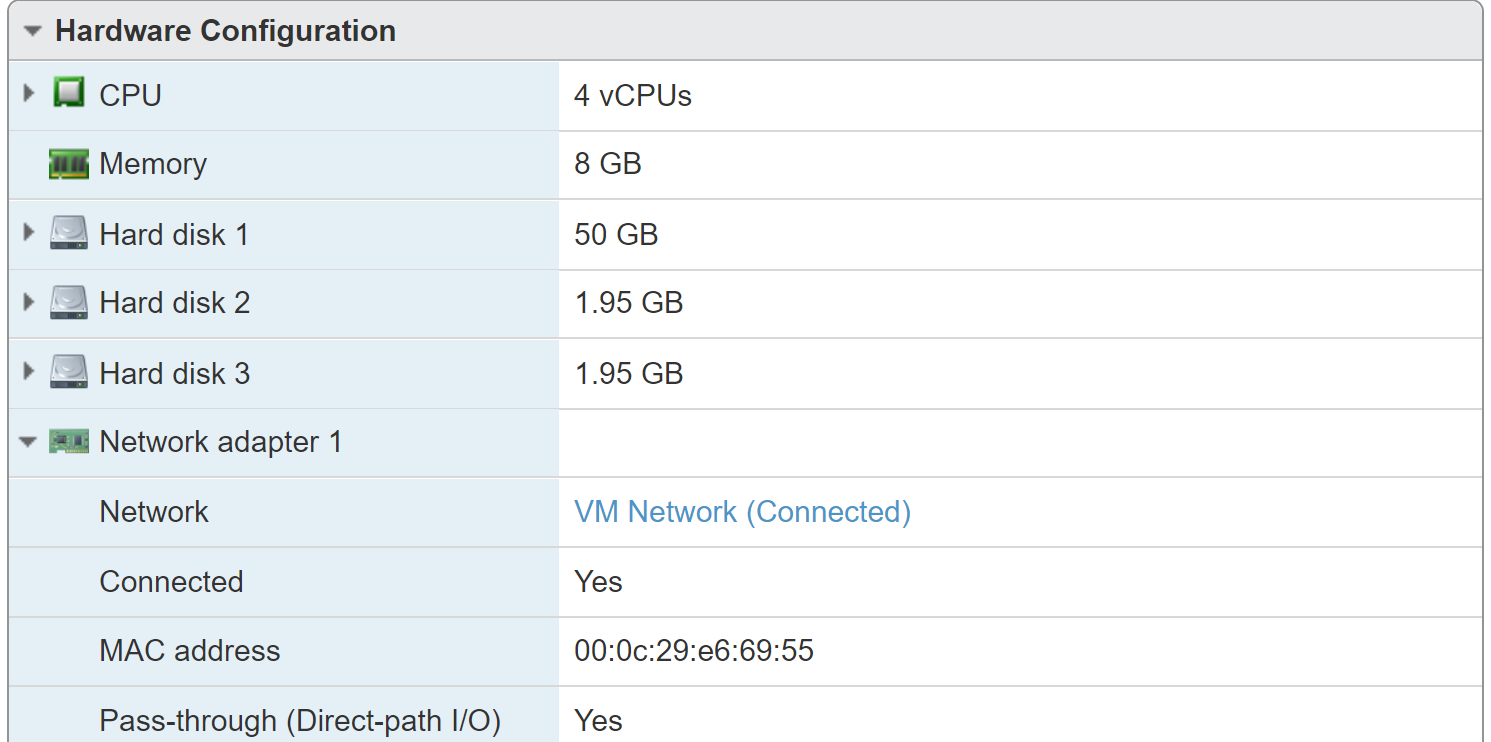
Now it makes sense. The virtual appliance wants 4 vCPU. Our host is saying it only has 2 CPU to provide. As you can see in the screenshot above as well as that first screenshot with VM details from VMware Workstation earlier, we only allocated 2 vCPU to the virtual ESXi host.
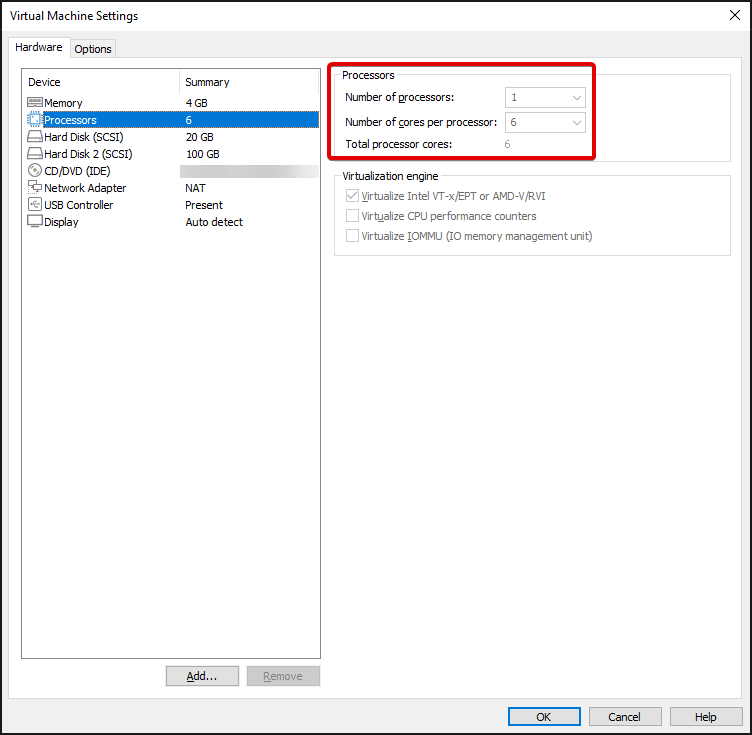
When the ESXi VM was built, I never changed the default vCPU count away from the minimum requirements for an ESXi host. The fix in this case was to power down the ESXi VM and increase the processor count. The processor on my laptop is a dual 6 core processor, so I decided to give the ESXi VM 1 CPU socket with 6 cores. Hopefully that will do the trick.
Once the ESXi host is powered back on again, we can confirm it sees 6 CPU to use. The ESXi hosts believes these CPU are a single core each. Our VM remains powered off because it did not power on automatically when the host did. Click on the VM to look at the details of it.
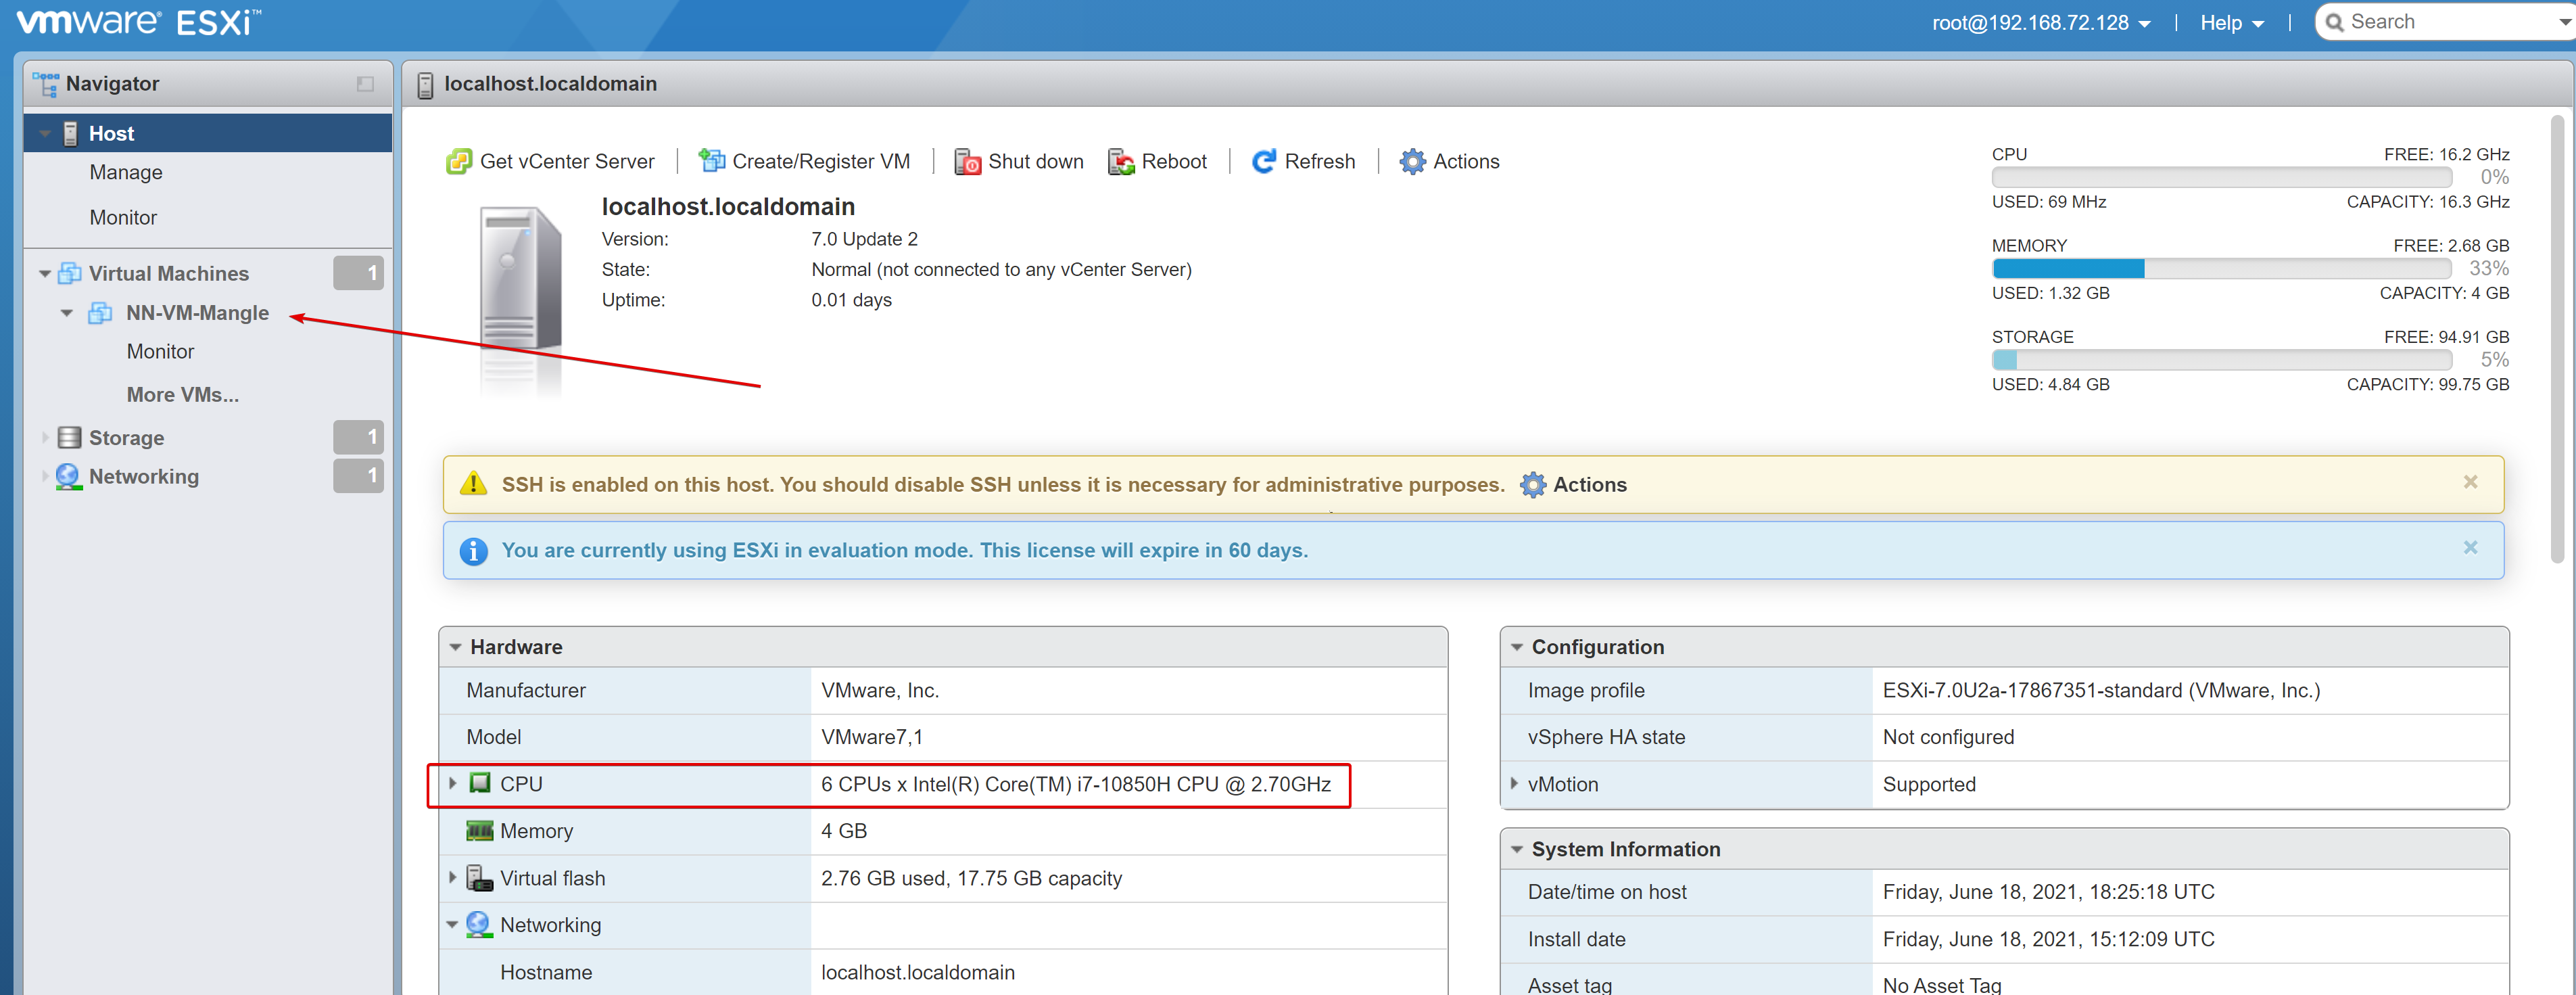
Notice the VM for Mangle shows to be allocated 4 vCPU and 8 GB memory. Interestingly enough, not having enough CPU won’t let us power on the VM, but we can overallocate RAM no problem. Click Power on to see if this works.
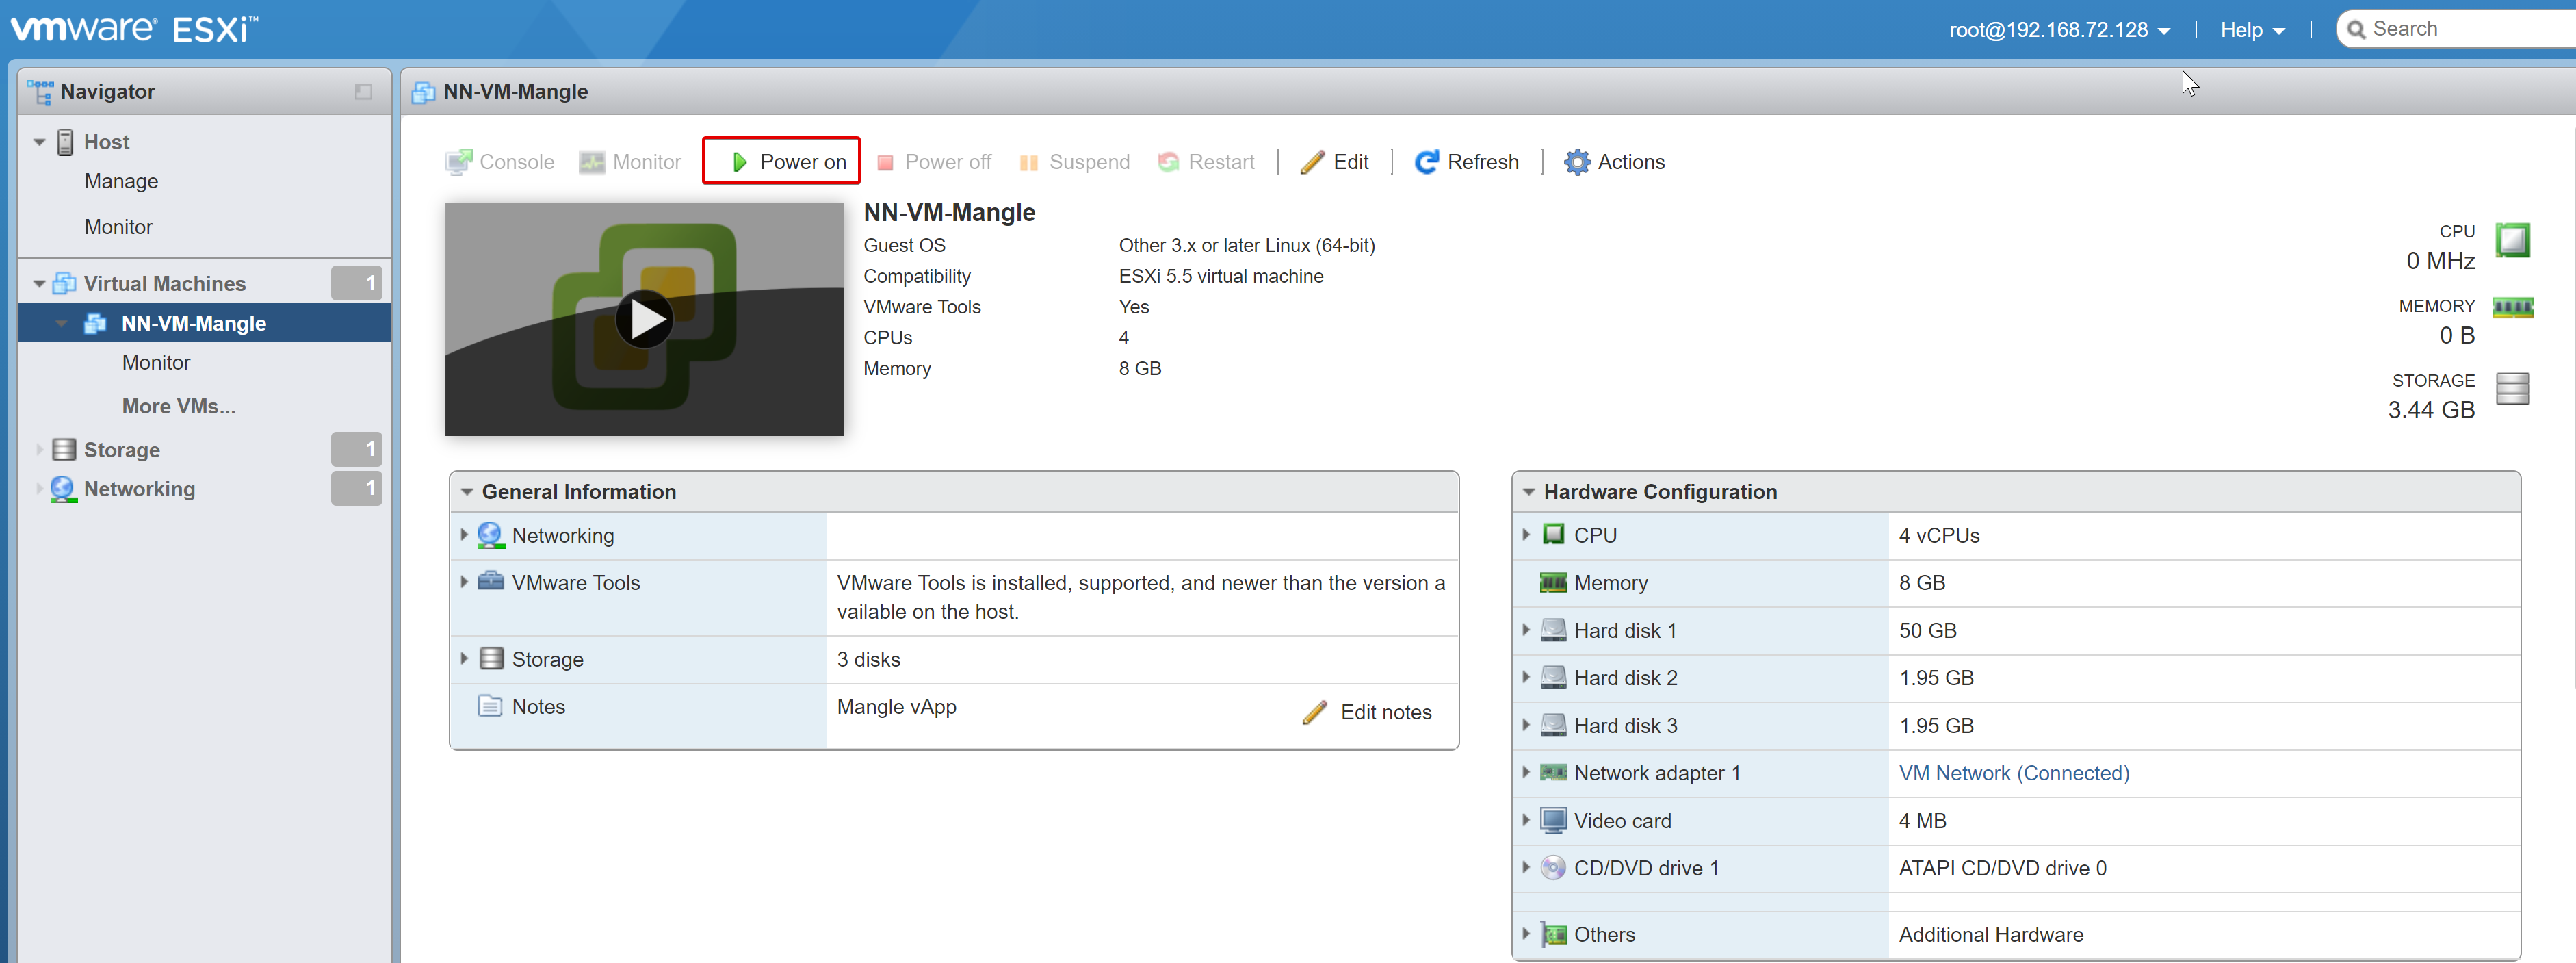
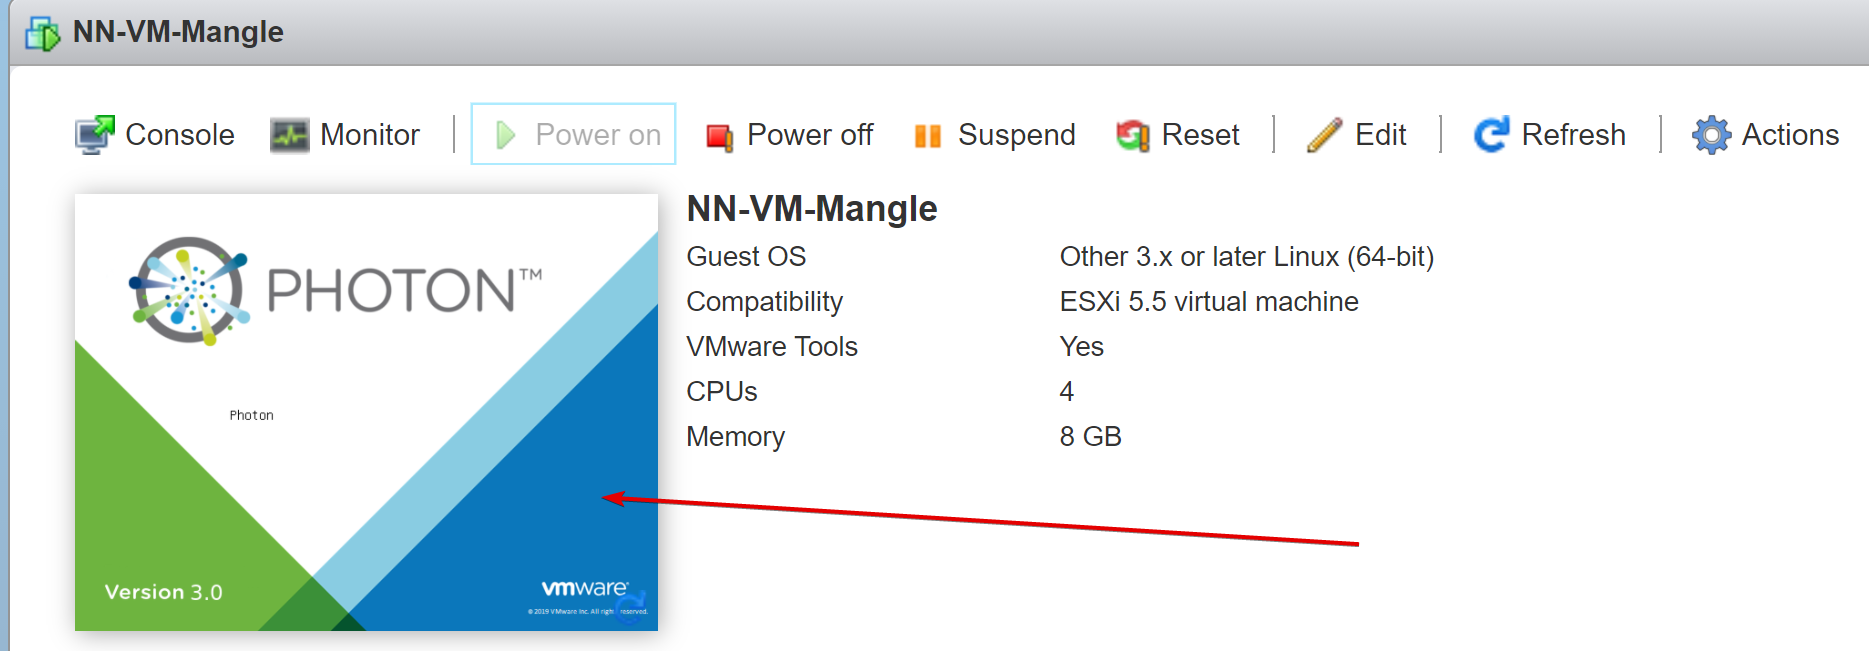
As the VM starts to boot, we can see a preview of the console. Click on the thumbnail below to open a console window to the Mangle appliance automatically (opens in a new browser window). Alternatively, we could have clicked the thumbnail to power on the machine and open a console window automatically.
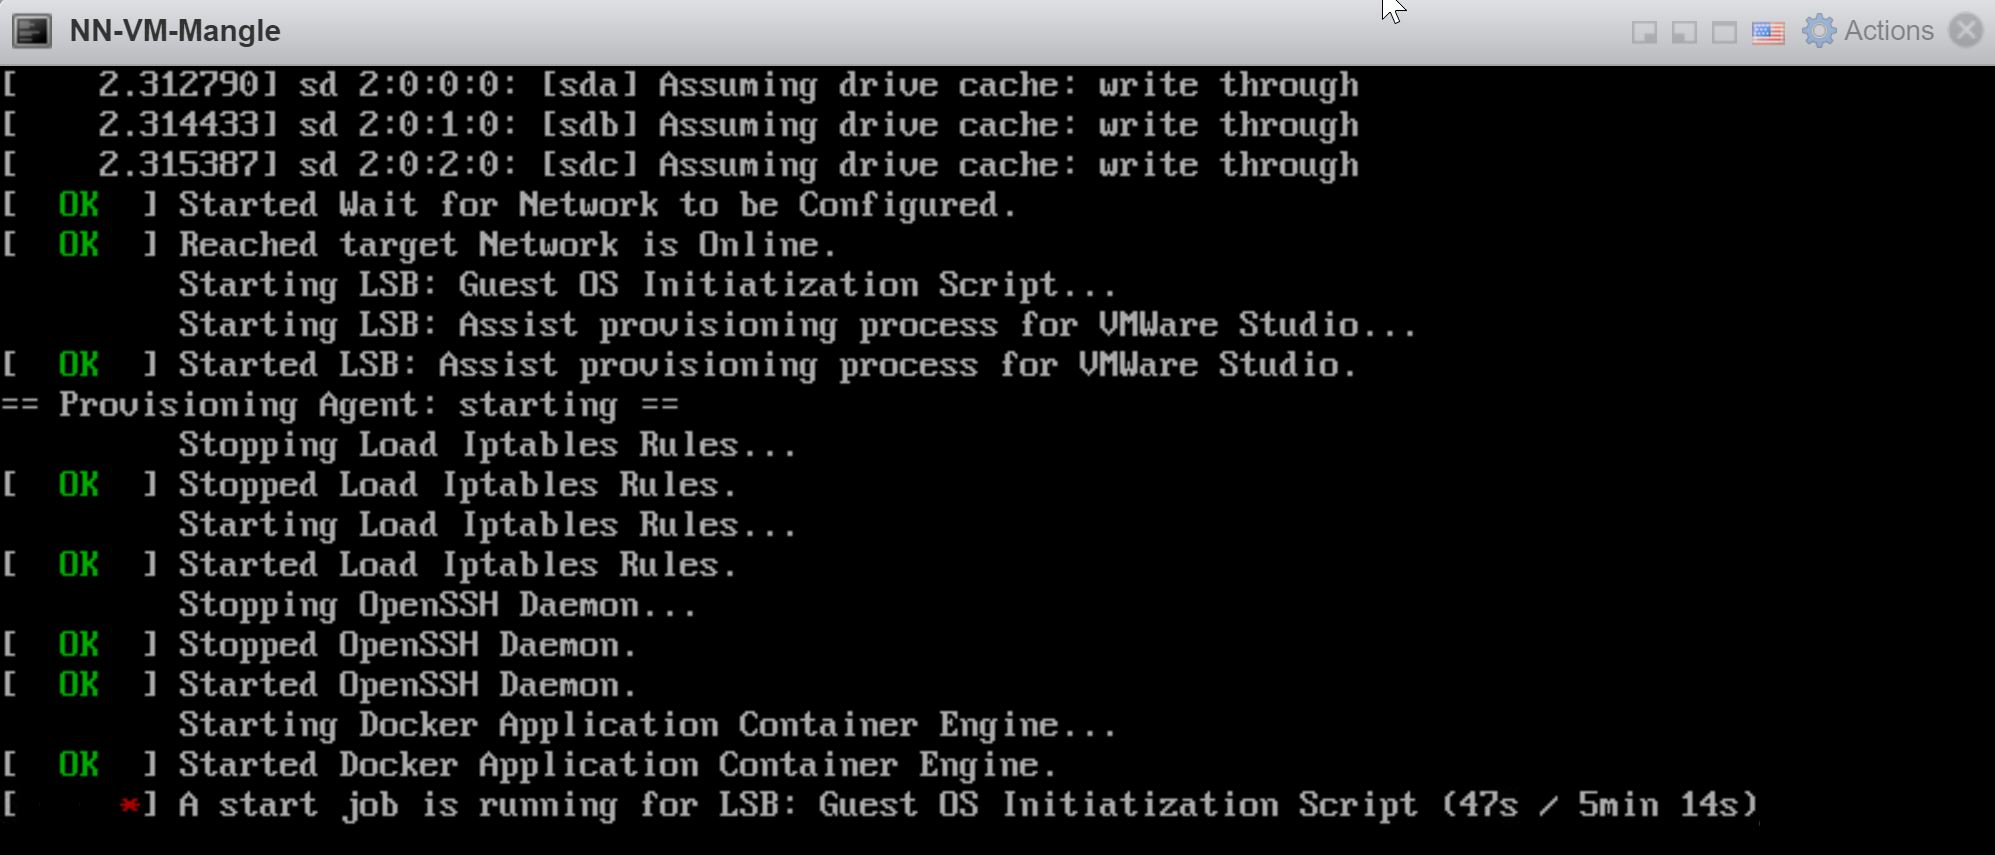
At first, things look promising. It appears all first boot tasks are happening, and we are almost ready to be able to login to the Mangle appliance.
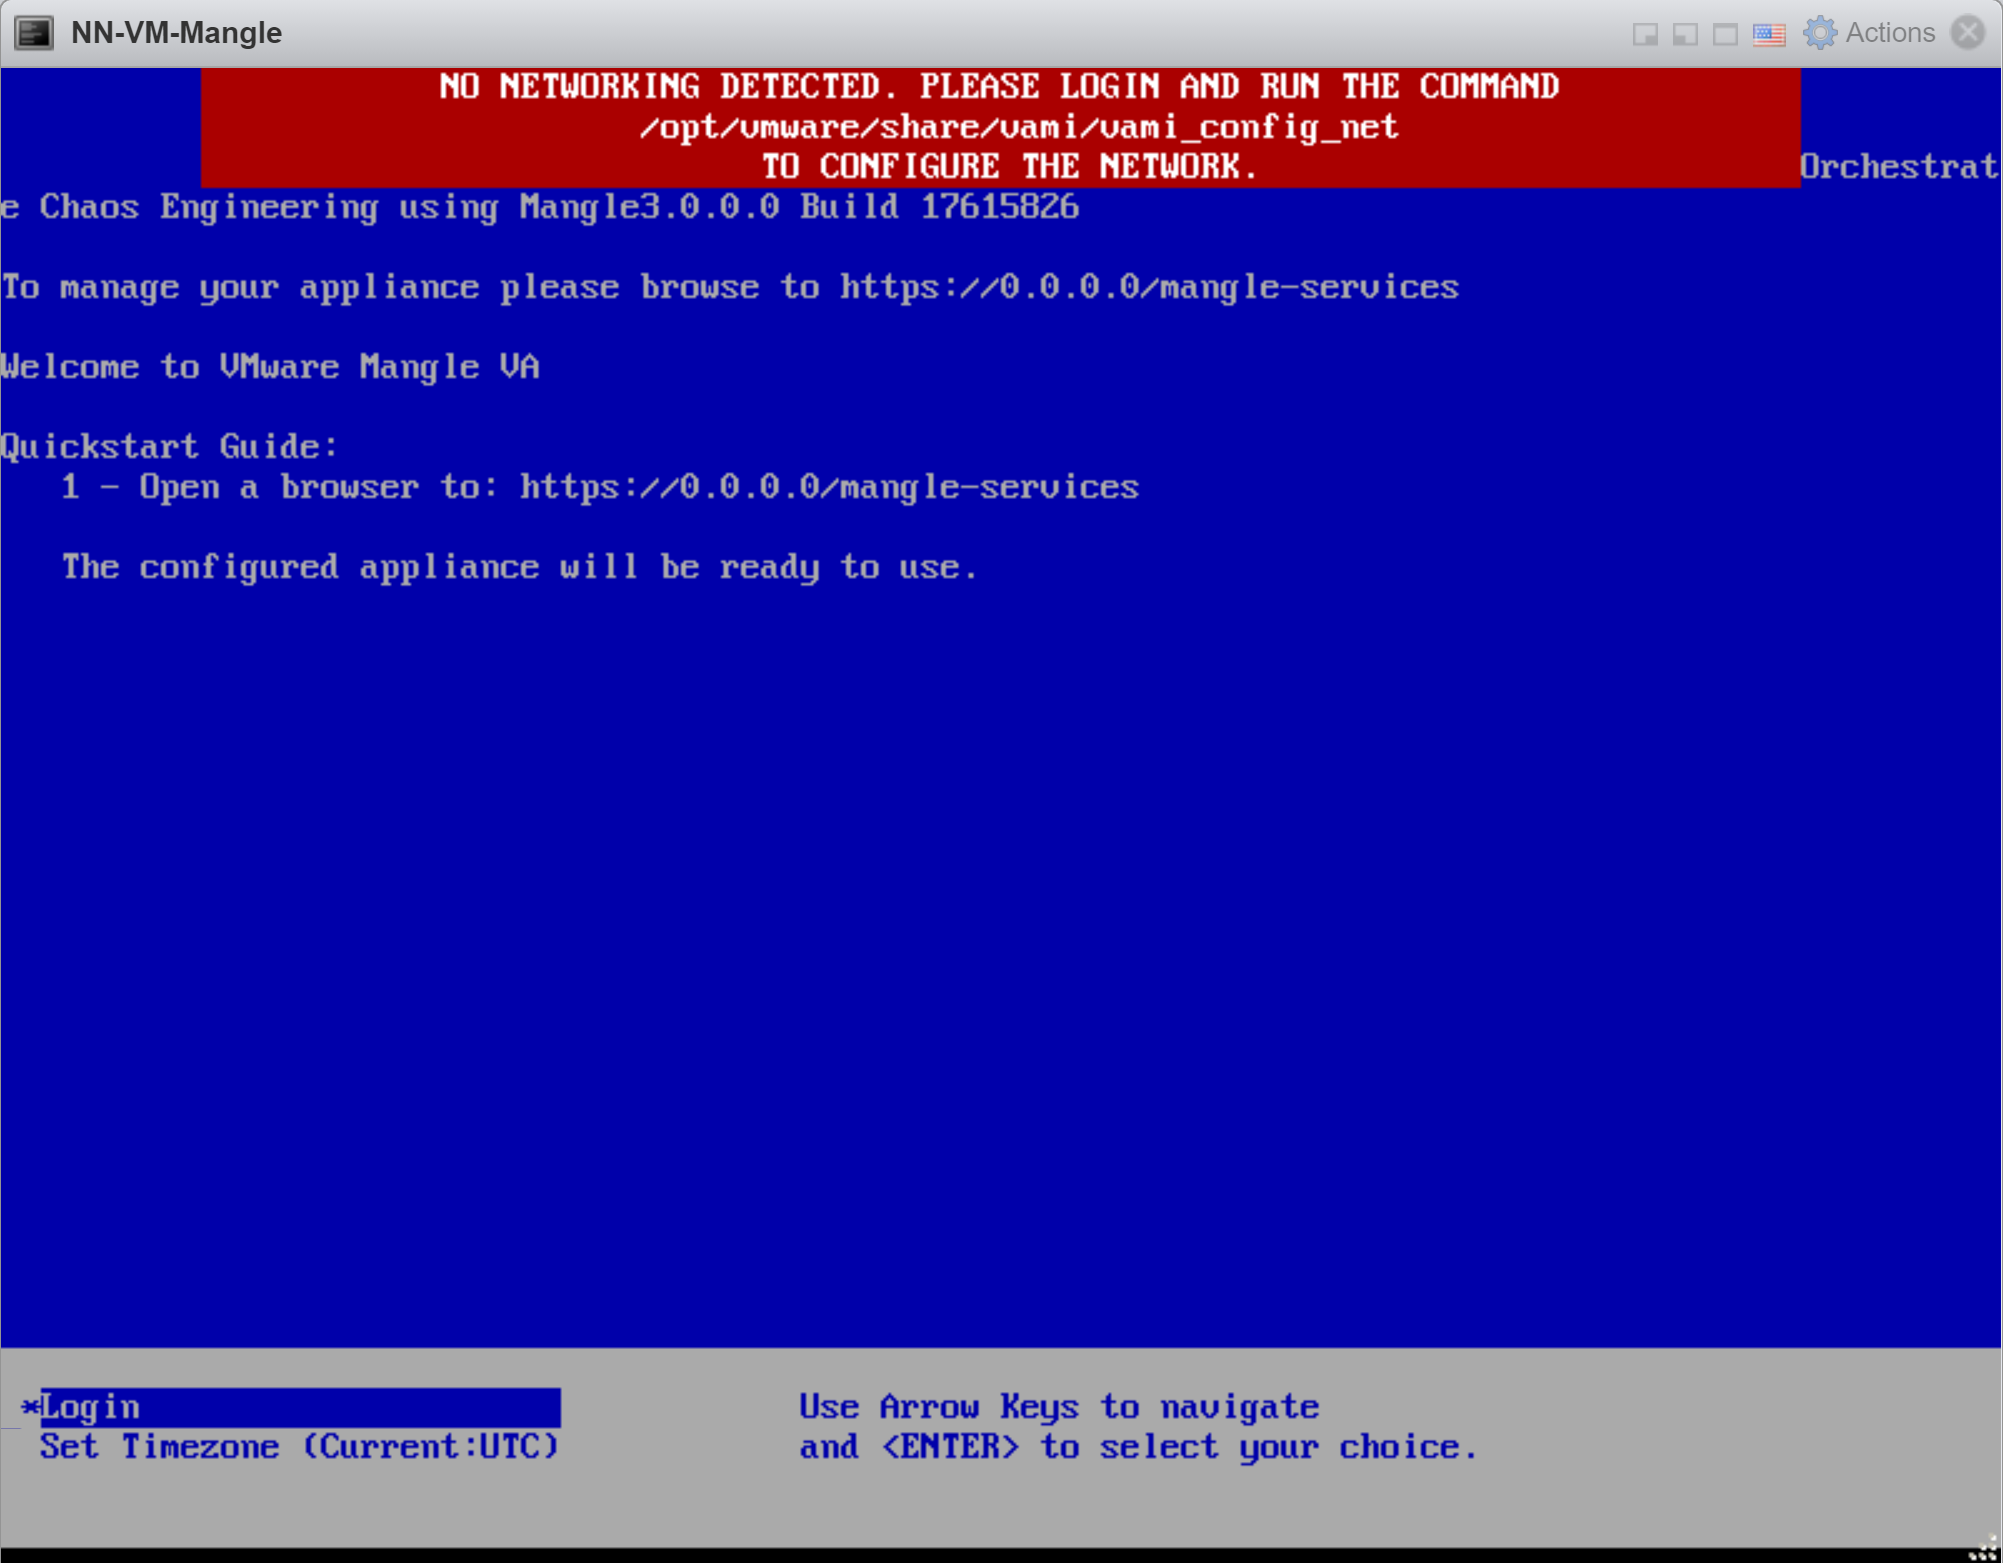
After a couple of minutes, the console changed a little, and we’ve run into another issue. The appliance did not detect any networking present. Maybe this is due to the fact that I’m running a VM on top of a nested ESXi host?
Let’s double check something back inside our ESXi embedded host client. You can see that the virtual NIC for the appliance is connected and seems functional from the standpoint of what the host sees (connected to the only network that exists inside the standard virtual switch on the ESXi host).
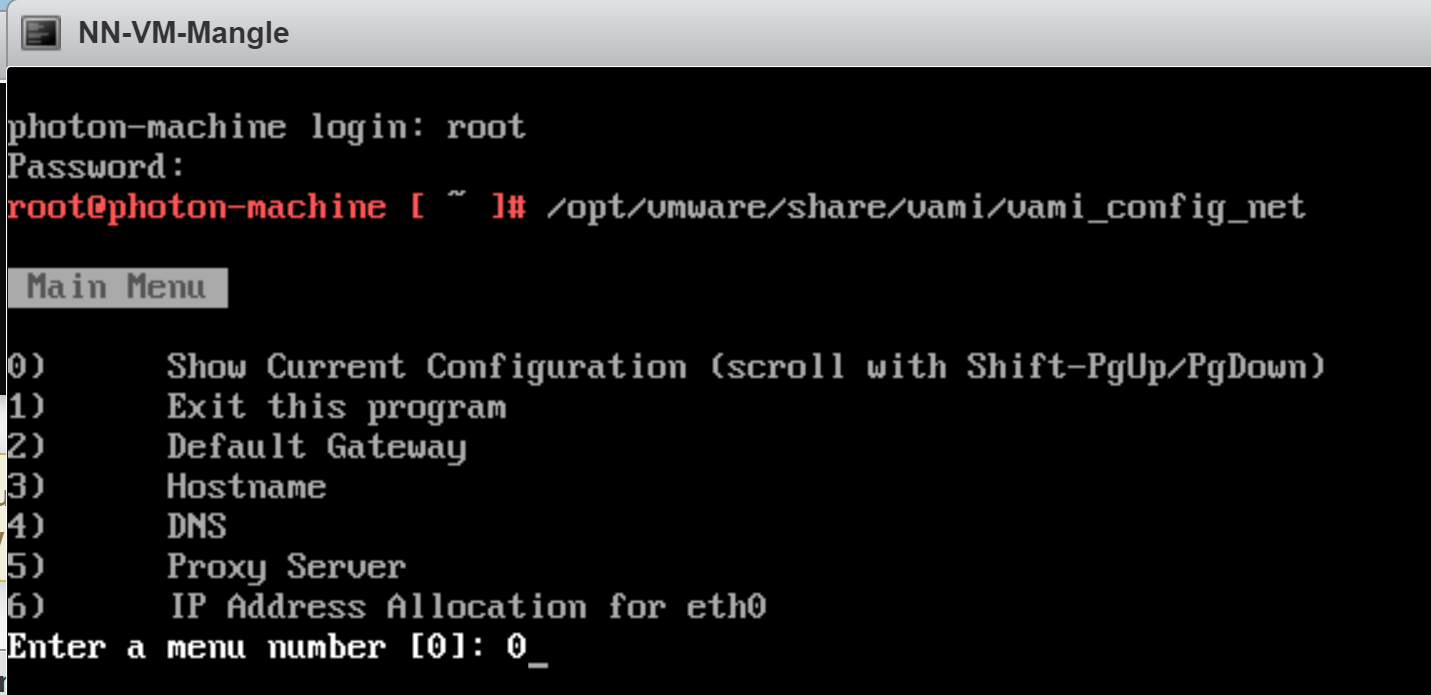
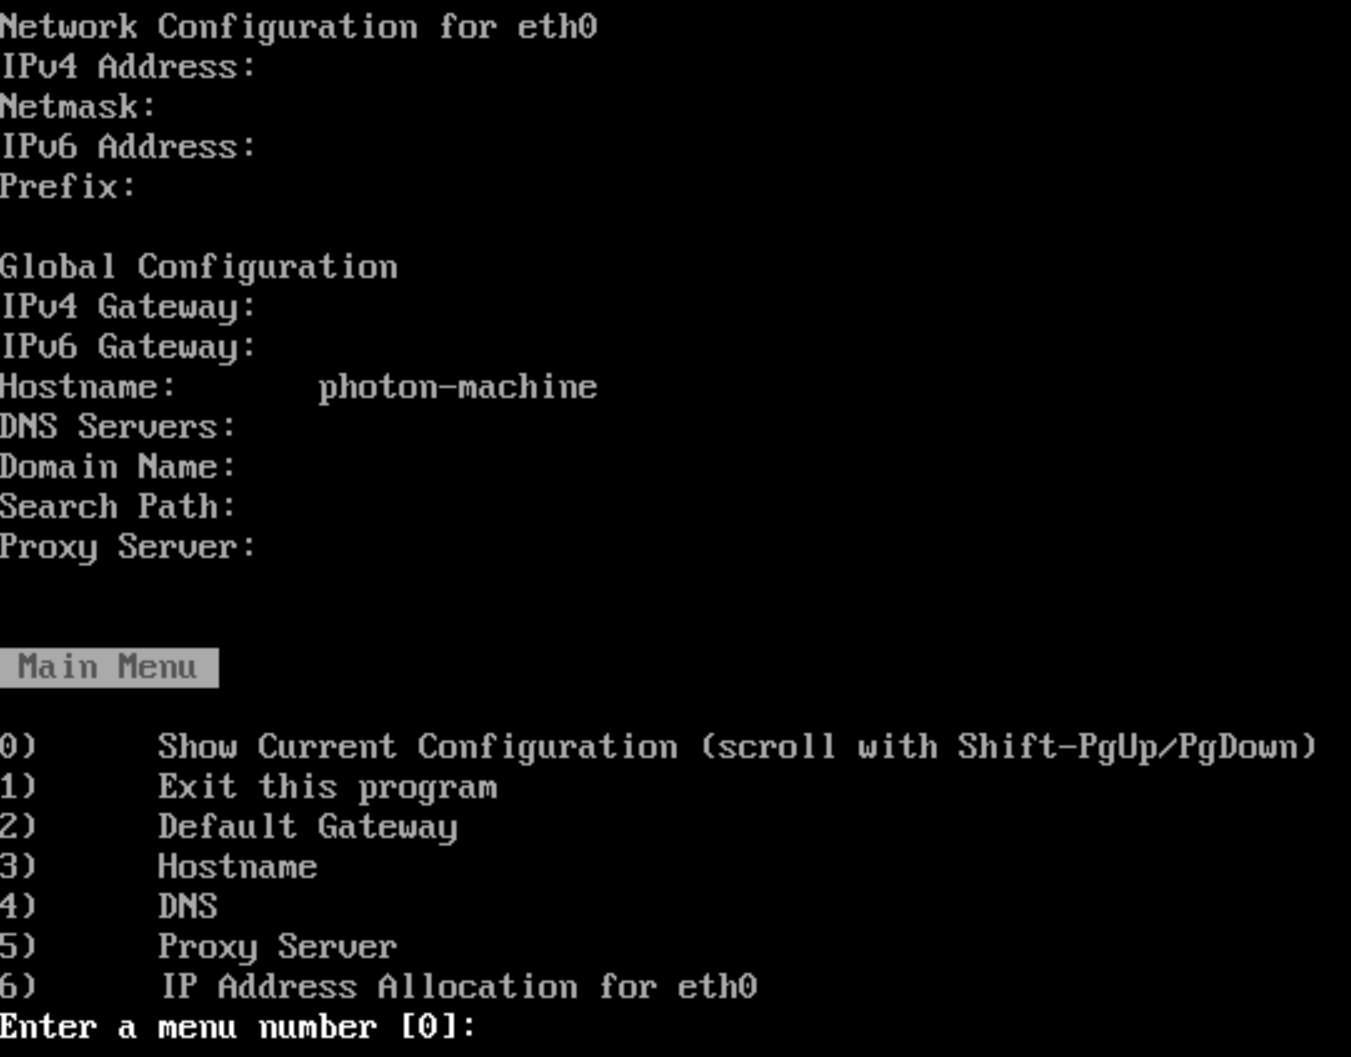
What if we try logging into the appliance from the console as was recommended and run the command (/opt/vmware/share/vami/vami_config_net)? We’ll login with username root and the password set during the deployment of this VM. Running the above command gives a menu of options. If we select option 0, we would expect to see nothing, right? Let’s check that.
There is only one setting – hostname. Everything else is blank. What now?
Hitting a Wall
Sometimes shortcuts don’t get you where you need to go quickly, and in this case it did not get me there at all. I tried all of the following to no avail:
- Setting a static ipv4 address for the appliance
- I could ping the ip address from my laptop but never could access https://ipaddress/mangle-services successfully.
- Setting the ipv4 address to DHCP
- The appliance got an ip I could ping once again from my laptop, but I still could not access the web interface for the appliance.
- Rebooting the appliance after setting an ip
- The same issue persisted as documented above.
- I tried re-deploying the appliance from scratch but had the same issue regardless of whether I left all Network Properties blank or set static ip addresses.
- I remembered you can deploy an OVA in VMware Workstation directly, but I ran into the same problem with this approach also.
When you hit a wall, you ask for help. I found from someone on the Mangle team that at the time of this article’s publishing, what I describe above is a known issue when deploying the OVA directly on an ESXi host (and is also a known issue deploying other Photon OS OVAs using this method). The recommendation was to deploy the OVA using vCenter to avoid this issue.
So much for taking a shortcut. The documentation didn’t call out vCenter specifically but did hint at it based on screenshots. Sometimes you need to do things the wrong way first to do them the right way the next time.
Deploying the Mangle OVA Using vCenter
To this point I have deployed a vCenter running on top of the virtual ESXi host mentioned earlier (NN-ESXi1) after allocating more RAM to it. The name of the vCenter is NN-vCenter1 with deployment size set to Tiny. Our host NN-ESXi1 is under its management now inside a datacenter called NN-DC1. Let’s walk through the steps to deploy the Mangle OVA using vCenter.
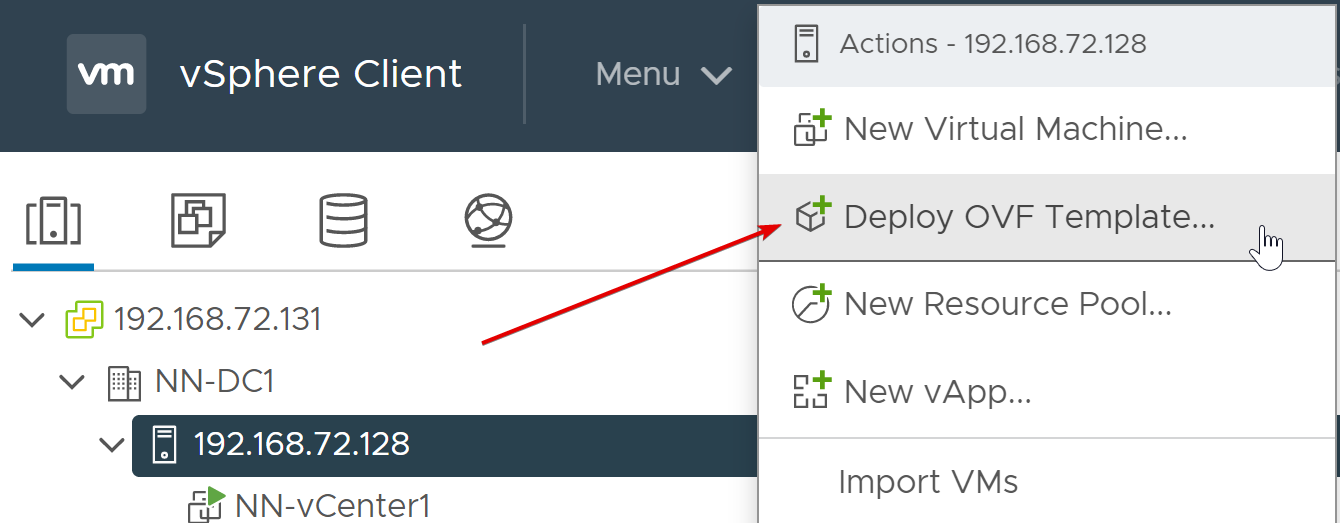
Login to vCenter as the SSO administrator, and we should go straight to the hosts and clusters view. Right-click the host, and select Deploy OVF template.
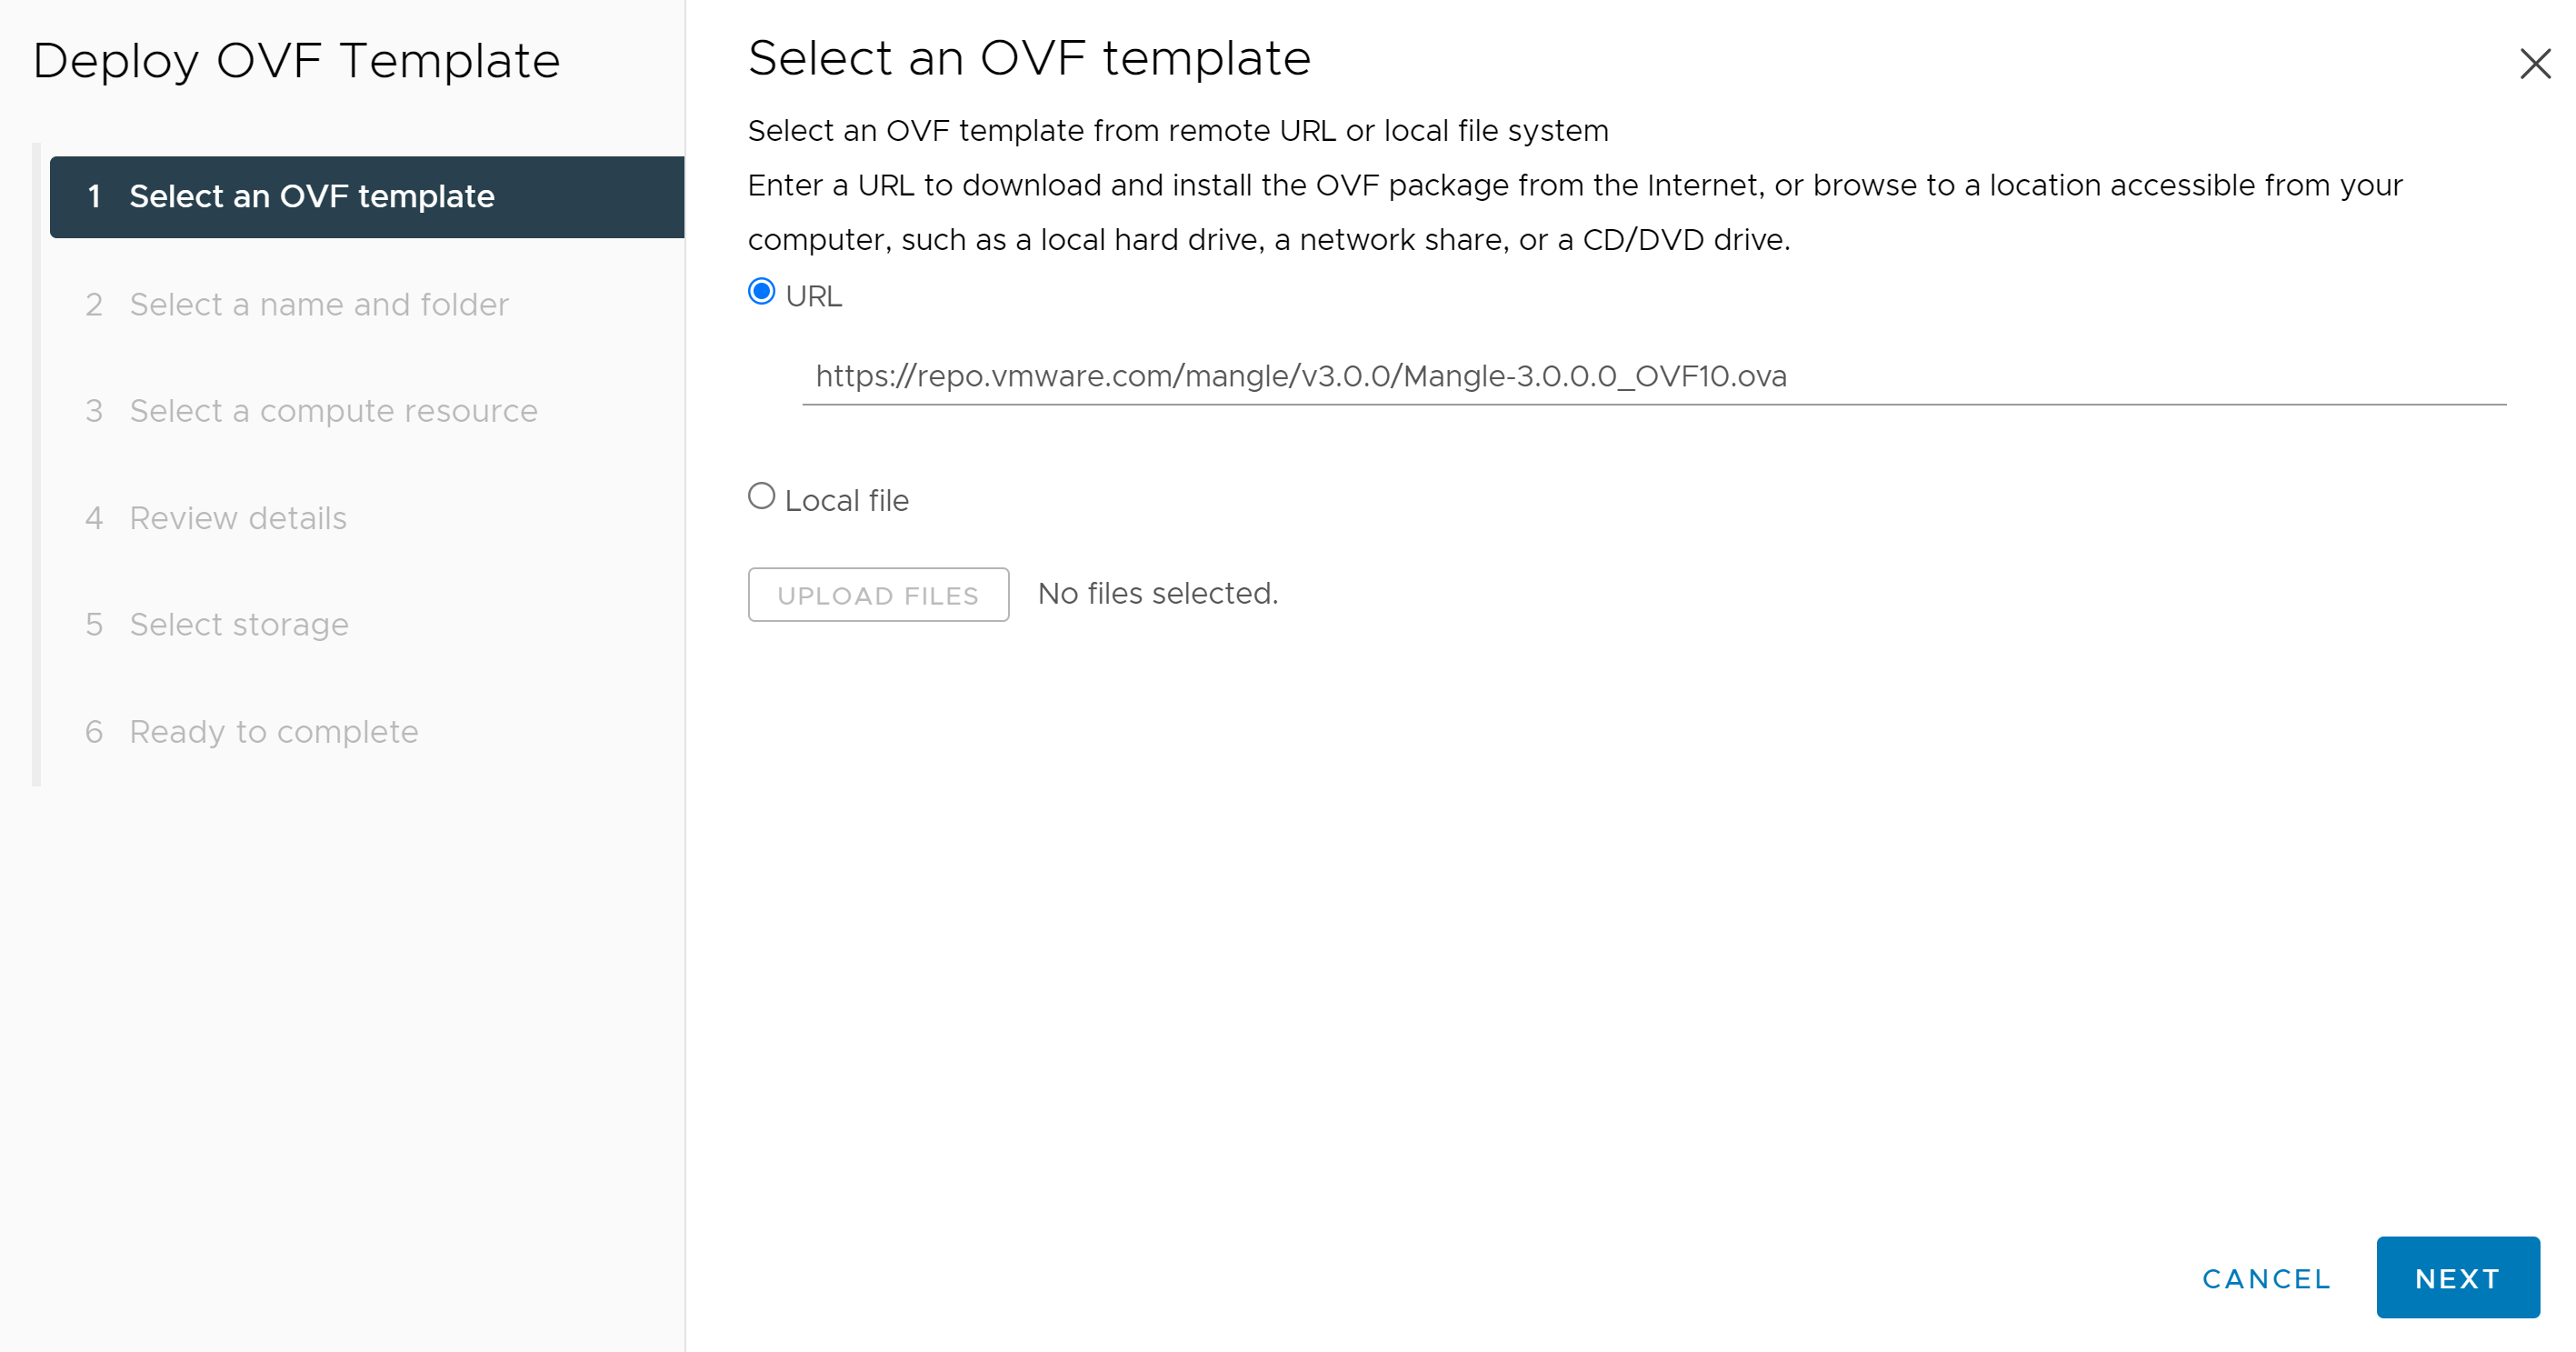
At this point, there are two options for grabbing the OVA file. If vCenter can reach the internet, we can leverage a URL to download the OVA (this doc has the URL for the latest version of Mangle). Click Next to continue.
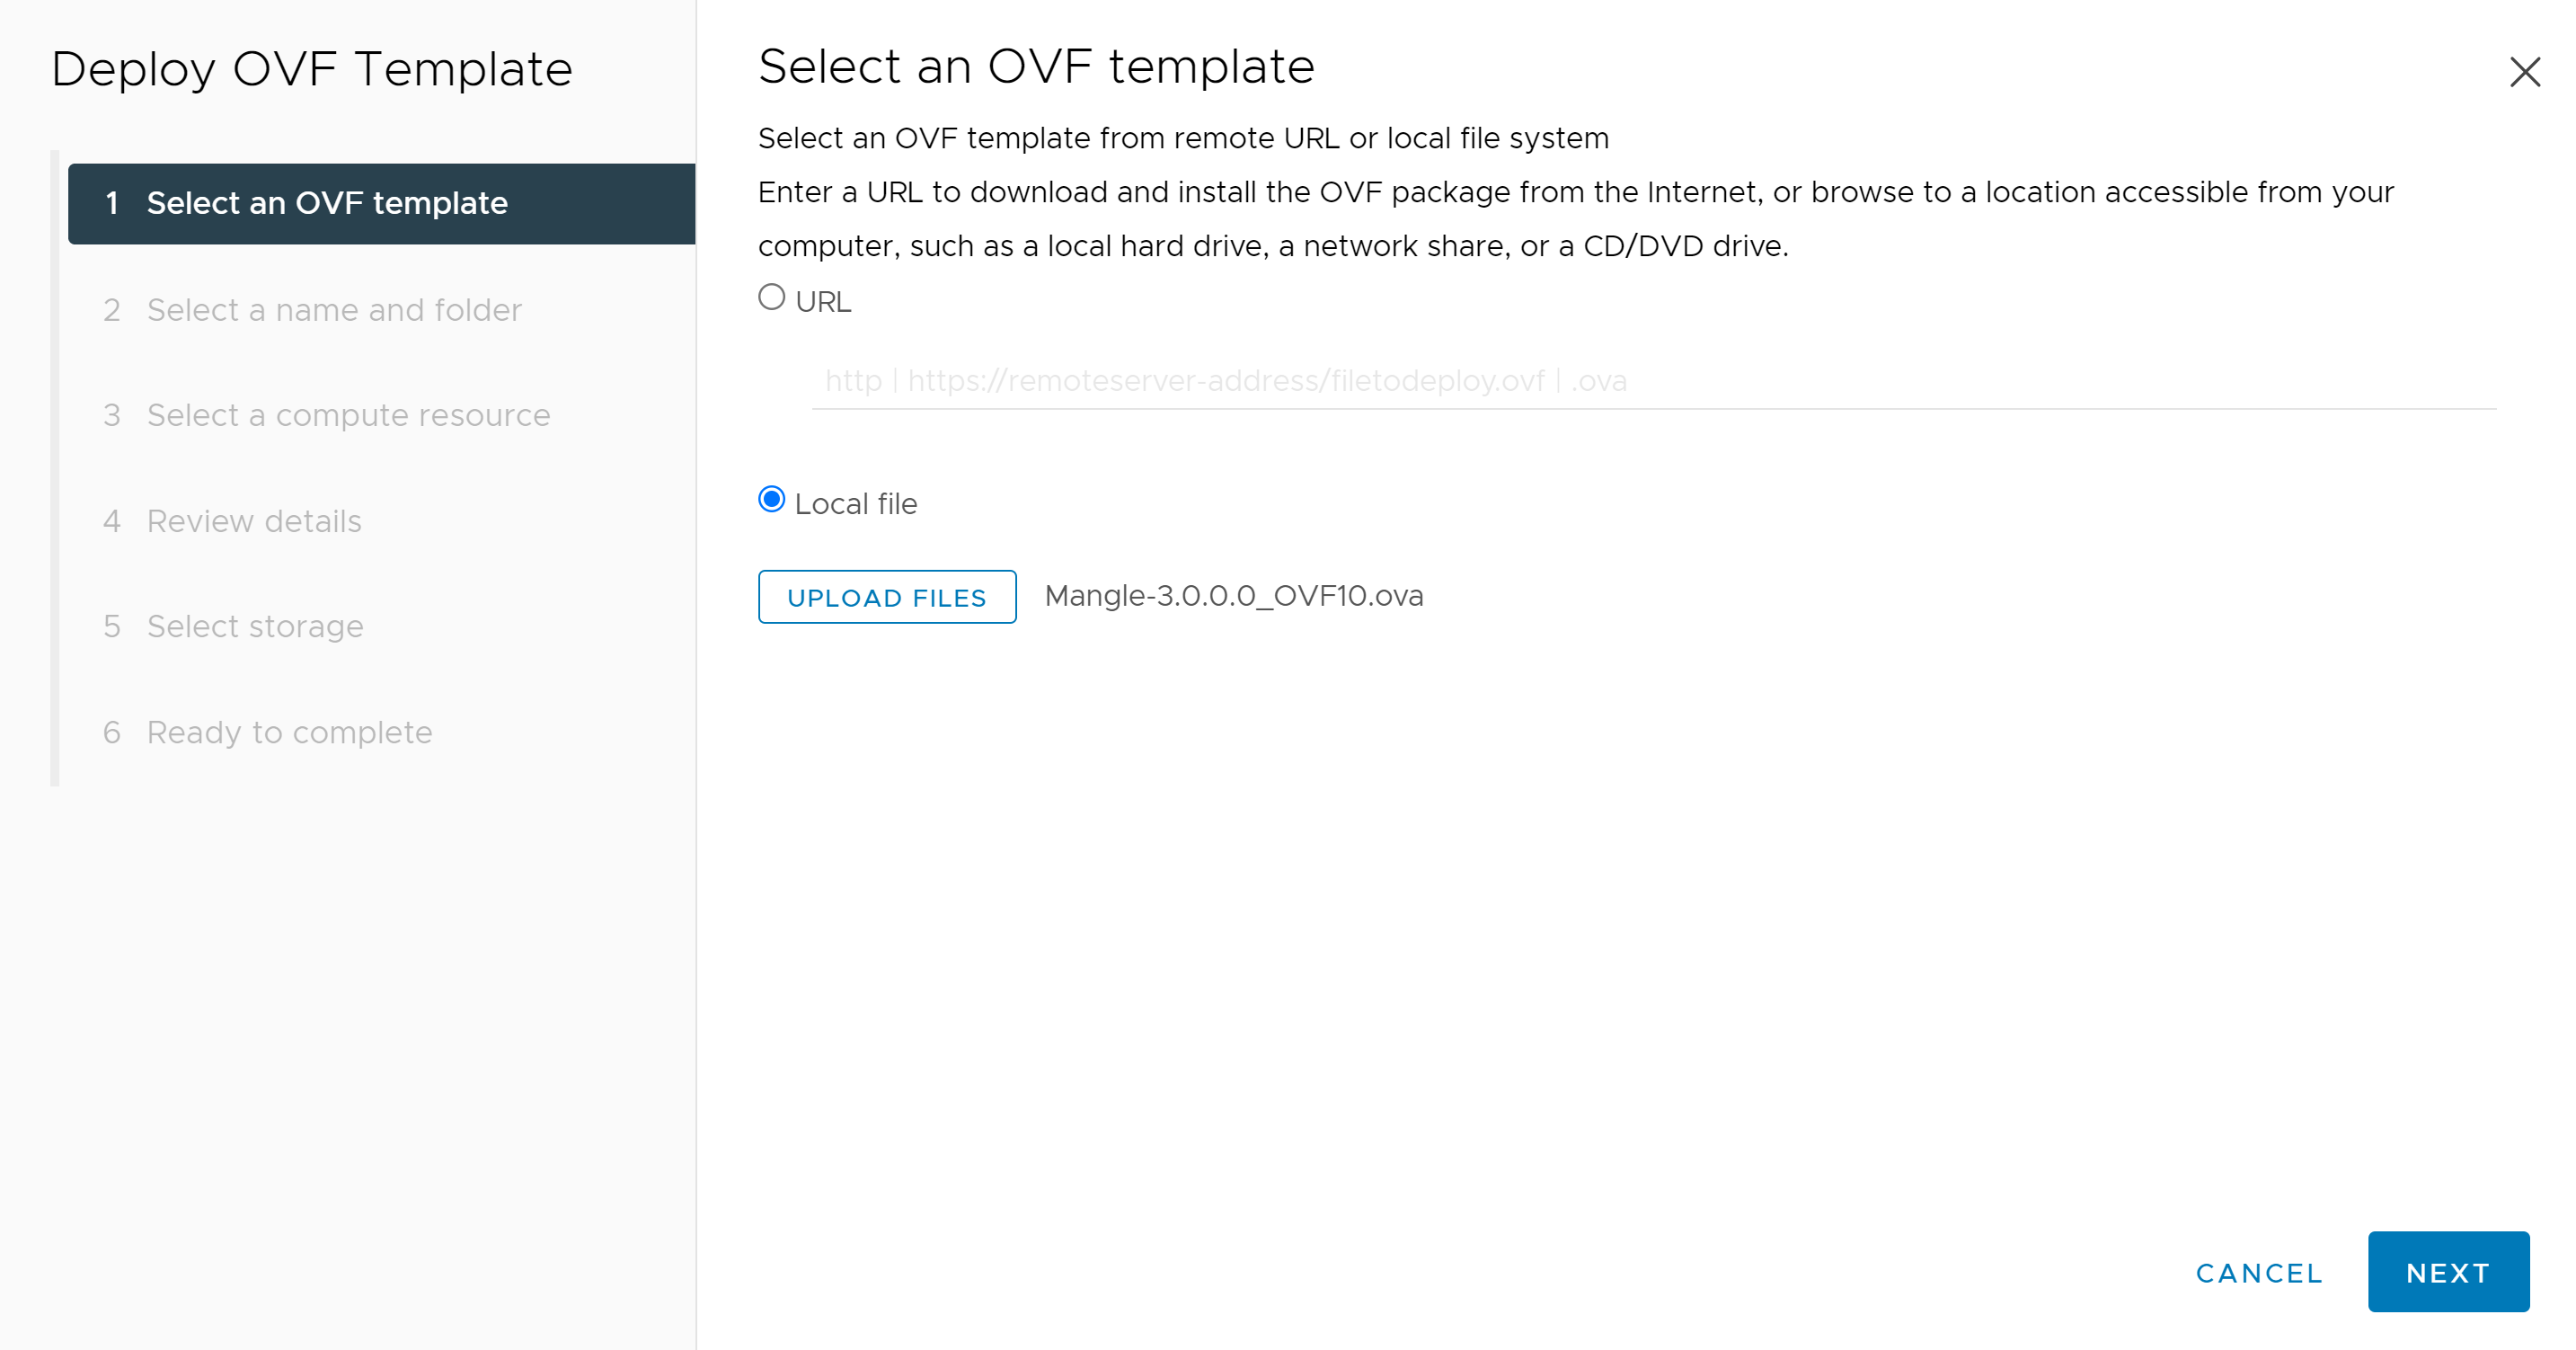
If the OVA has already been downloaded (which was the case for me), just browse to the location on your computer where the OVA is stored, select it, and click Next.
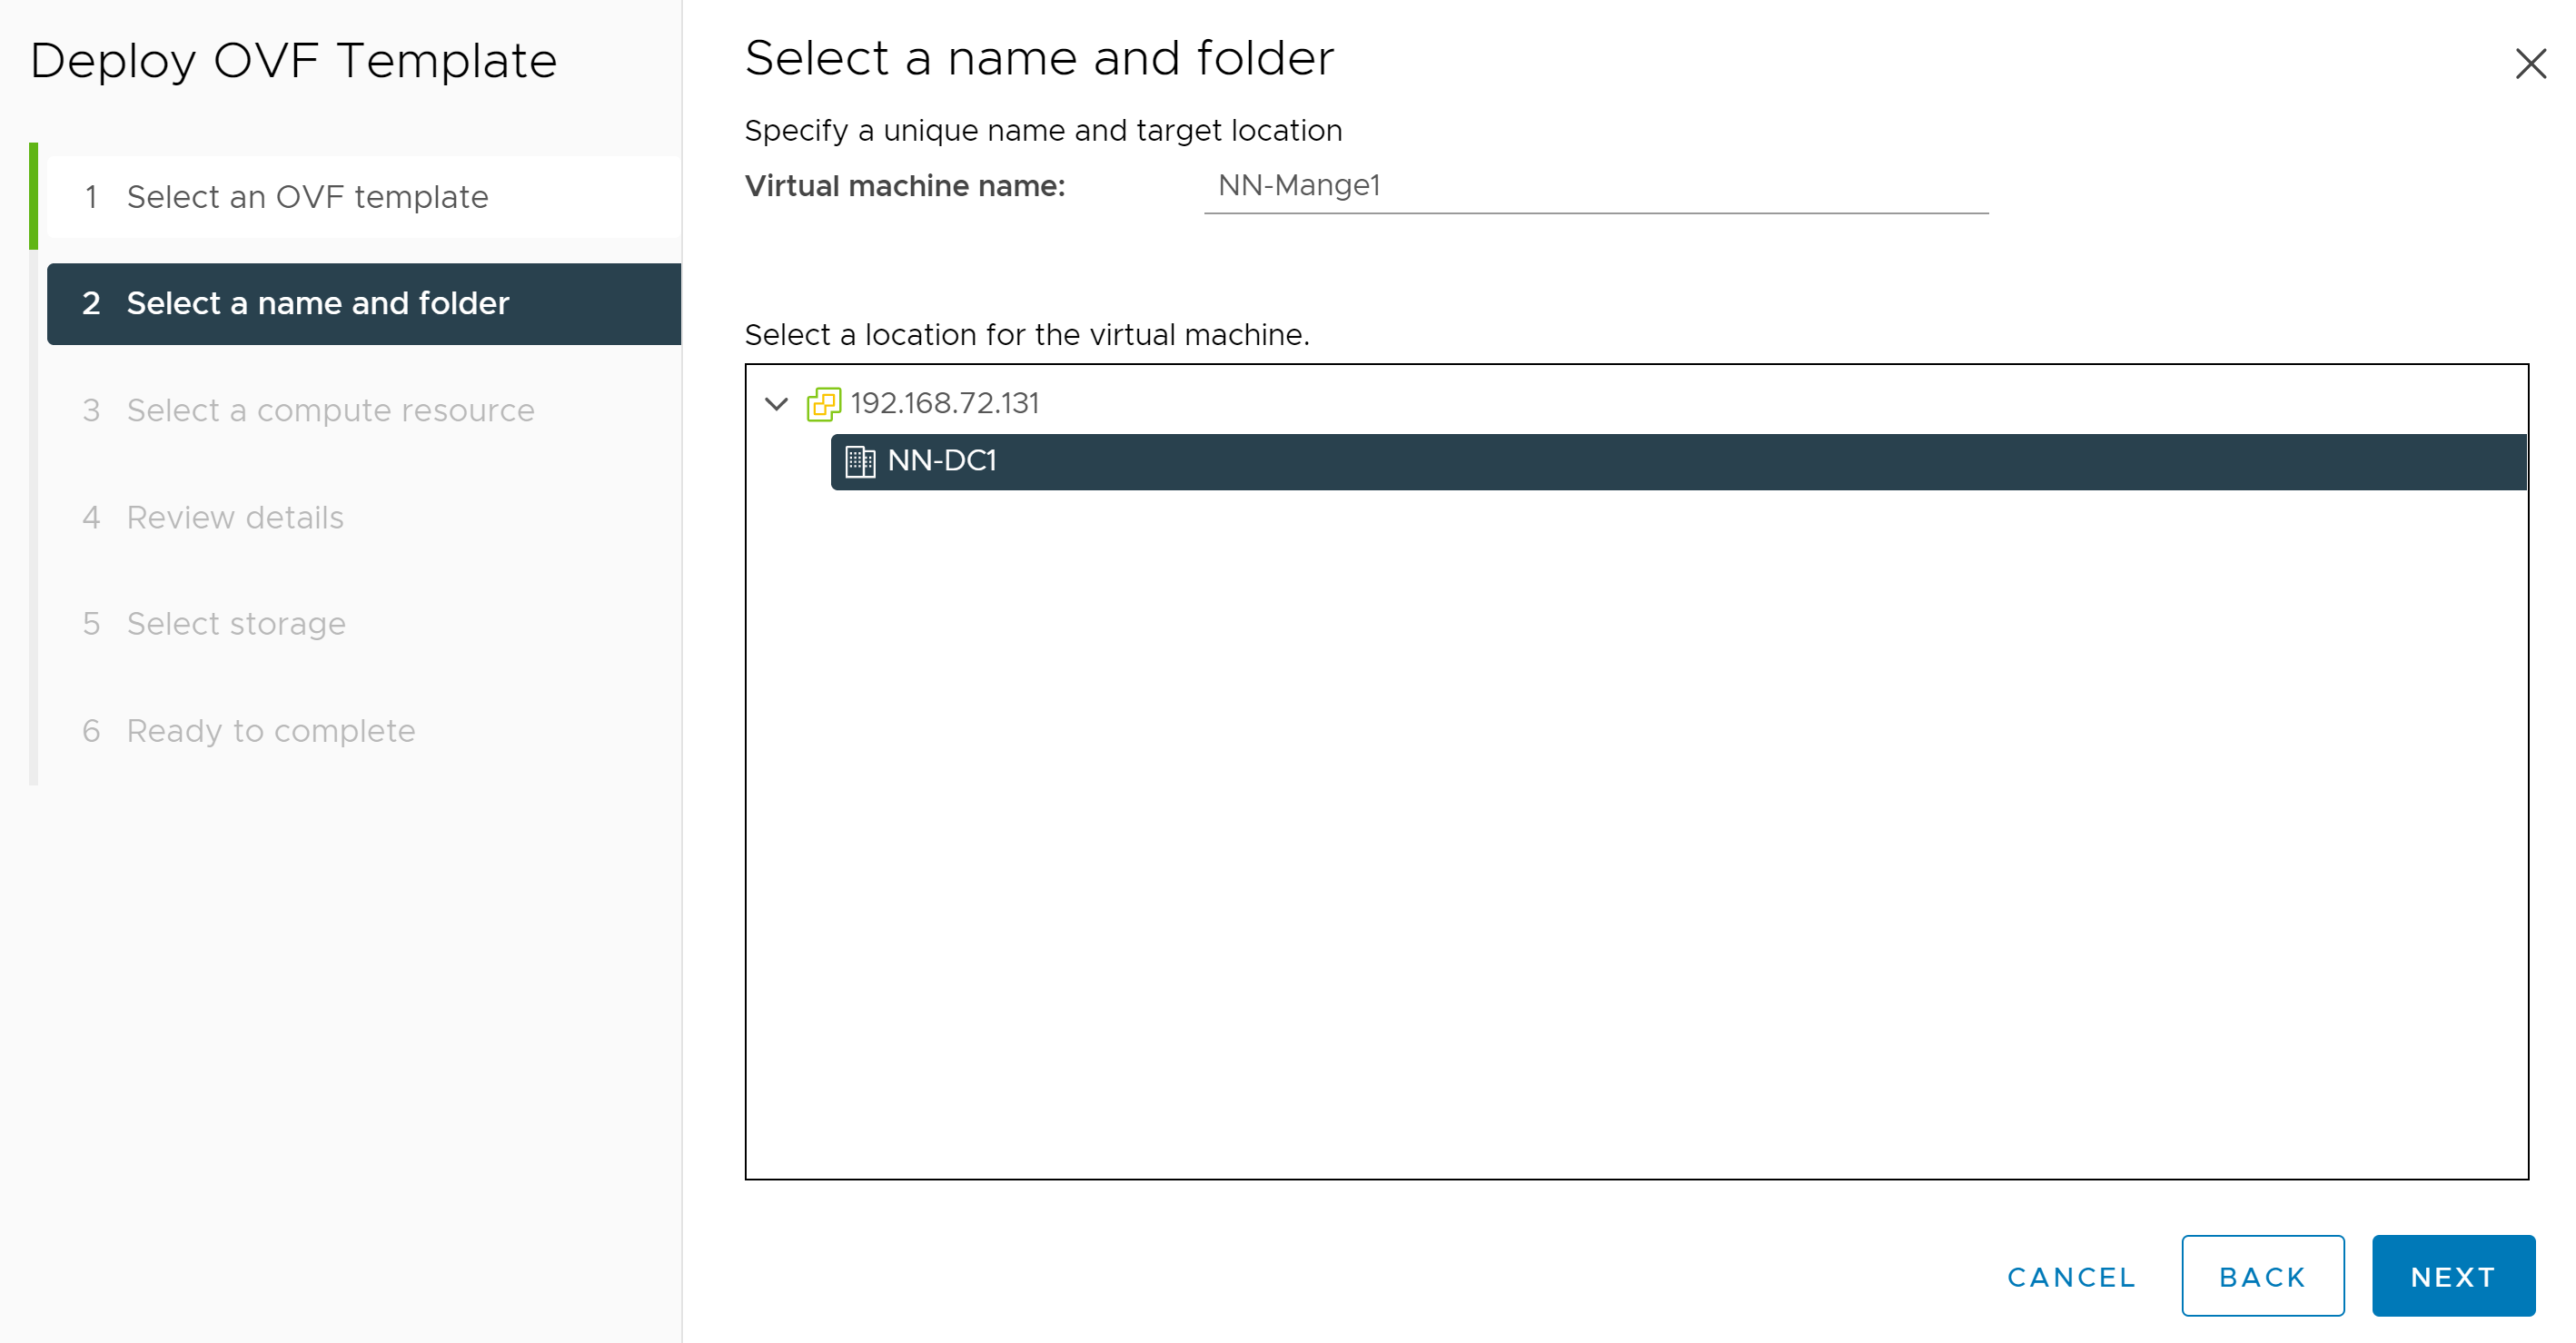
Give the new VM a name (in this case NN-Mangle1), and select the location for deployment. In this lab, there is only one datacenter location with no folders created yet, so we select NN-DC1.
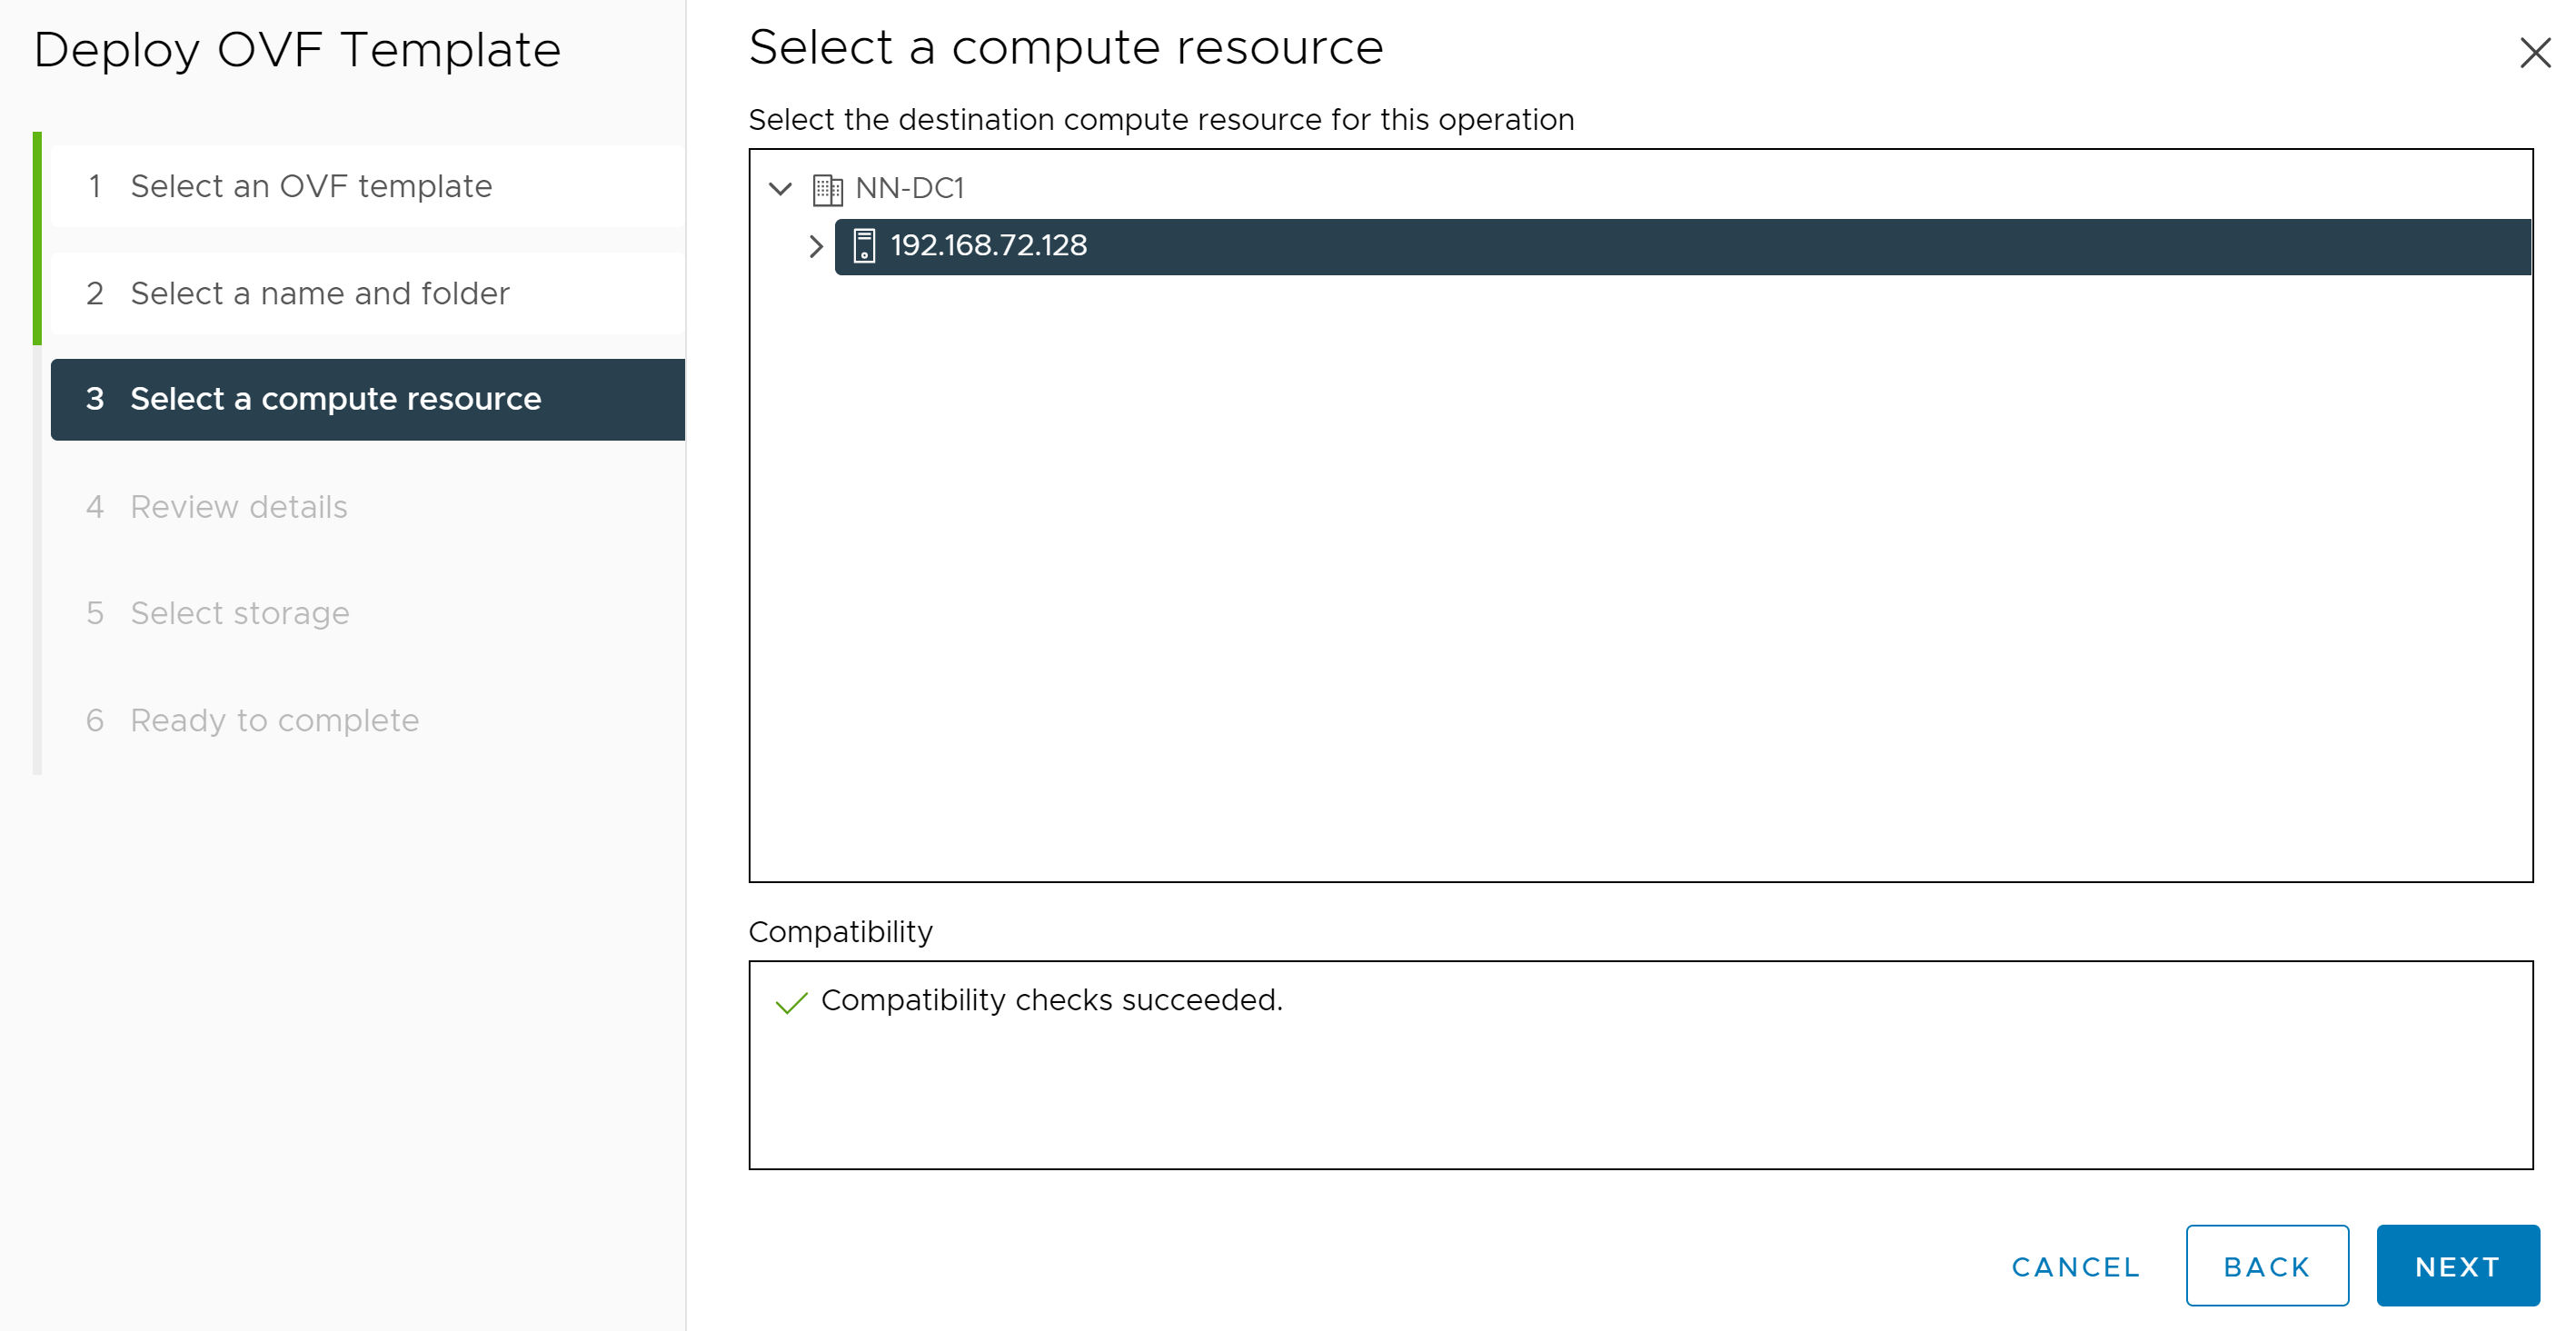
As for compute resource, we only have one host to select, and there are no compatibility issues with the OVA being deployed to that host. In a production environment our choice would likely be a specific cluster but could also be one specific host. Click Next to continue.
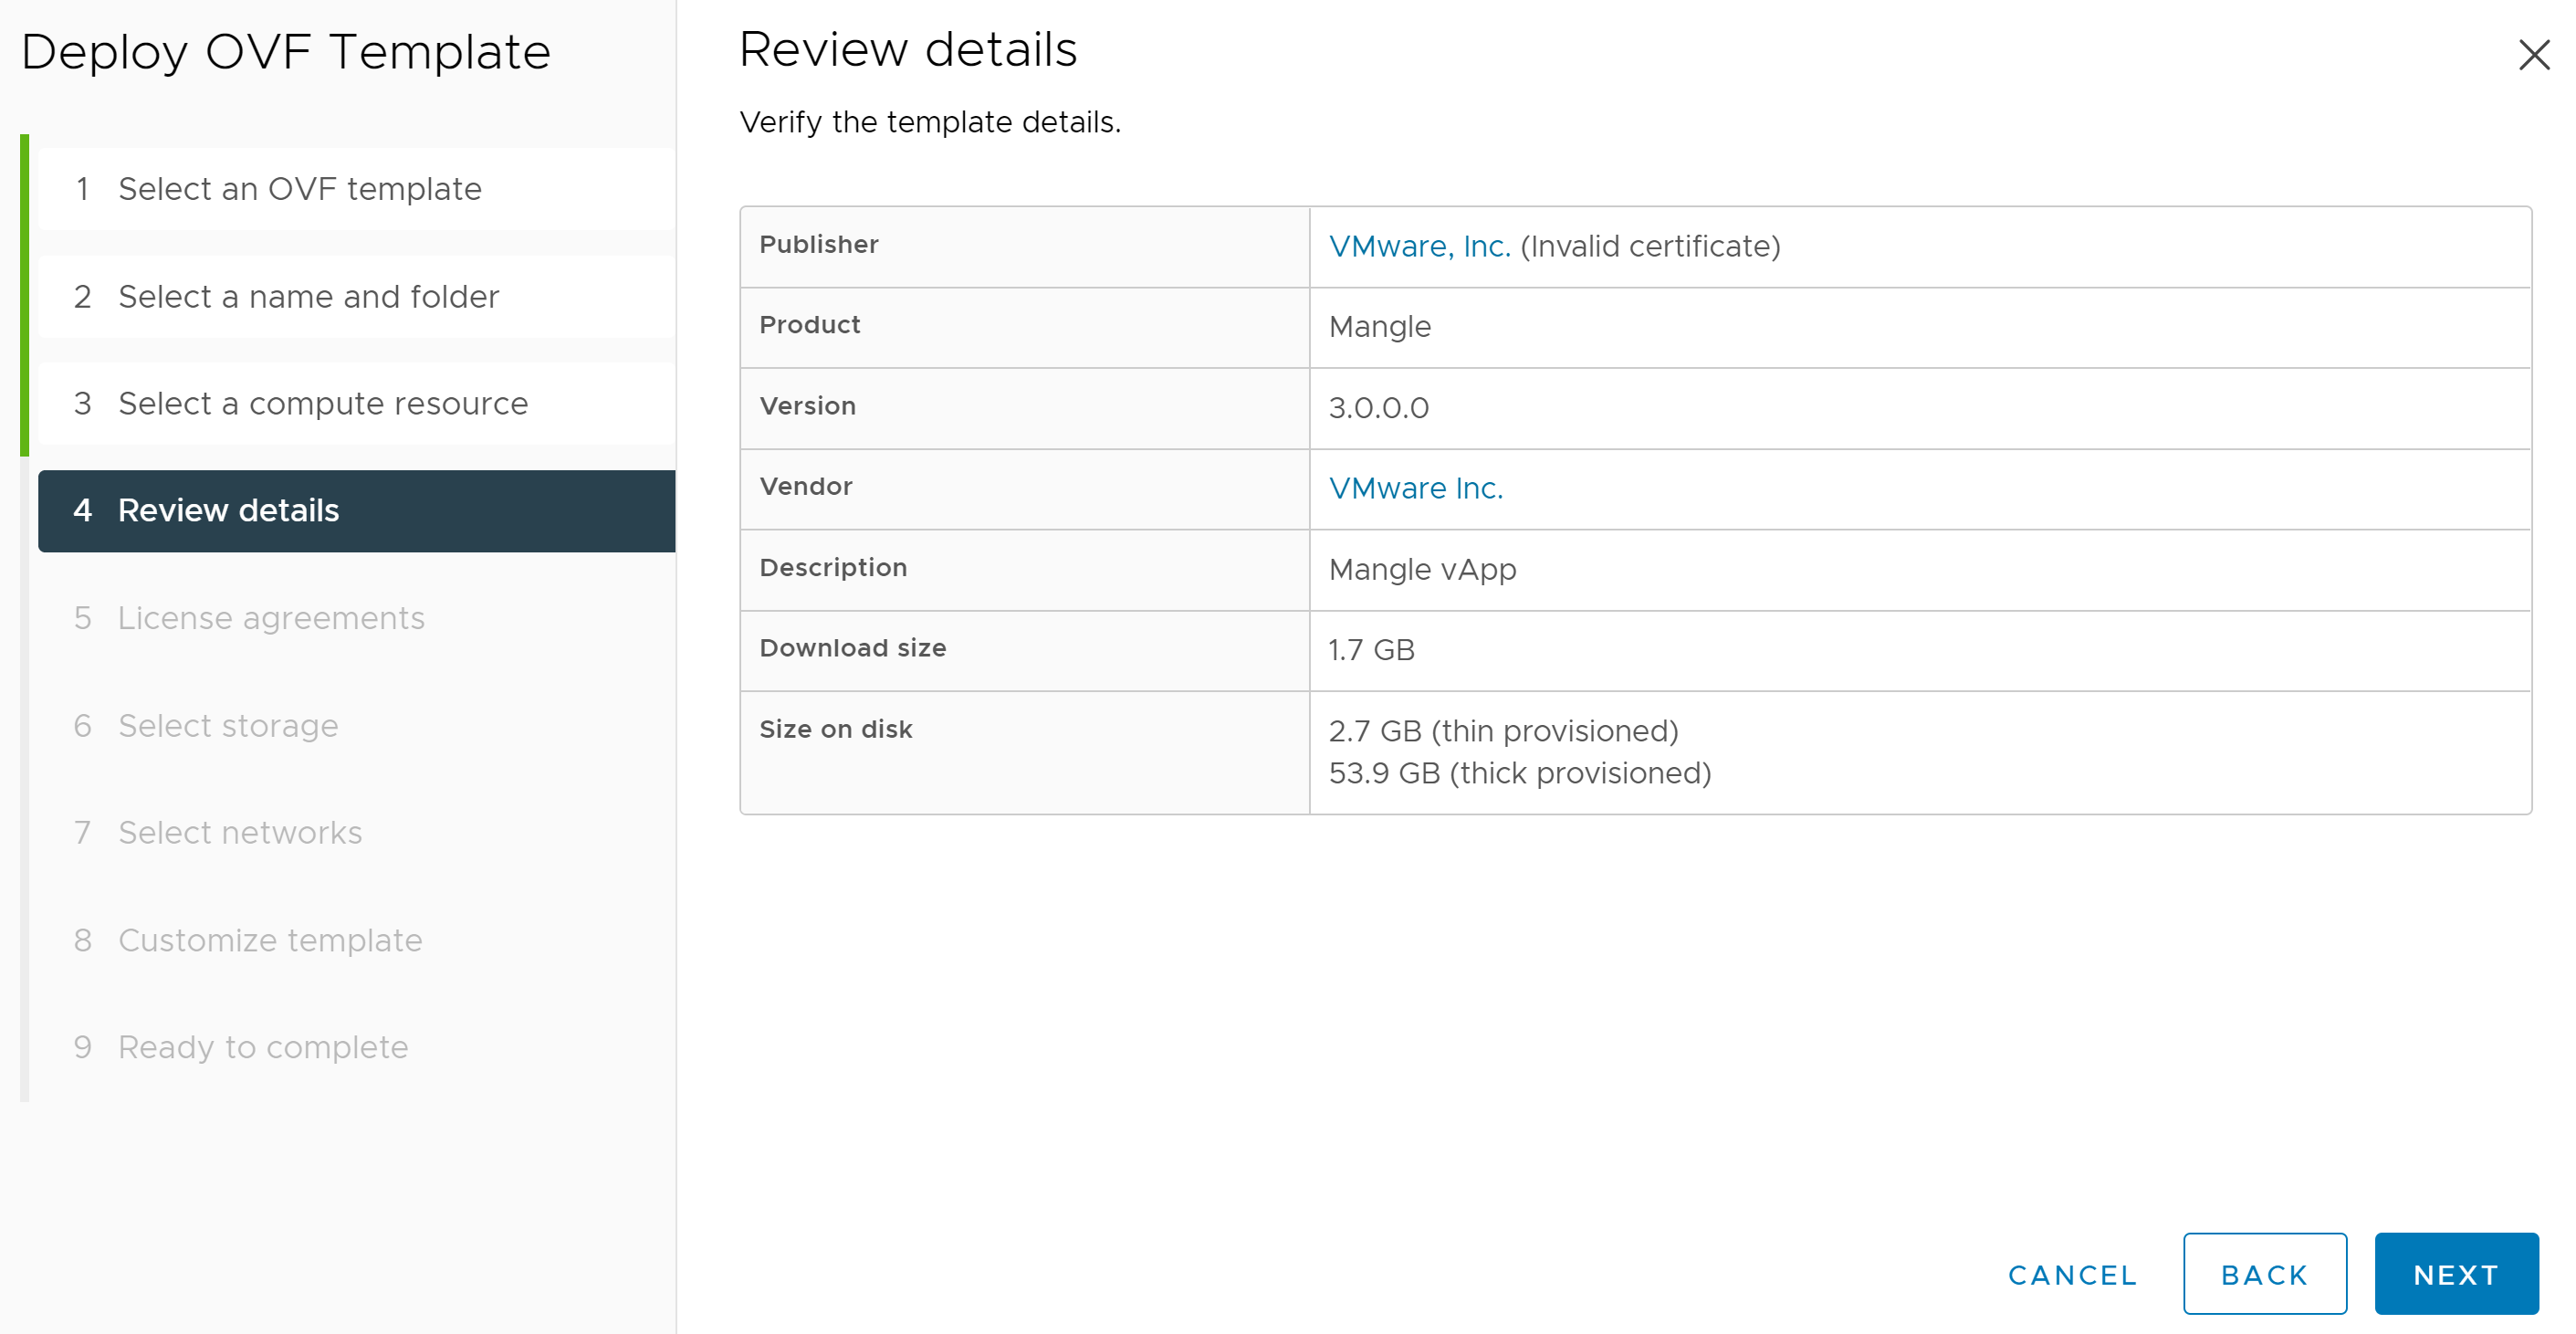
Now we review the template details and can confirm this is Mangle version 3.0. Click Next to continue now that our list of deployment steps has expanded.
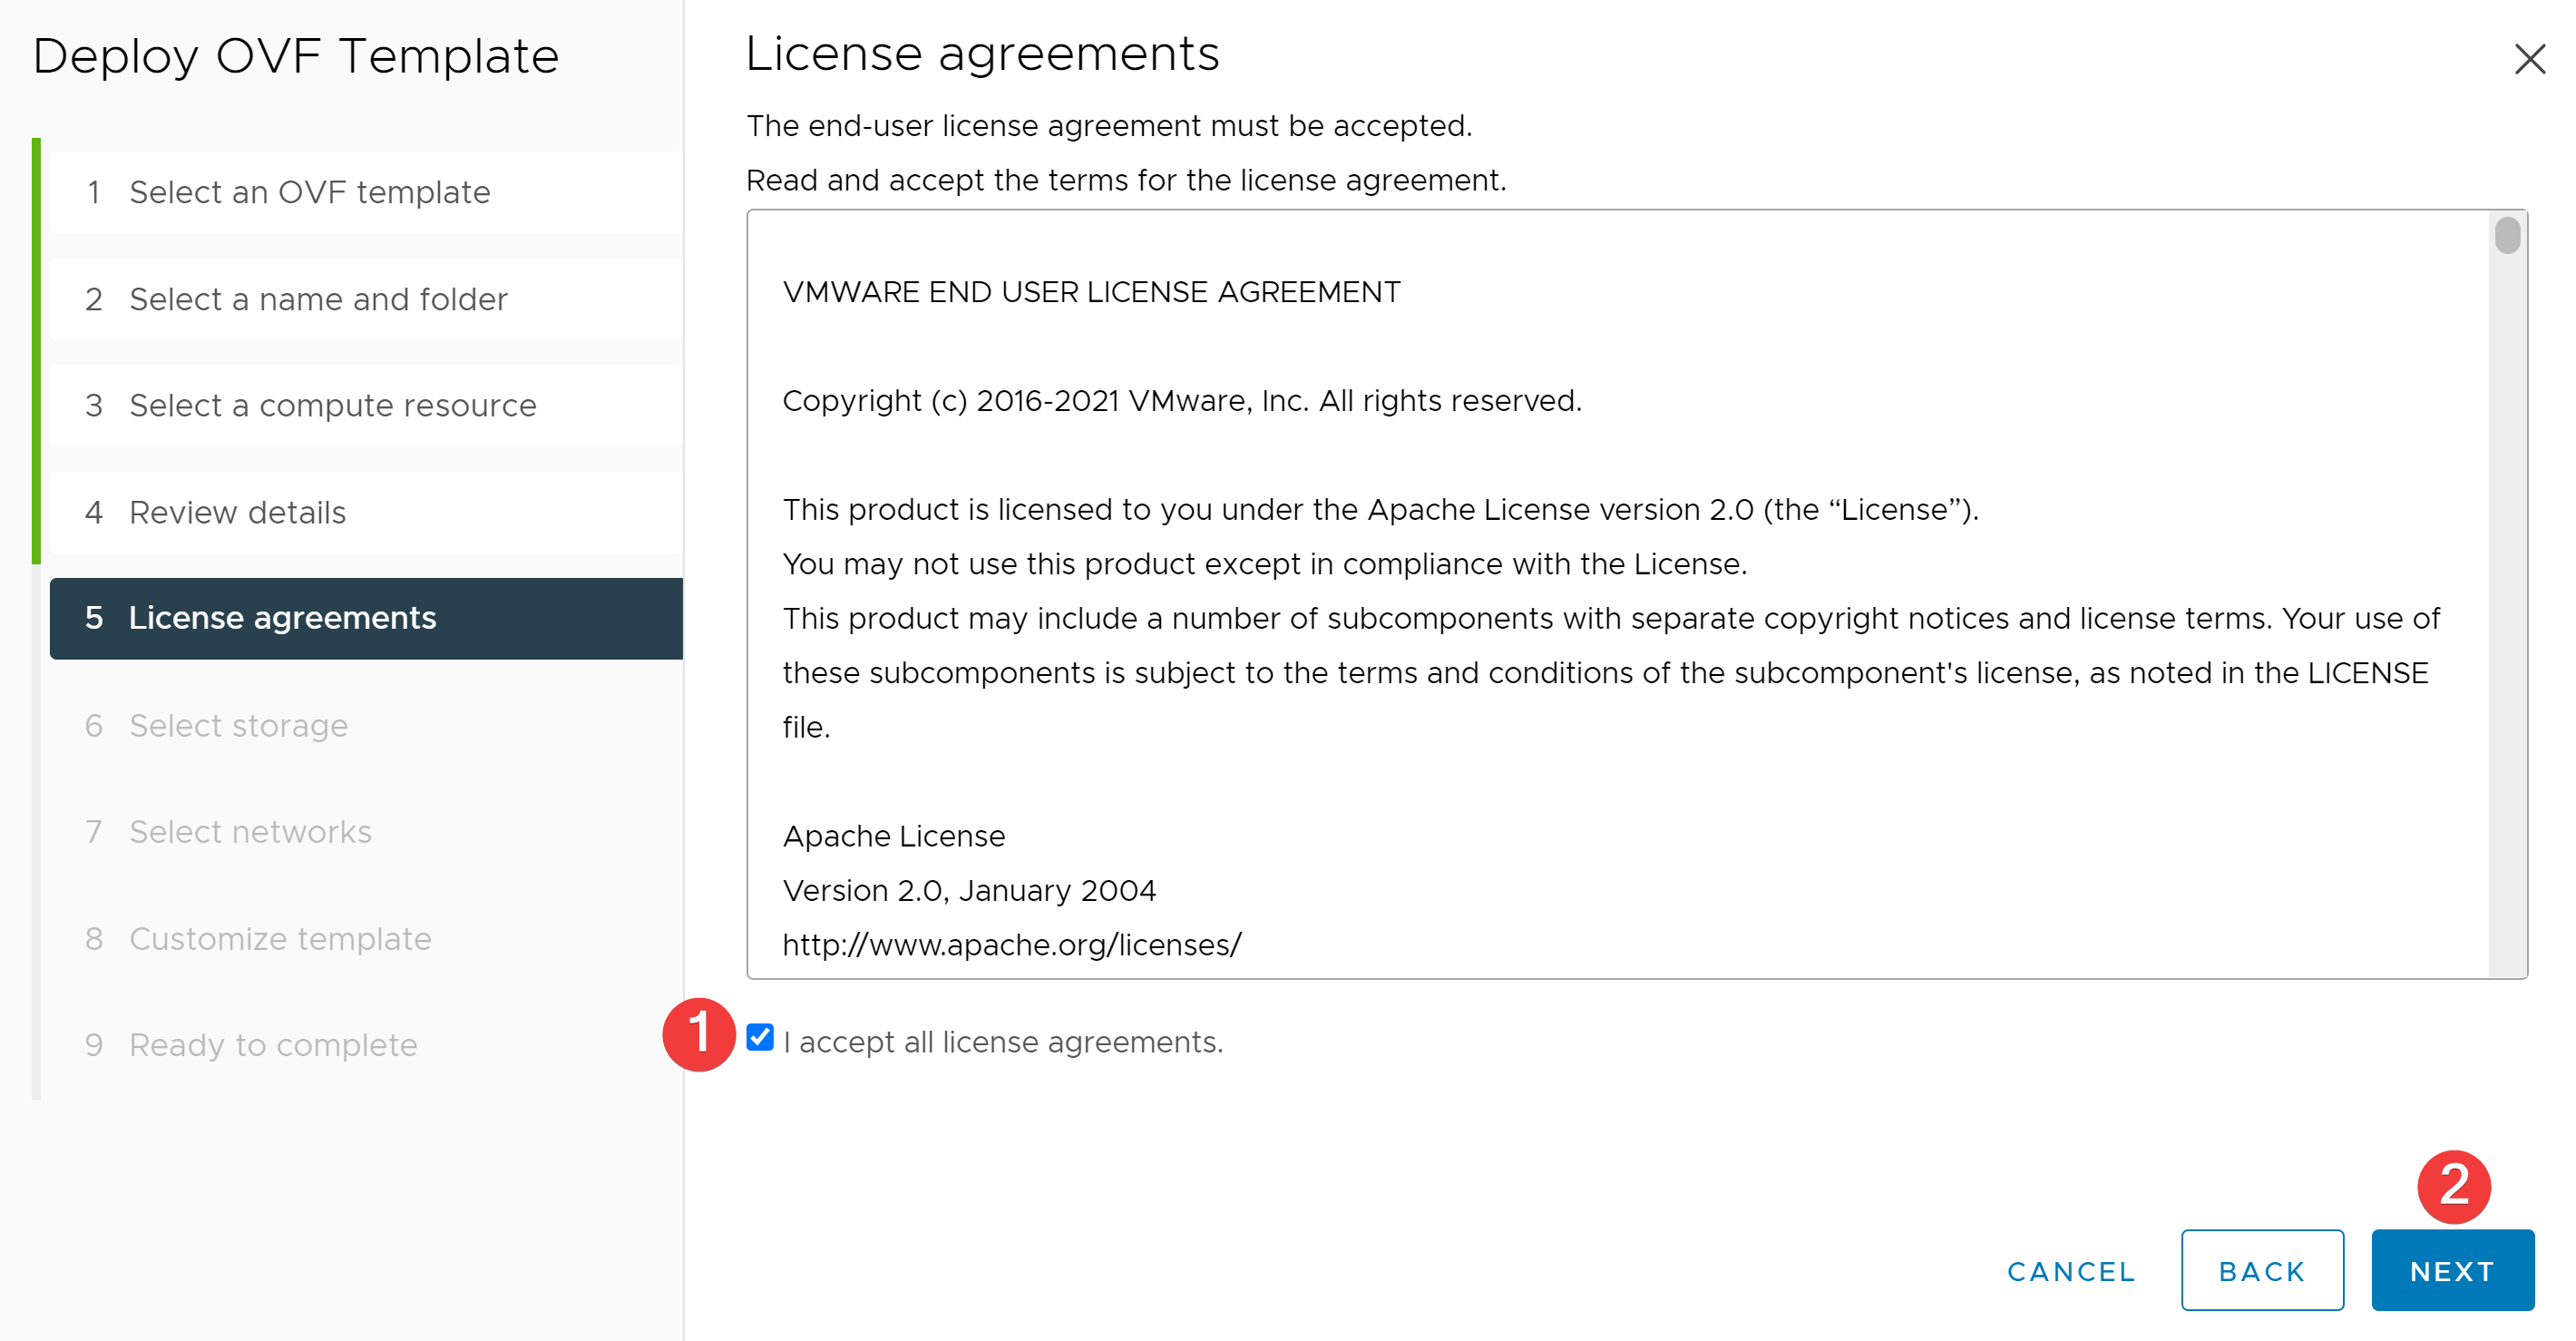
Check the box labeled “I accept all license agreements” followed by clicking Next. Clicking Next before accepting the license agreement will throw an error and prevent continuation of the deployment steps.
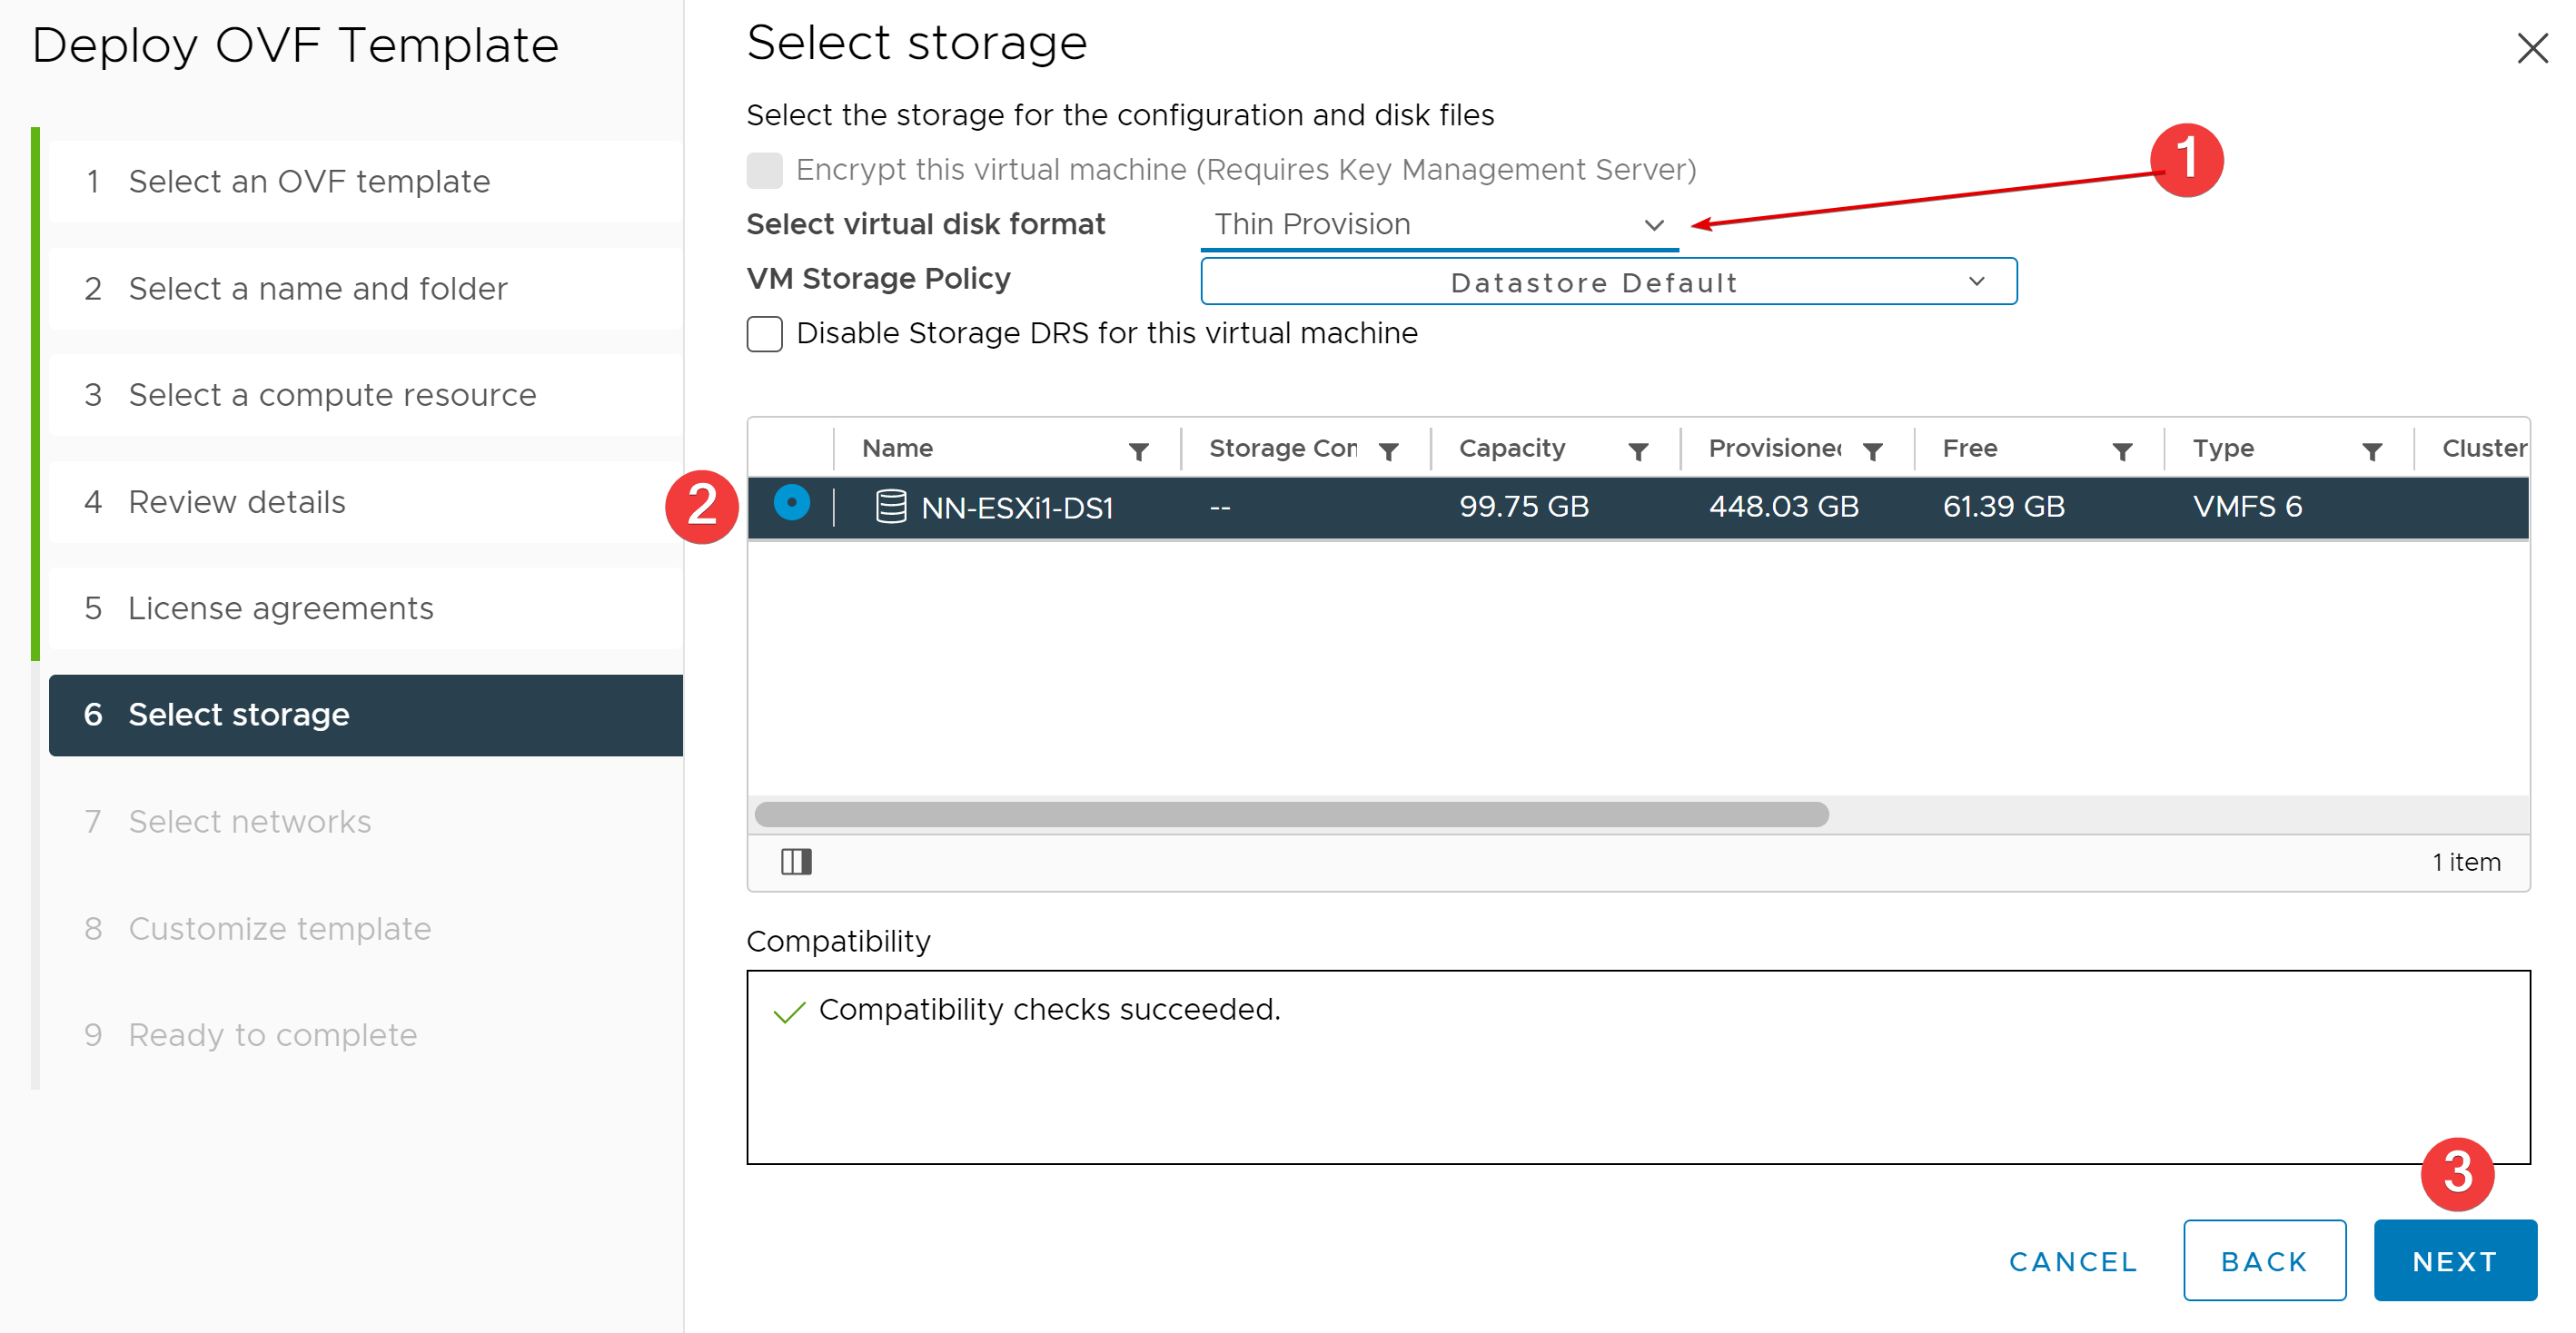
Now it’s time to select the virtual disk format for the appliance VMDKs and the datastore in which they will reside. Let’s choose thin provisioning (only uses 2.7 GB per the above screenshot), and there is only one datastore in this environment (NN-ESXi1-DS1). Click Next to continue.
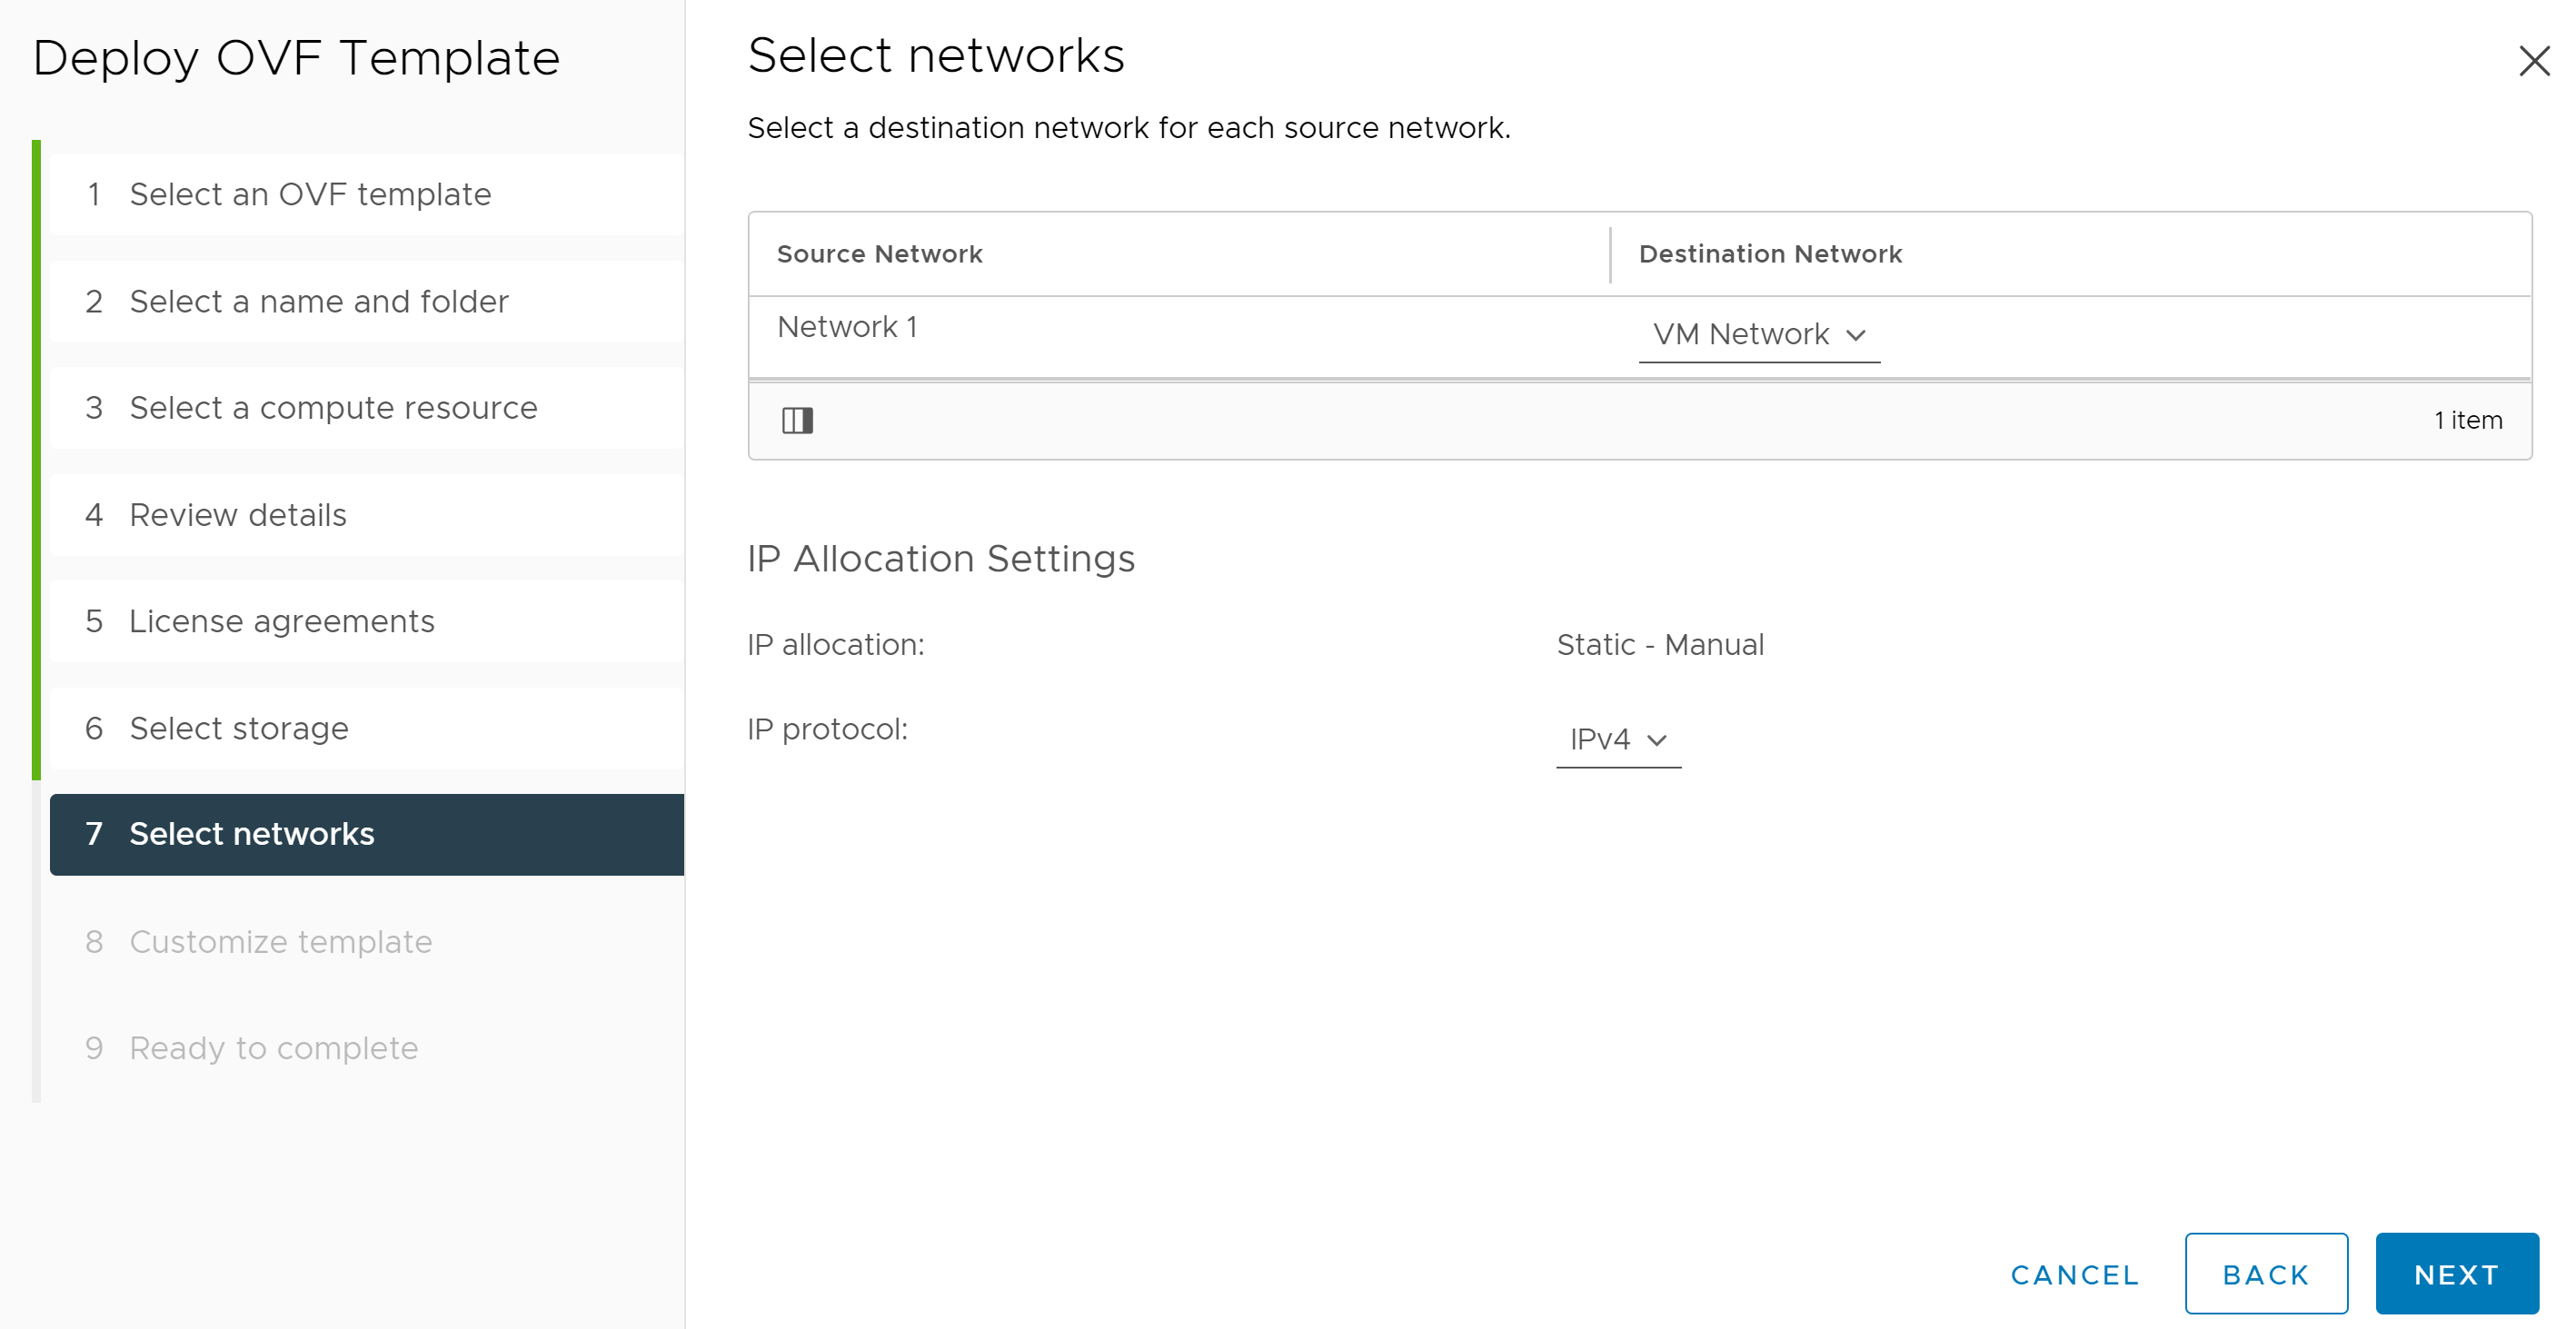
Select the virtual networks to use for the appliance. Only a single virtual network exists in the environment, so we will use VM Network here (selected by default in my environment). We will stick with IPv4 and click Next.
Once we reach the Customize template screen, we are immediately alerted that 1 property has an invalid value. What could that be?
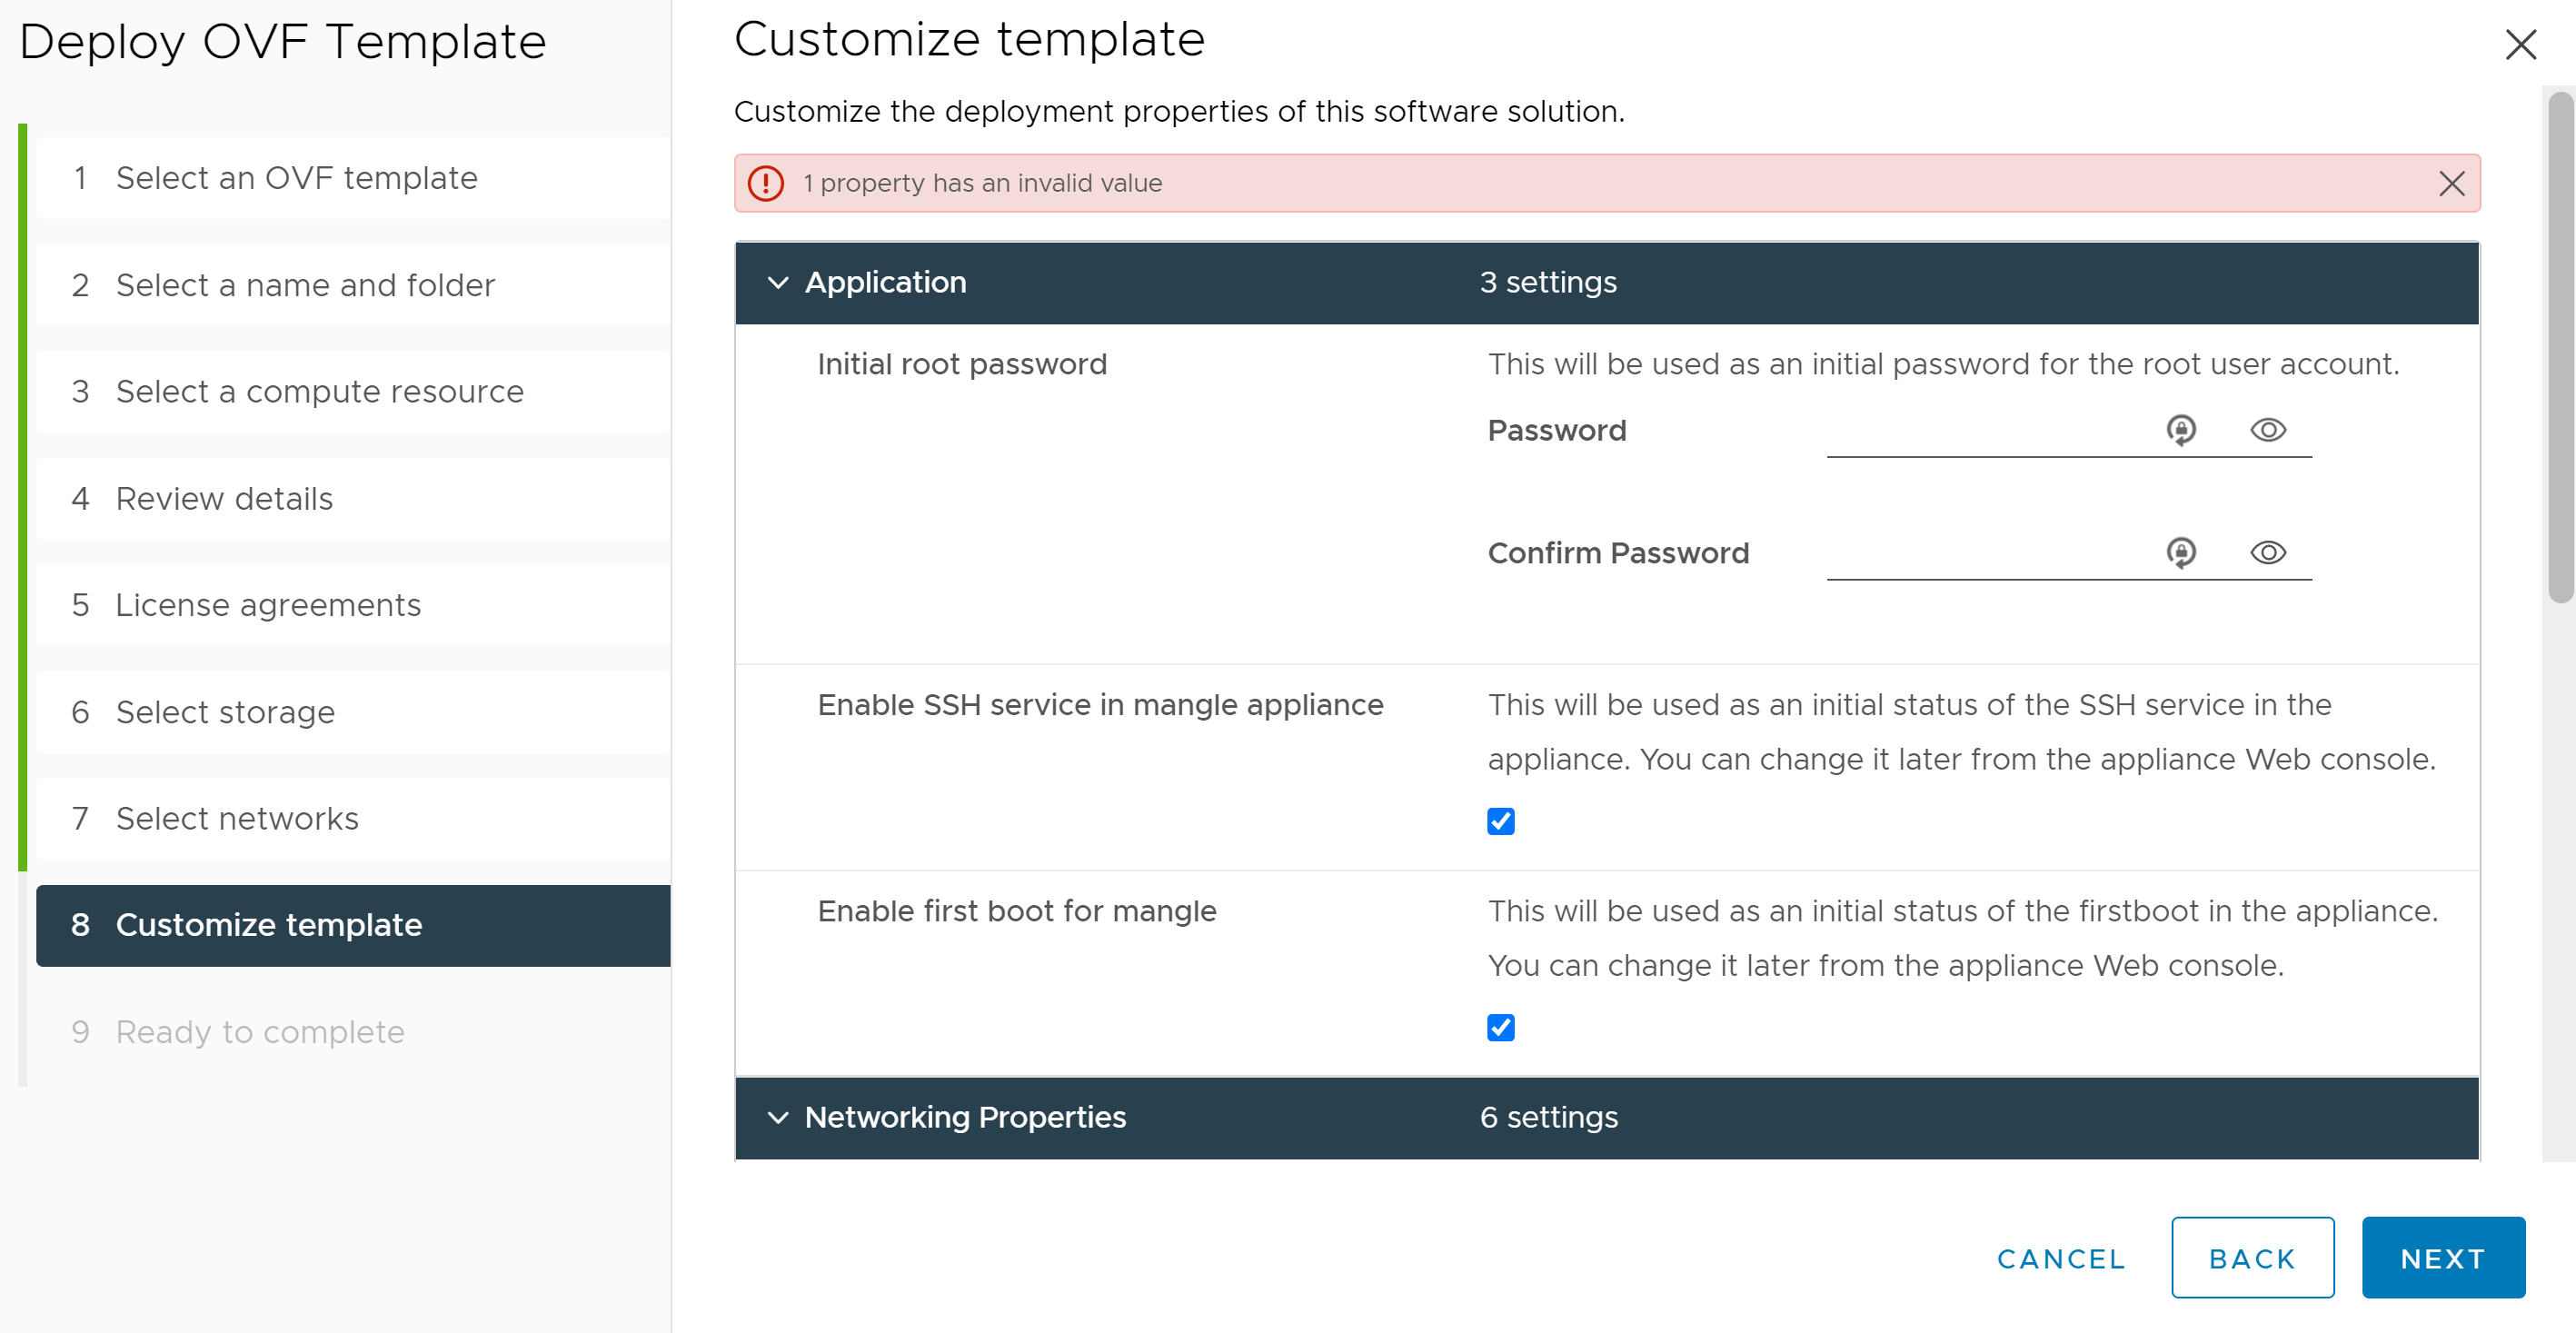
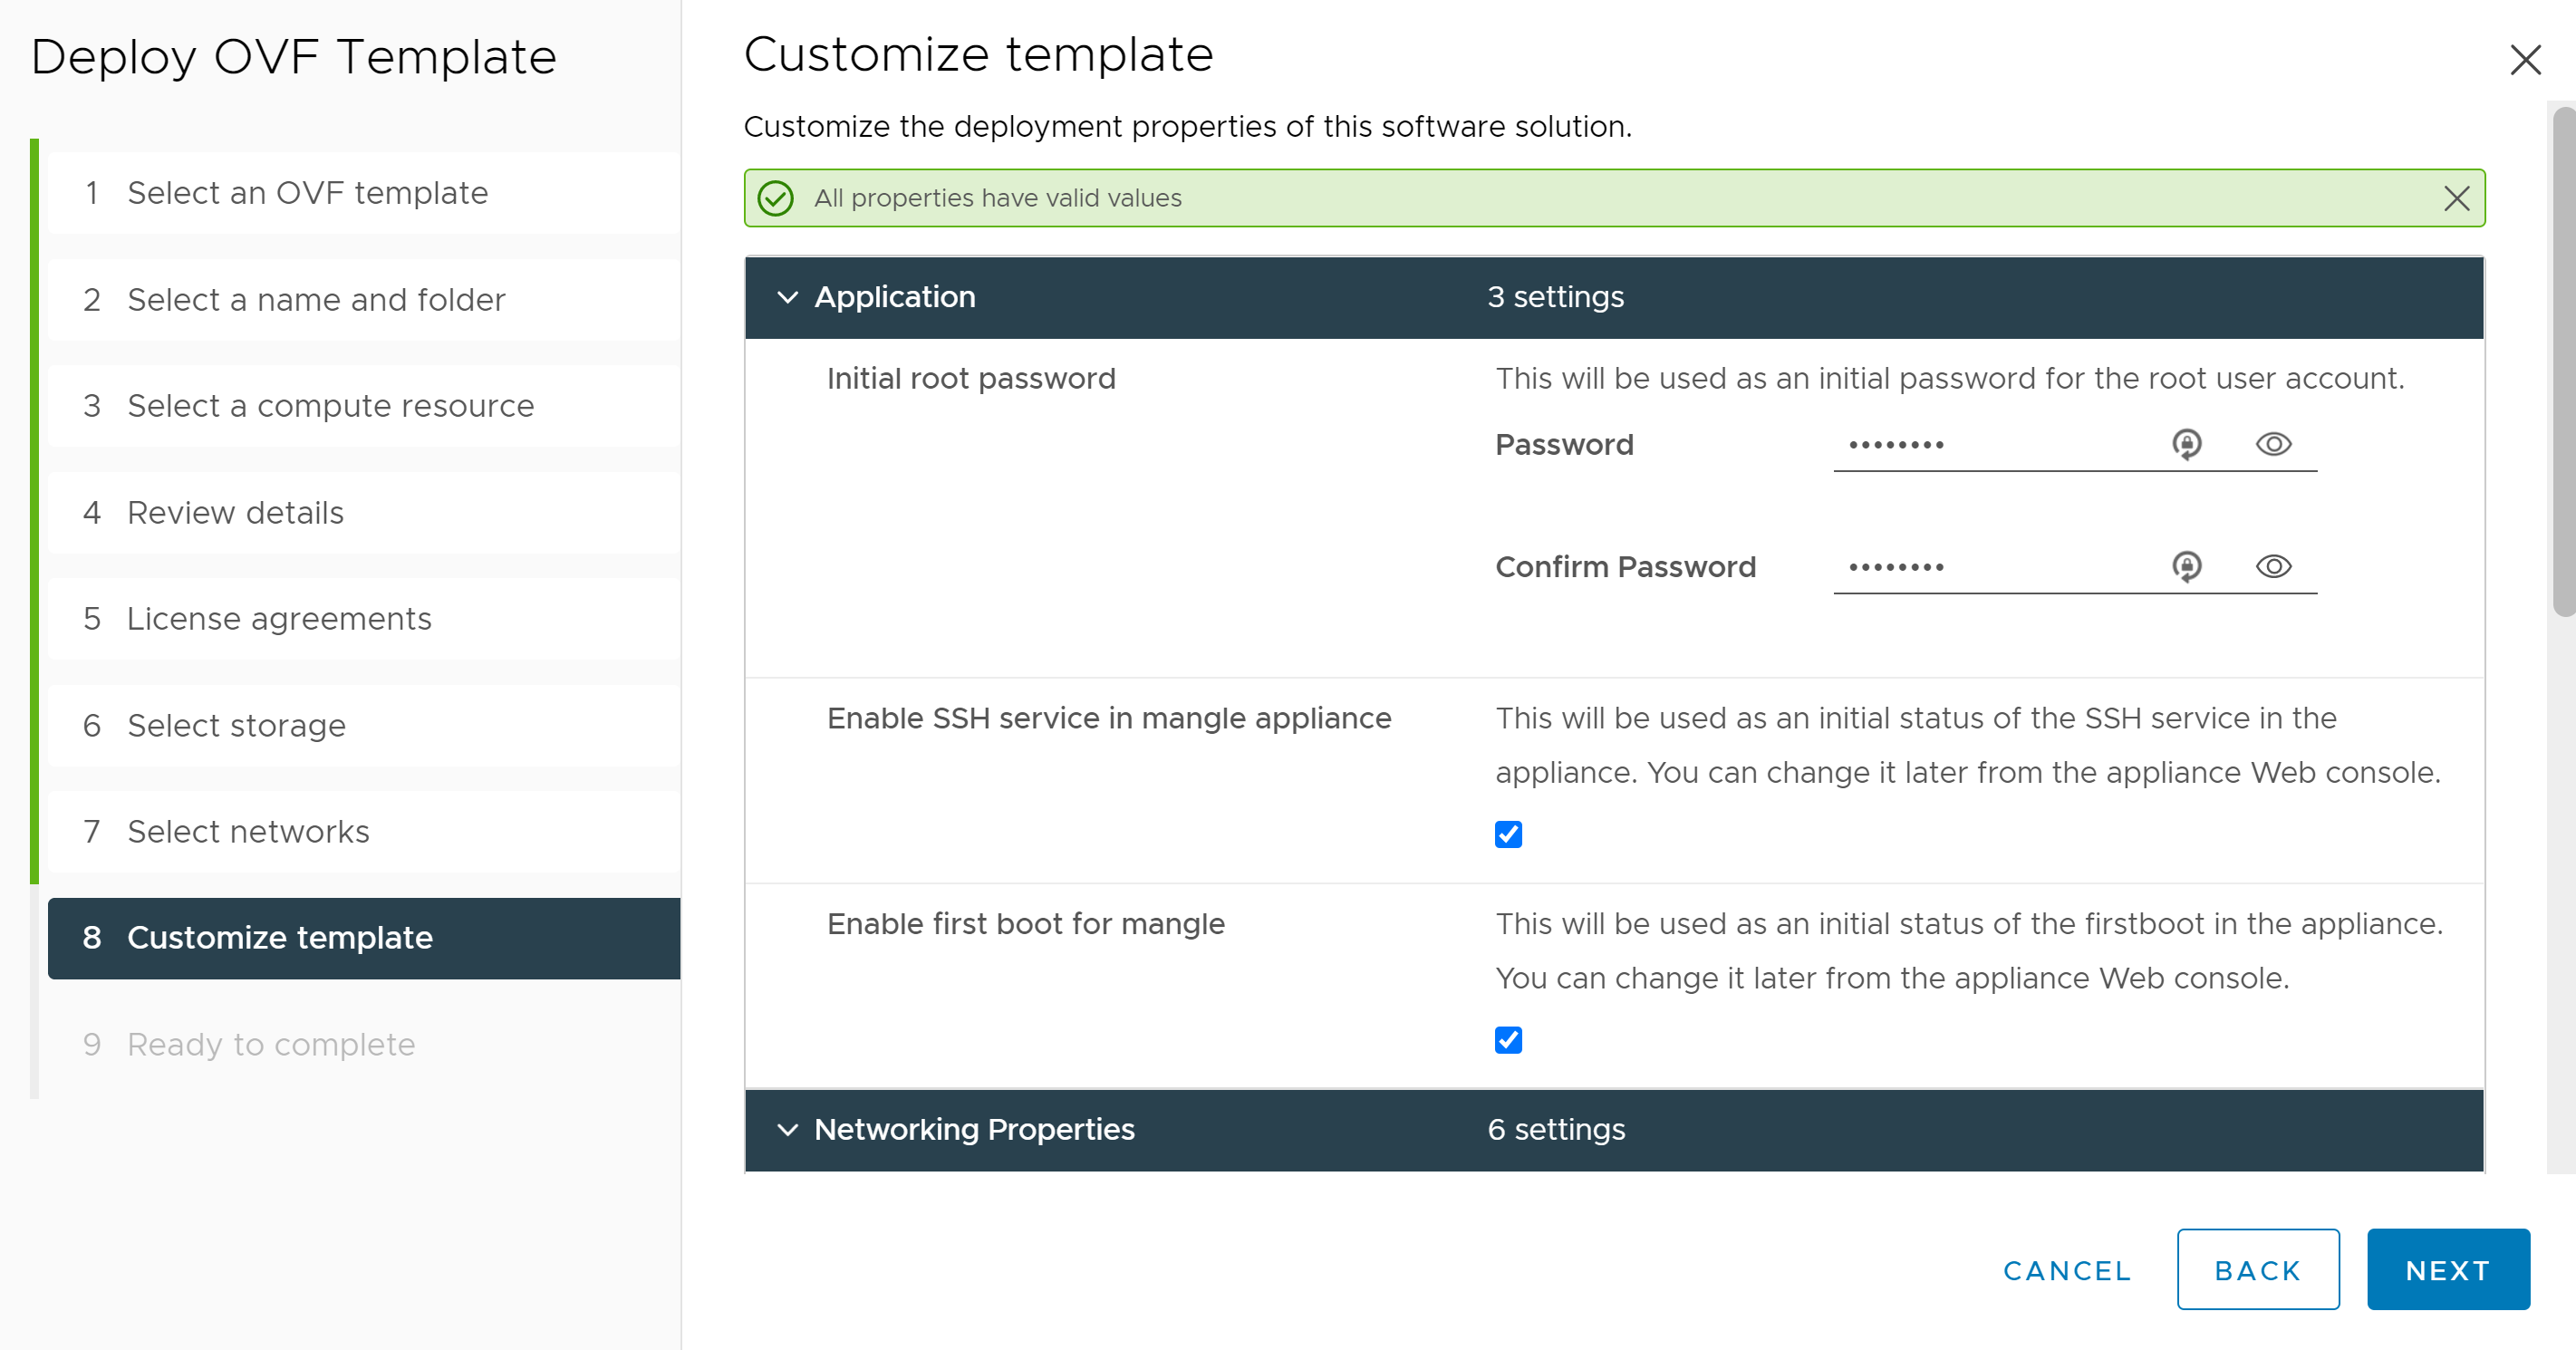
If you remember from trying this deployment directly on a host earlier, we have to set the appliance root password (the only required fields on this screen). Once we set a password, the error message turns into a success message. But don’t click Next yet. Scroll down to look at the Networking Properties section.
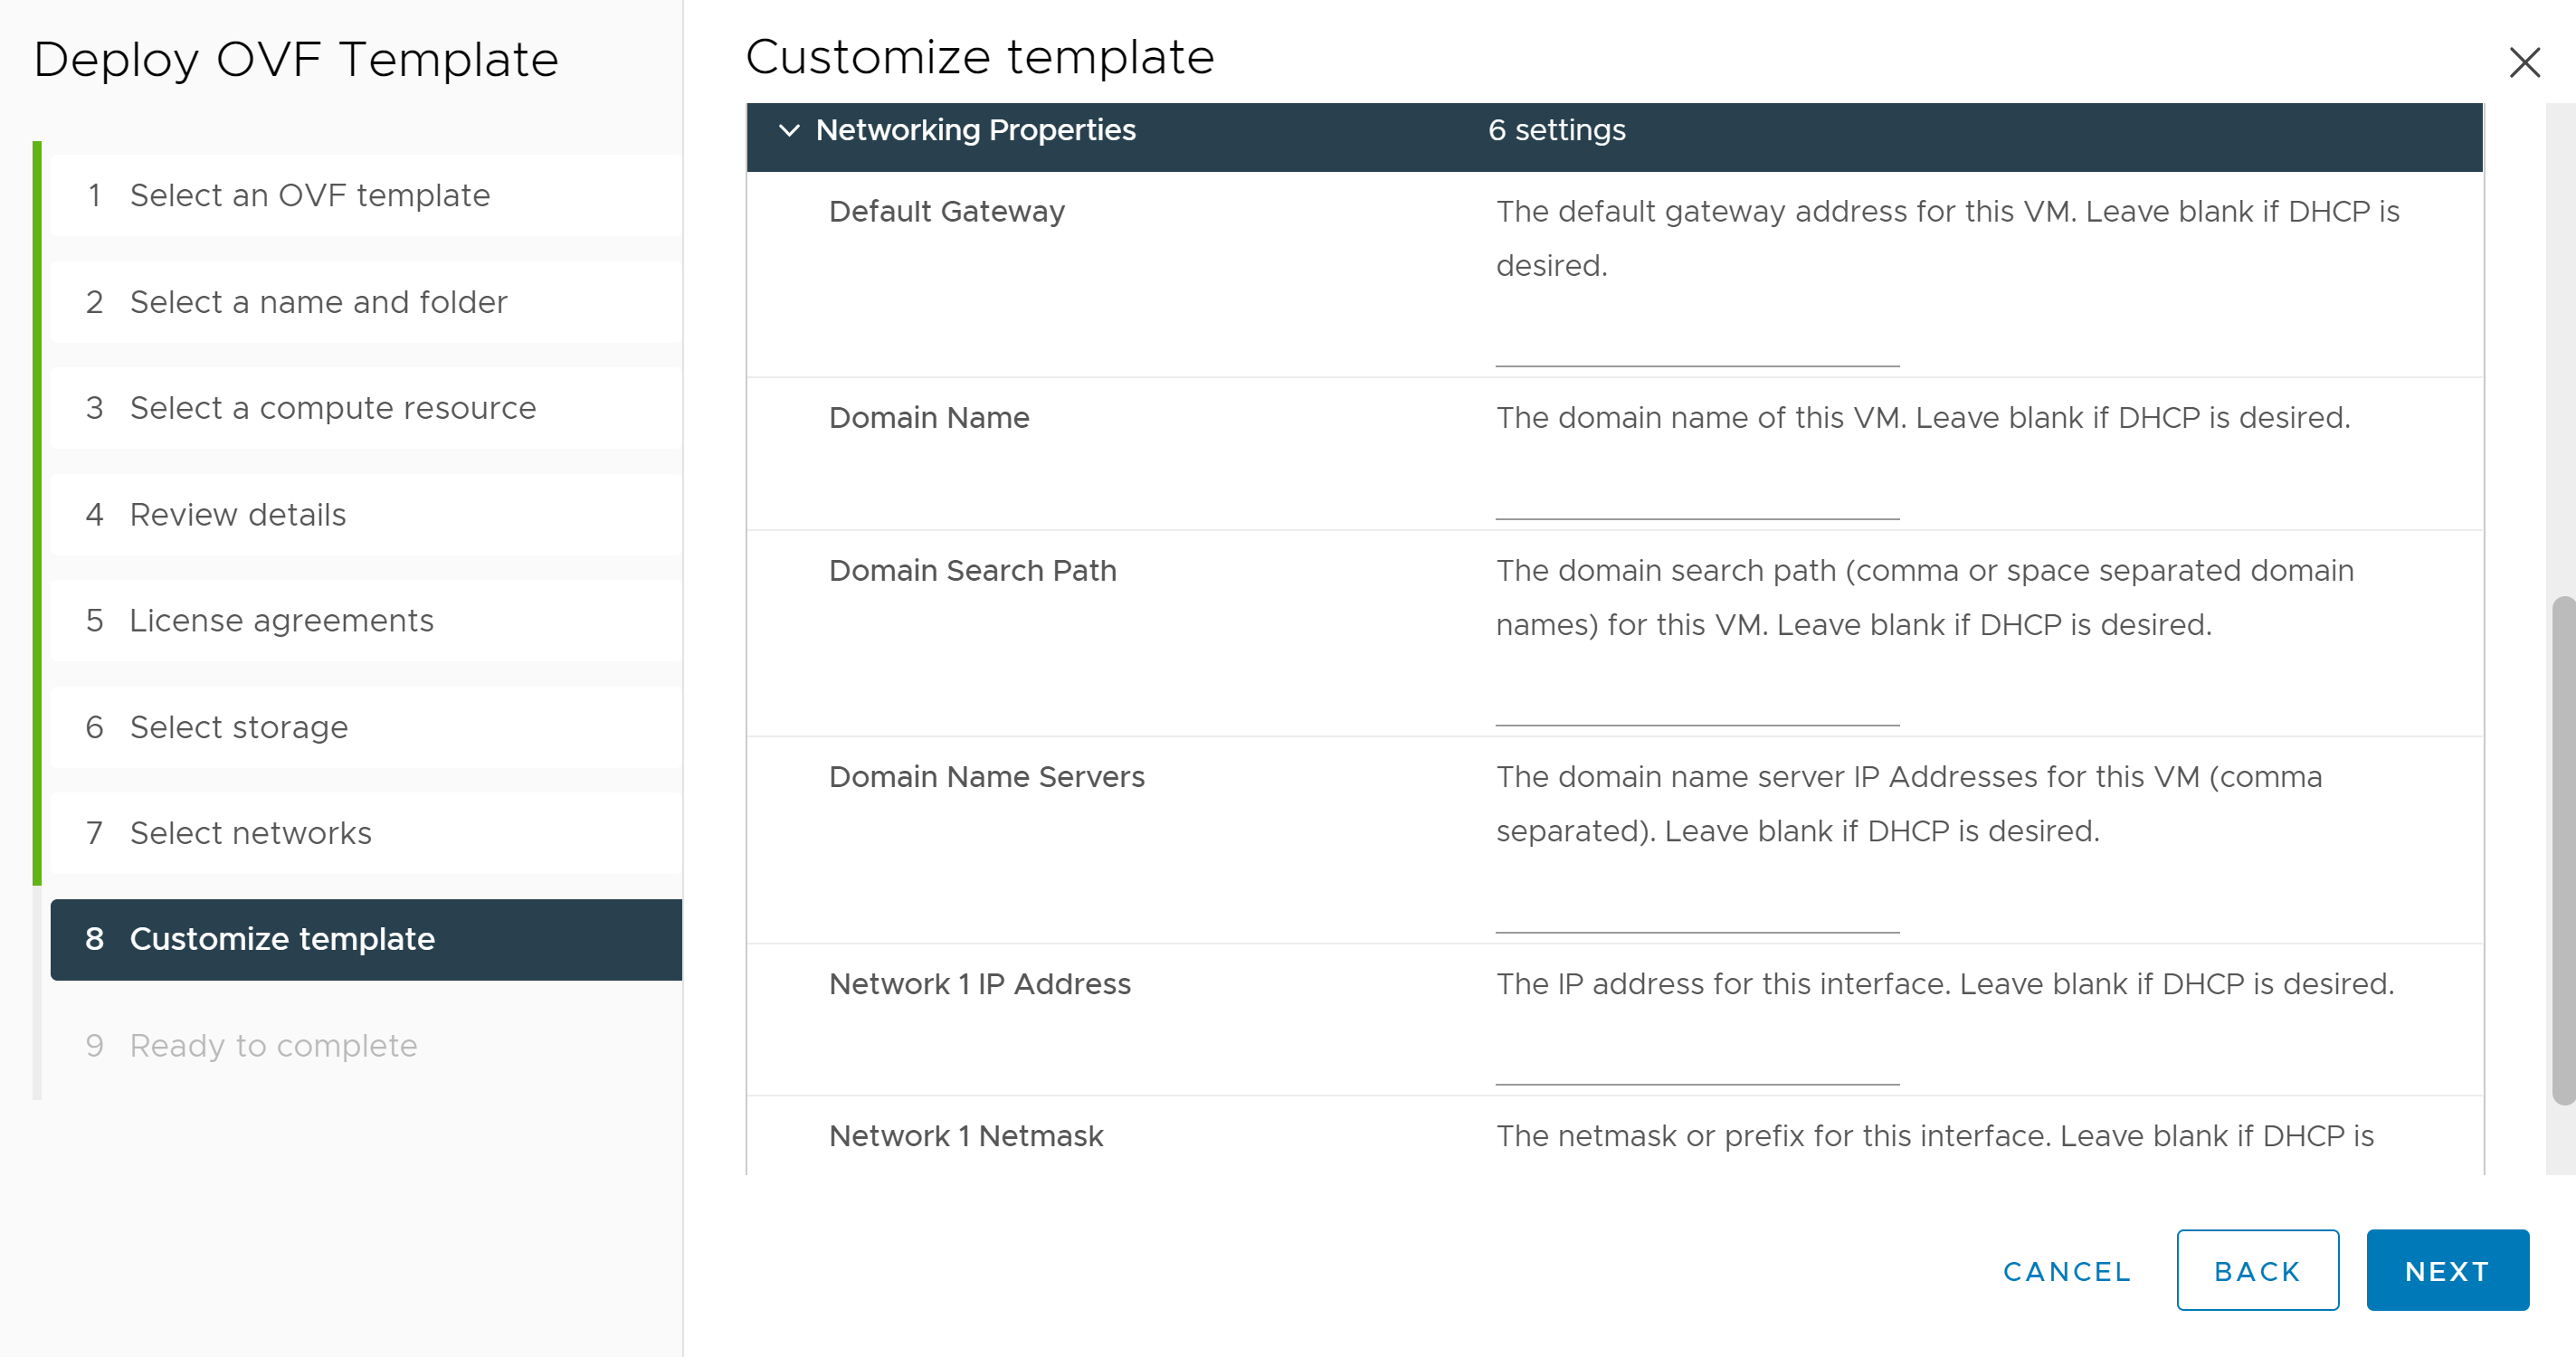
It’s easy to see that if a value is left blank in this area, we are communicating that we want to use DHCP. Just like before, we will leave that section blank to use DHCP and click Next to continue.
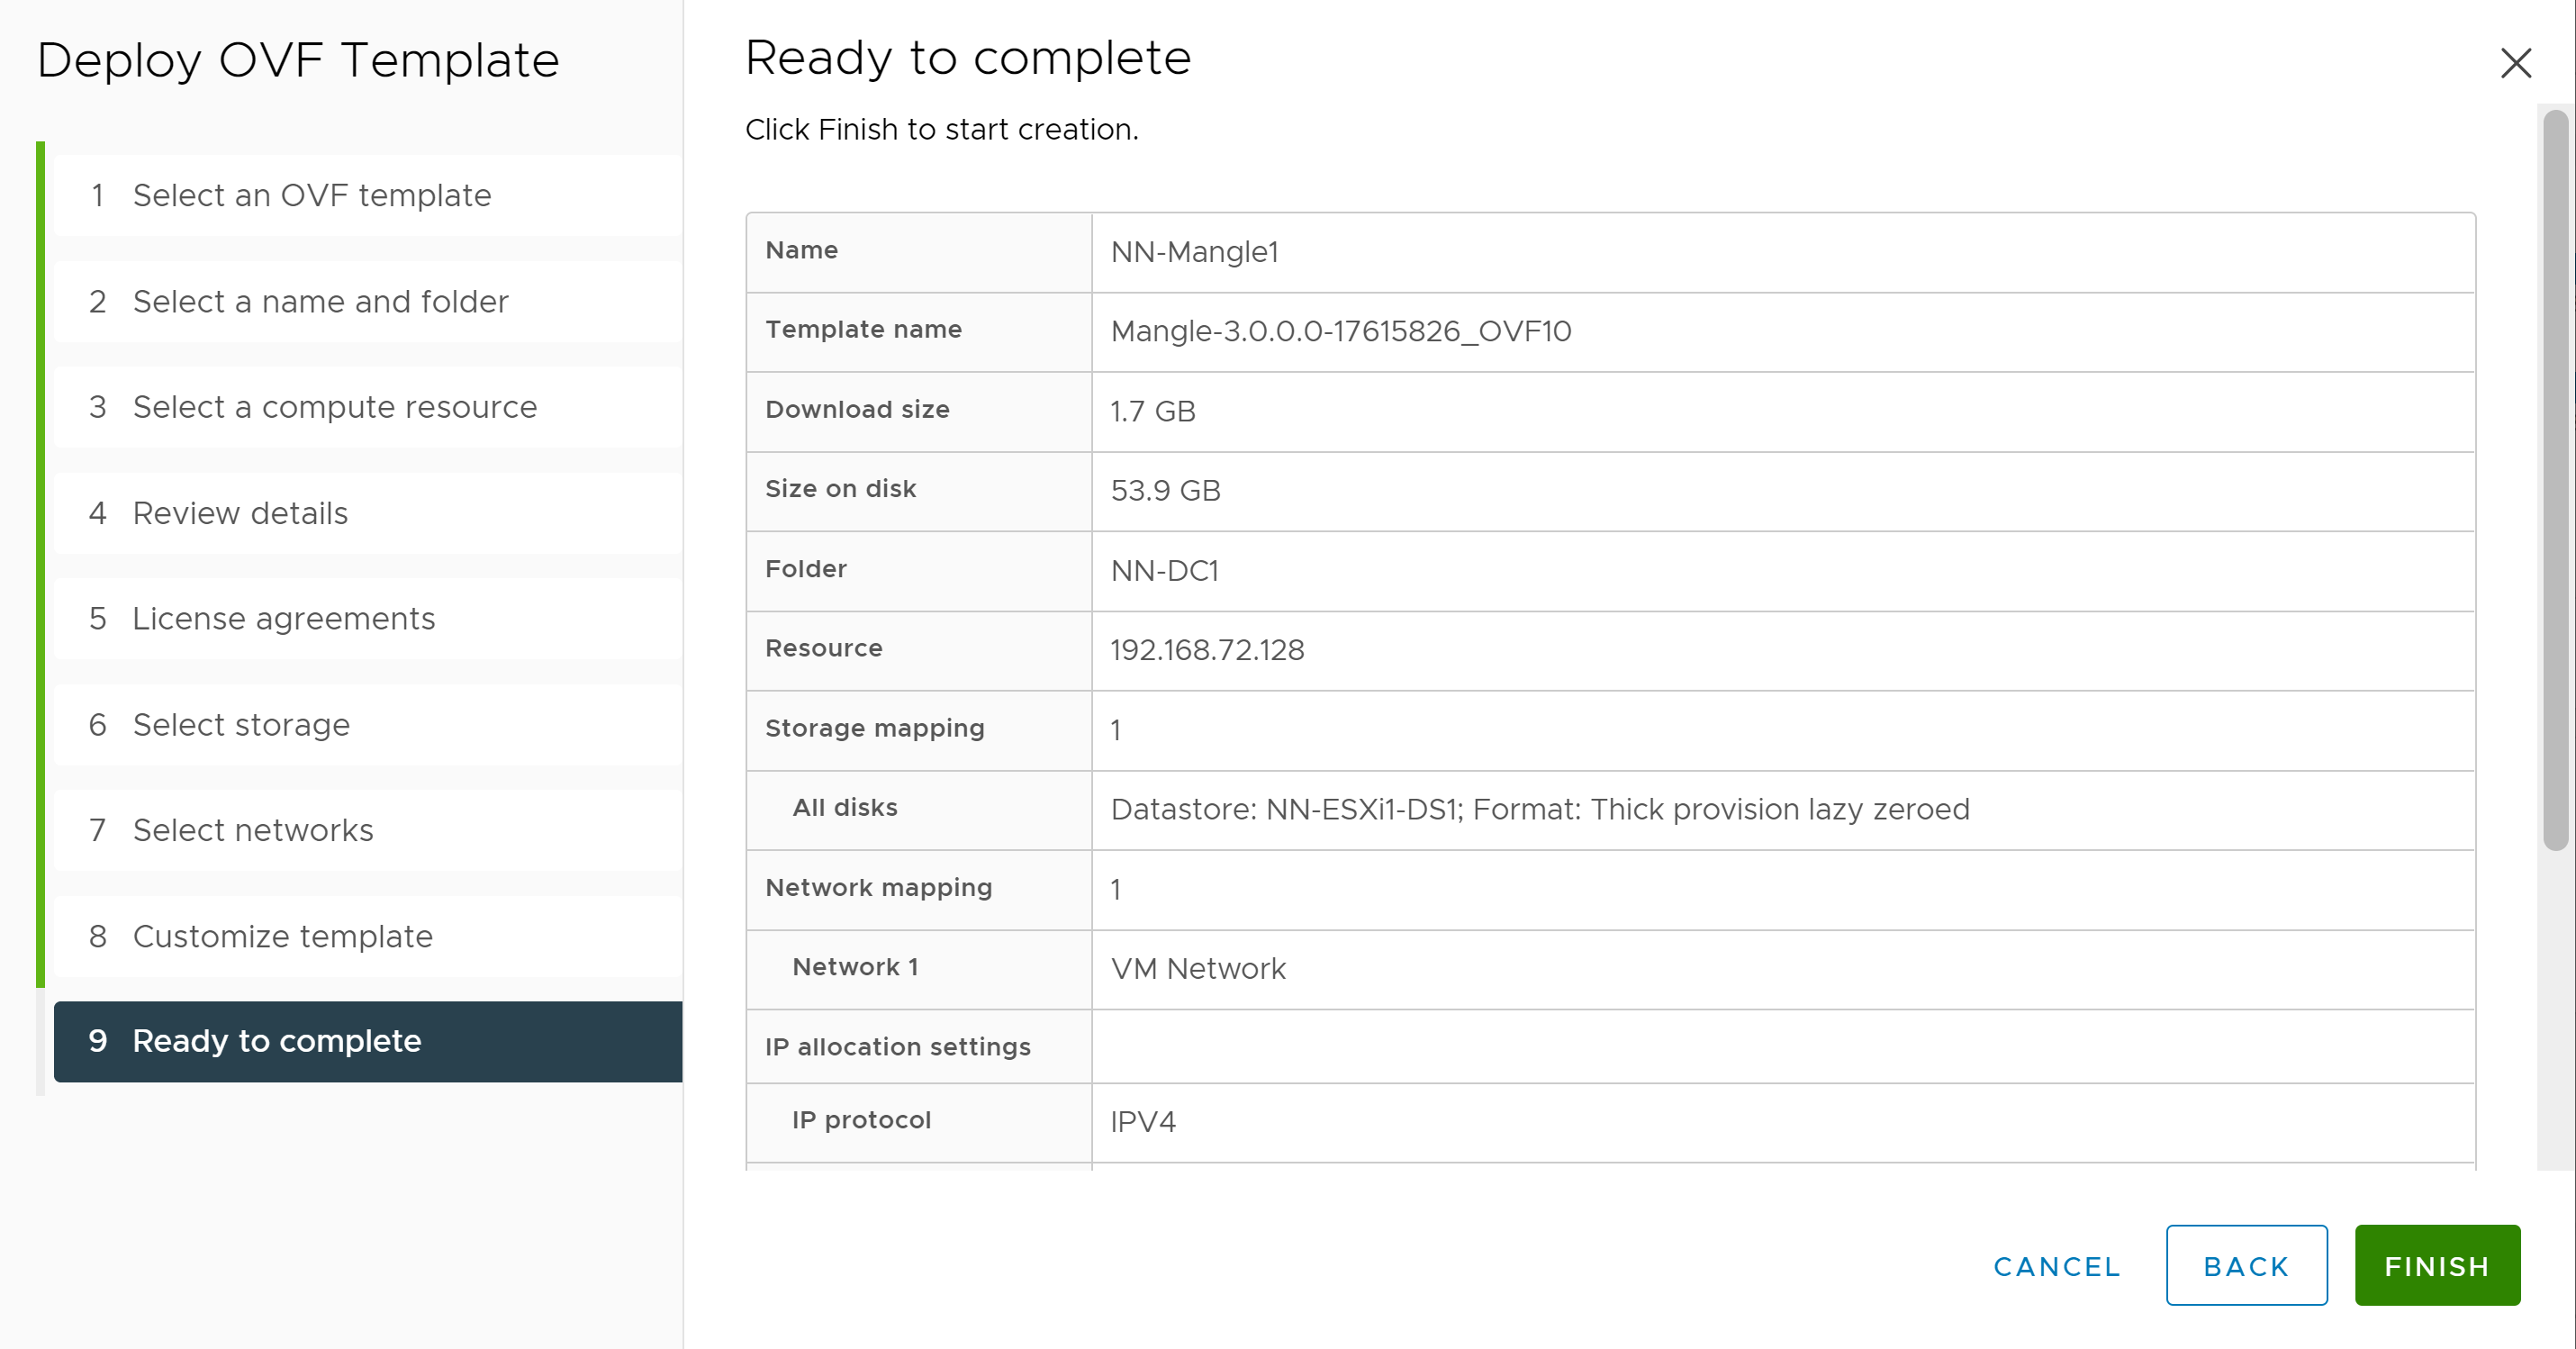
We’ve reached that final screen before starting the deployment. Review the settings to double check everything, and click Finish to begin the deployment.
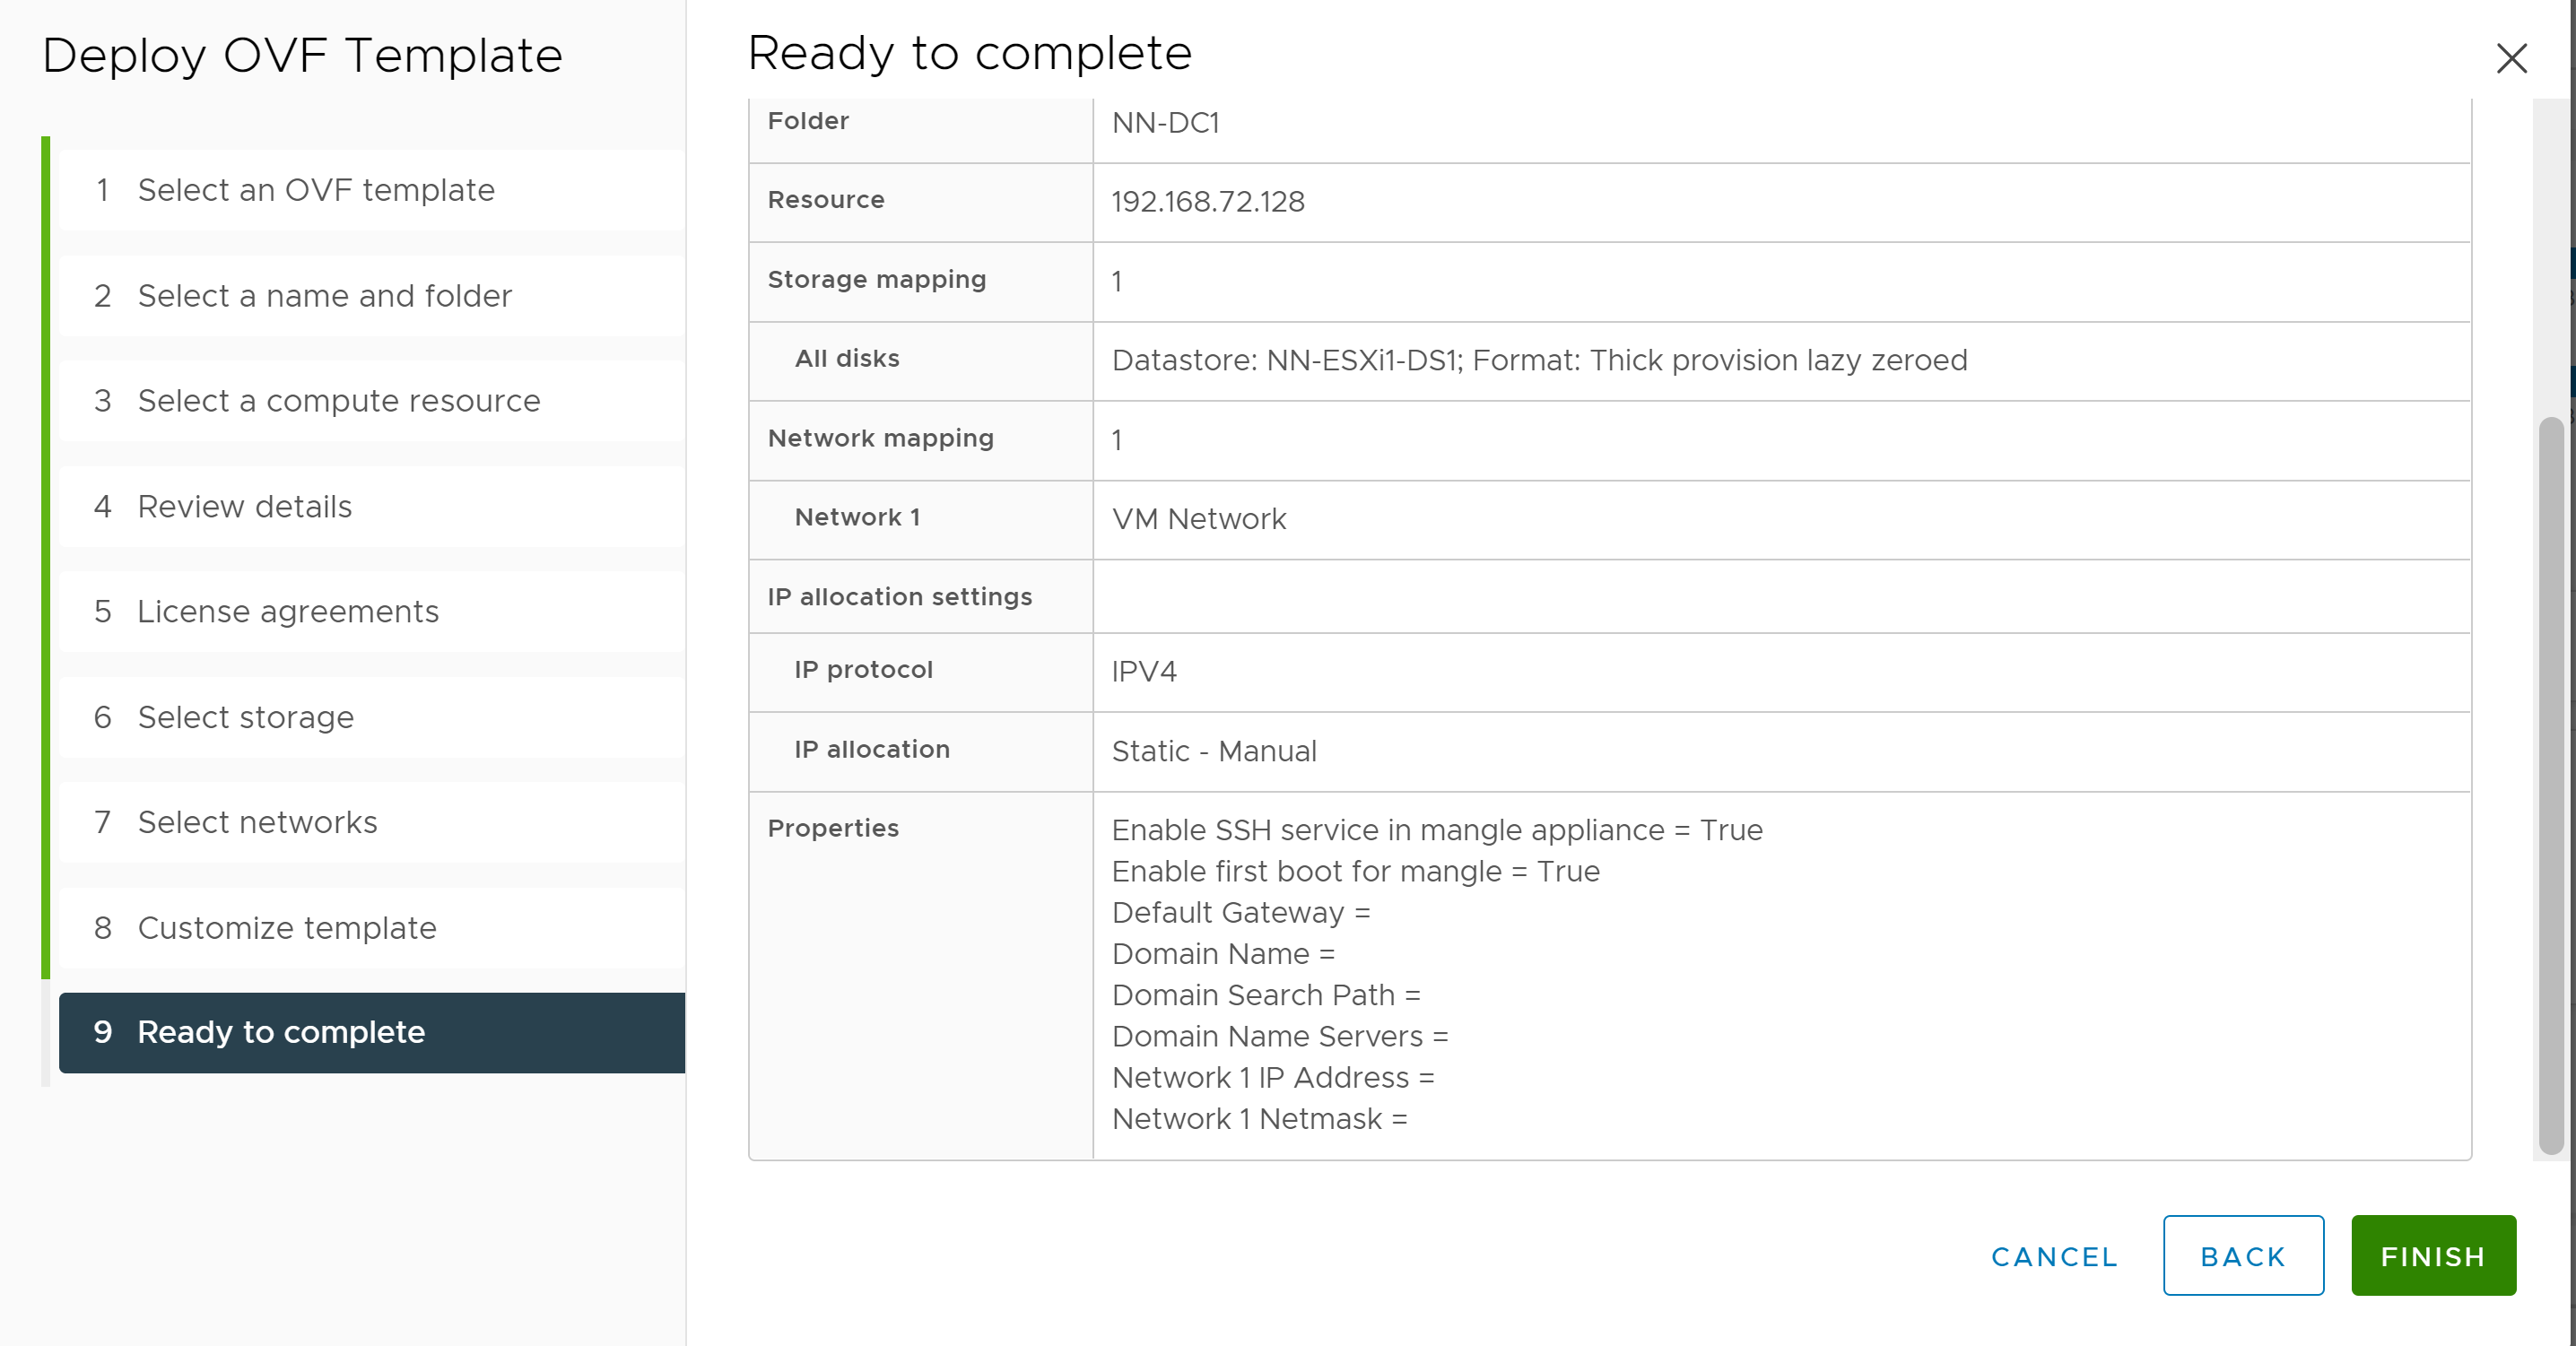
It looks like the deployment completed successfully, and we can see the new VM in vCenter’s inventory. Let’s see what happens when we power it on.
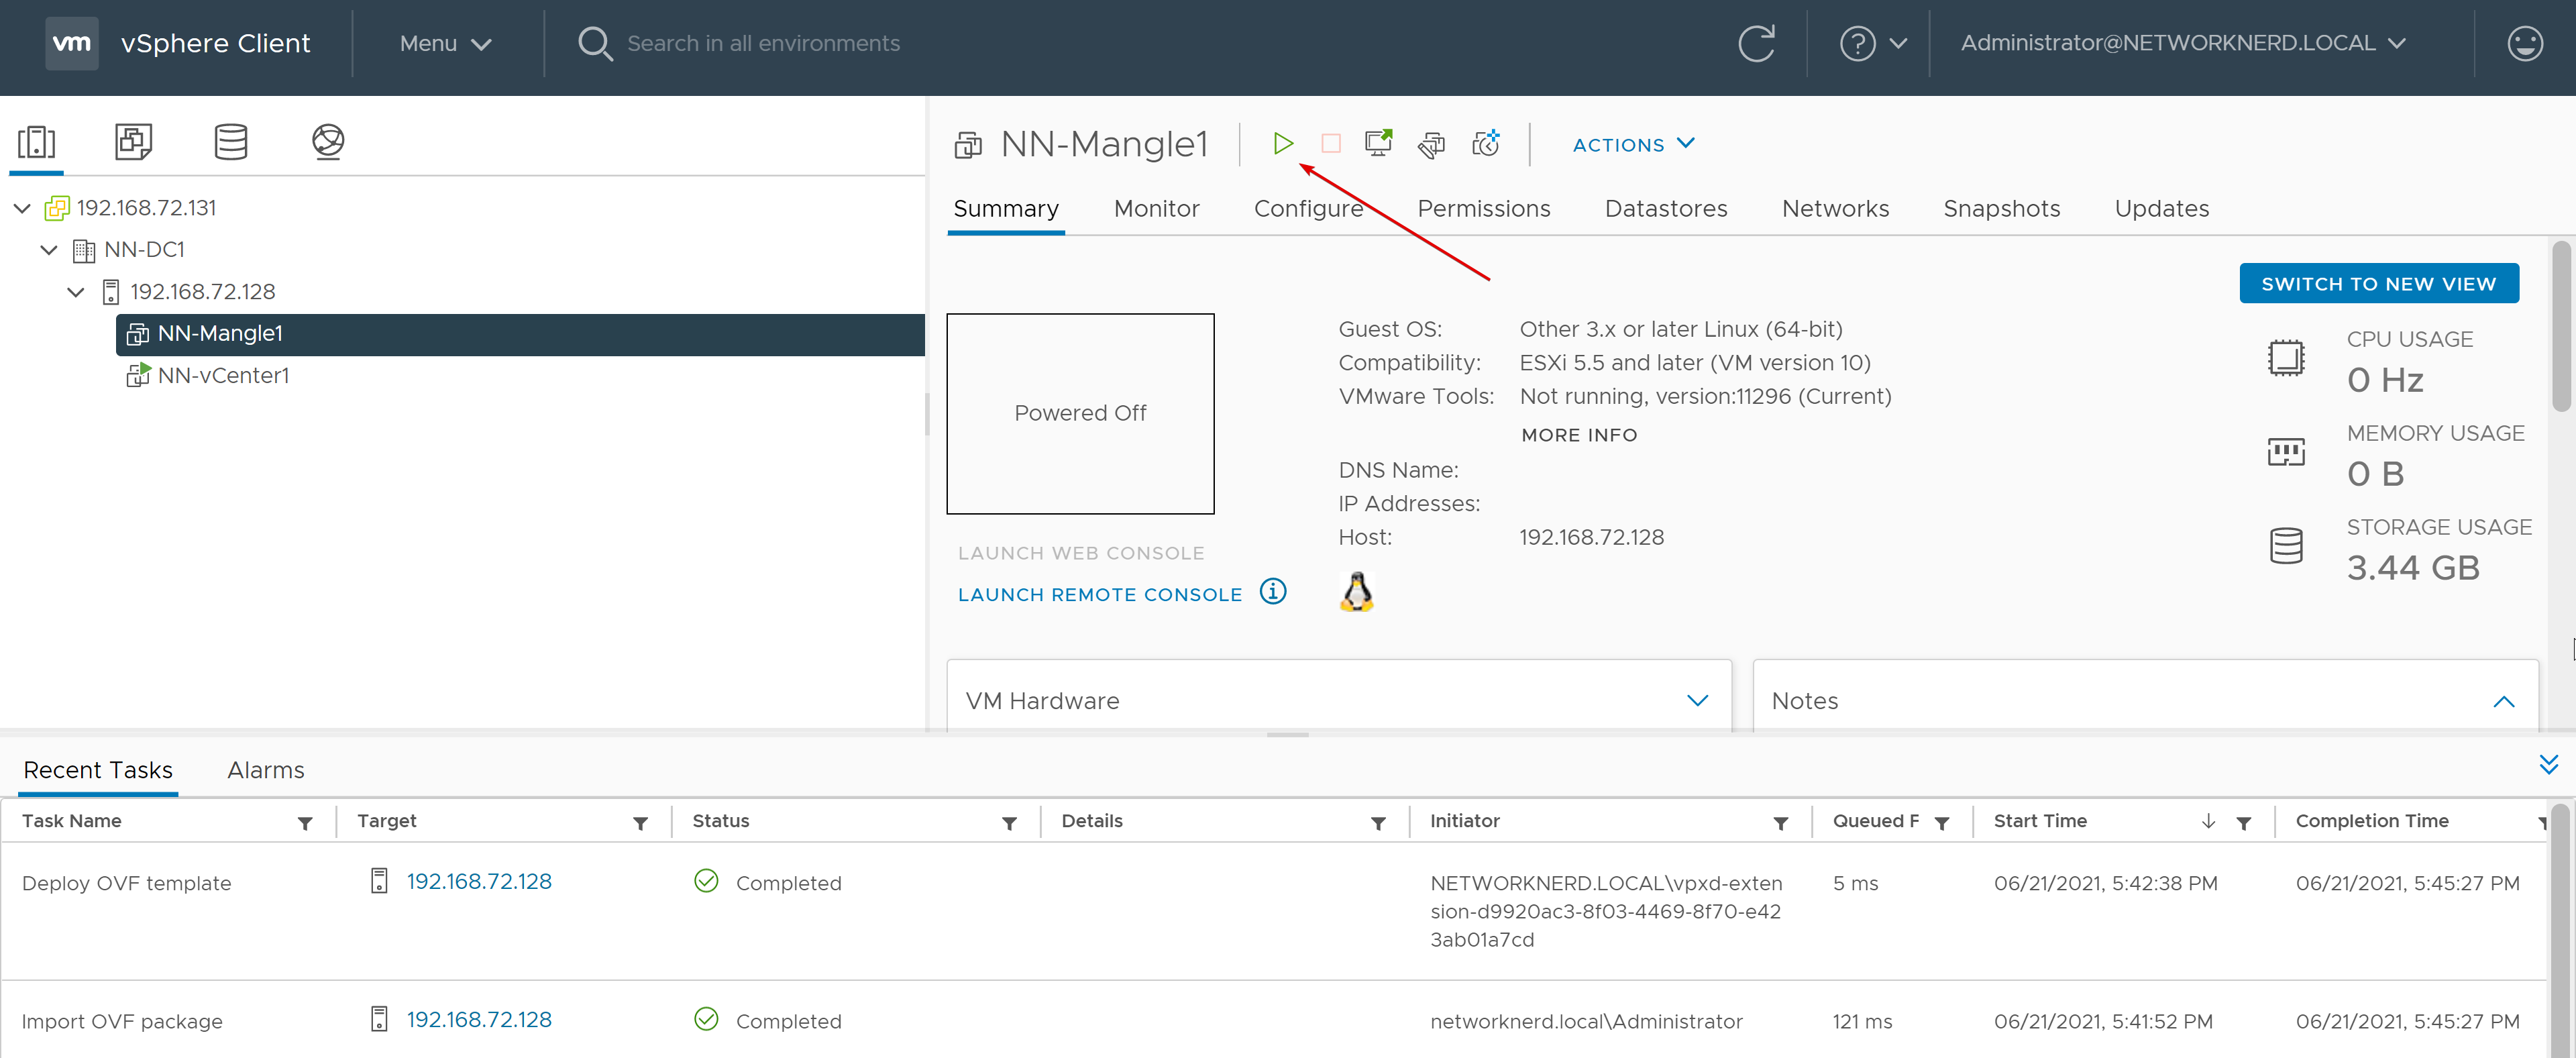
Similar to before, we can open a console to keep an eye on things. This boot process looks normal.
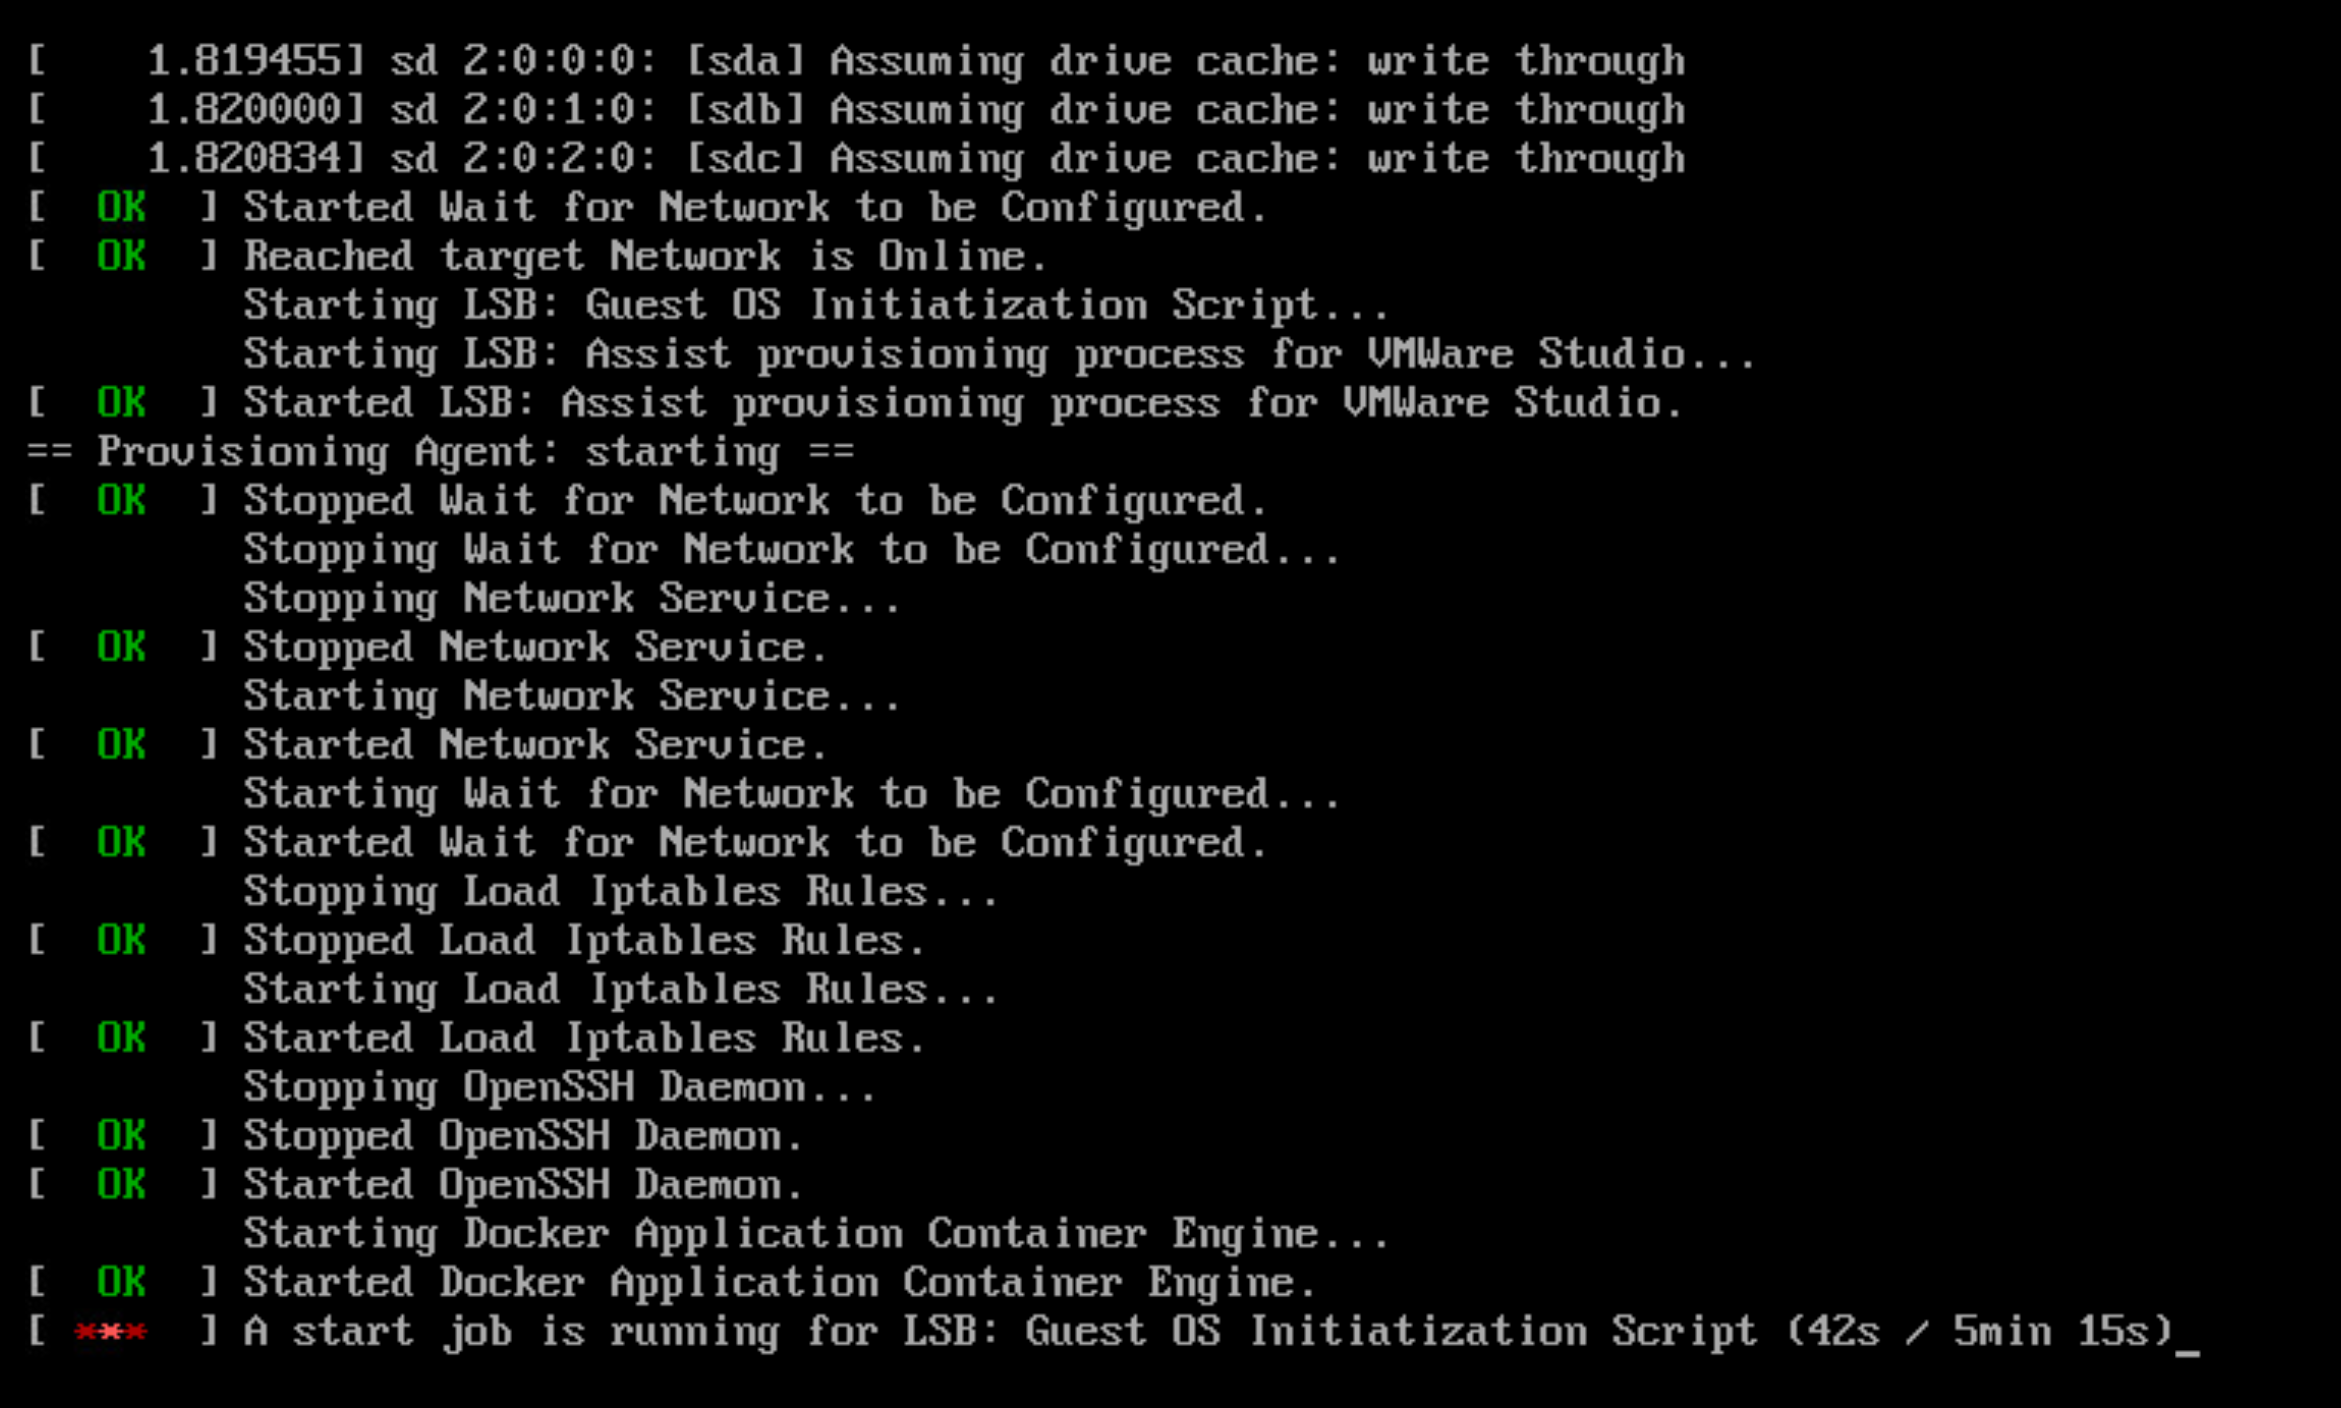
Look at that. We have an ip address on boot from DHCP. Maybe, just maybe, this worked as expected.
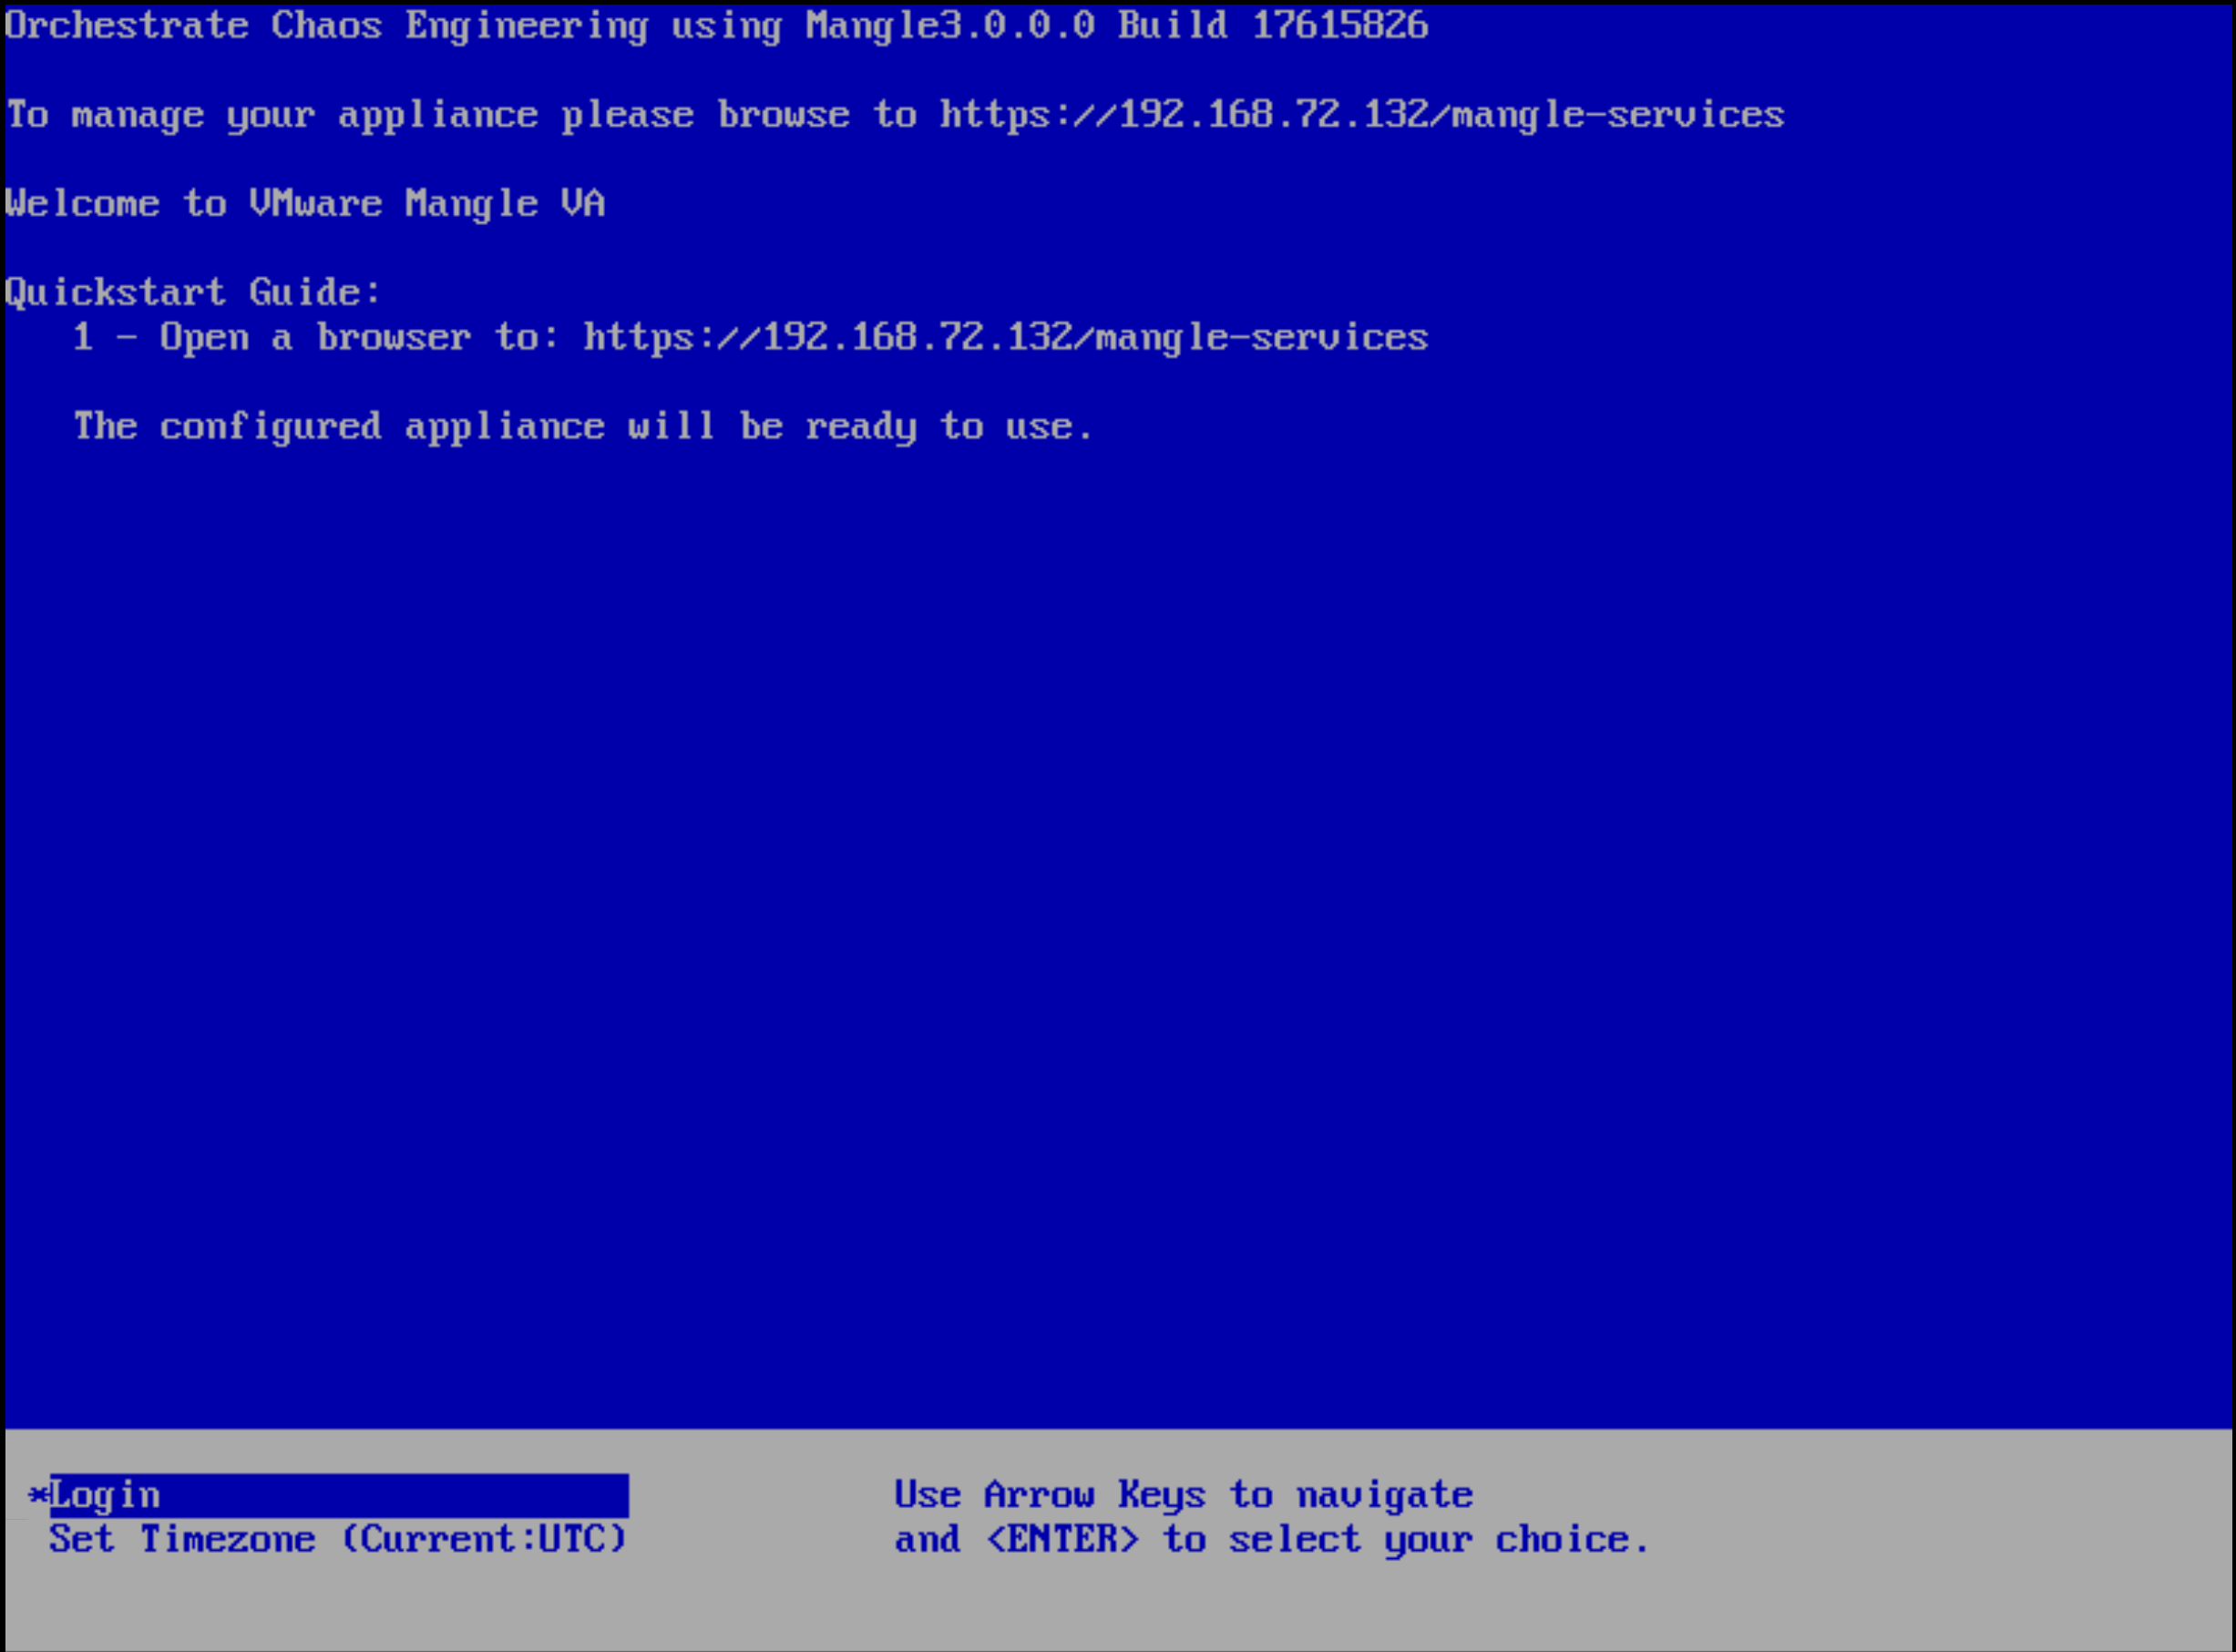
The console above appears to be the only place that allows setting the time zone for the appliance. I recommend doing that before proceeding (steps not shown here).
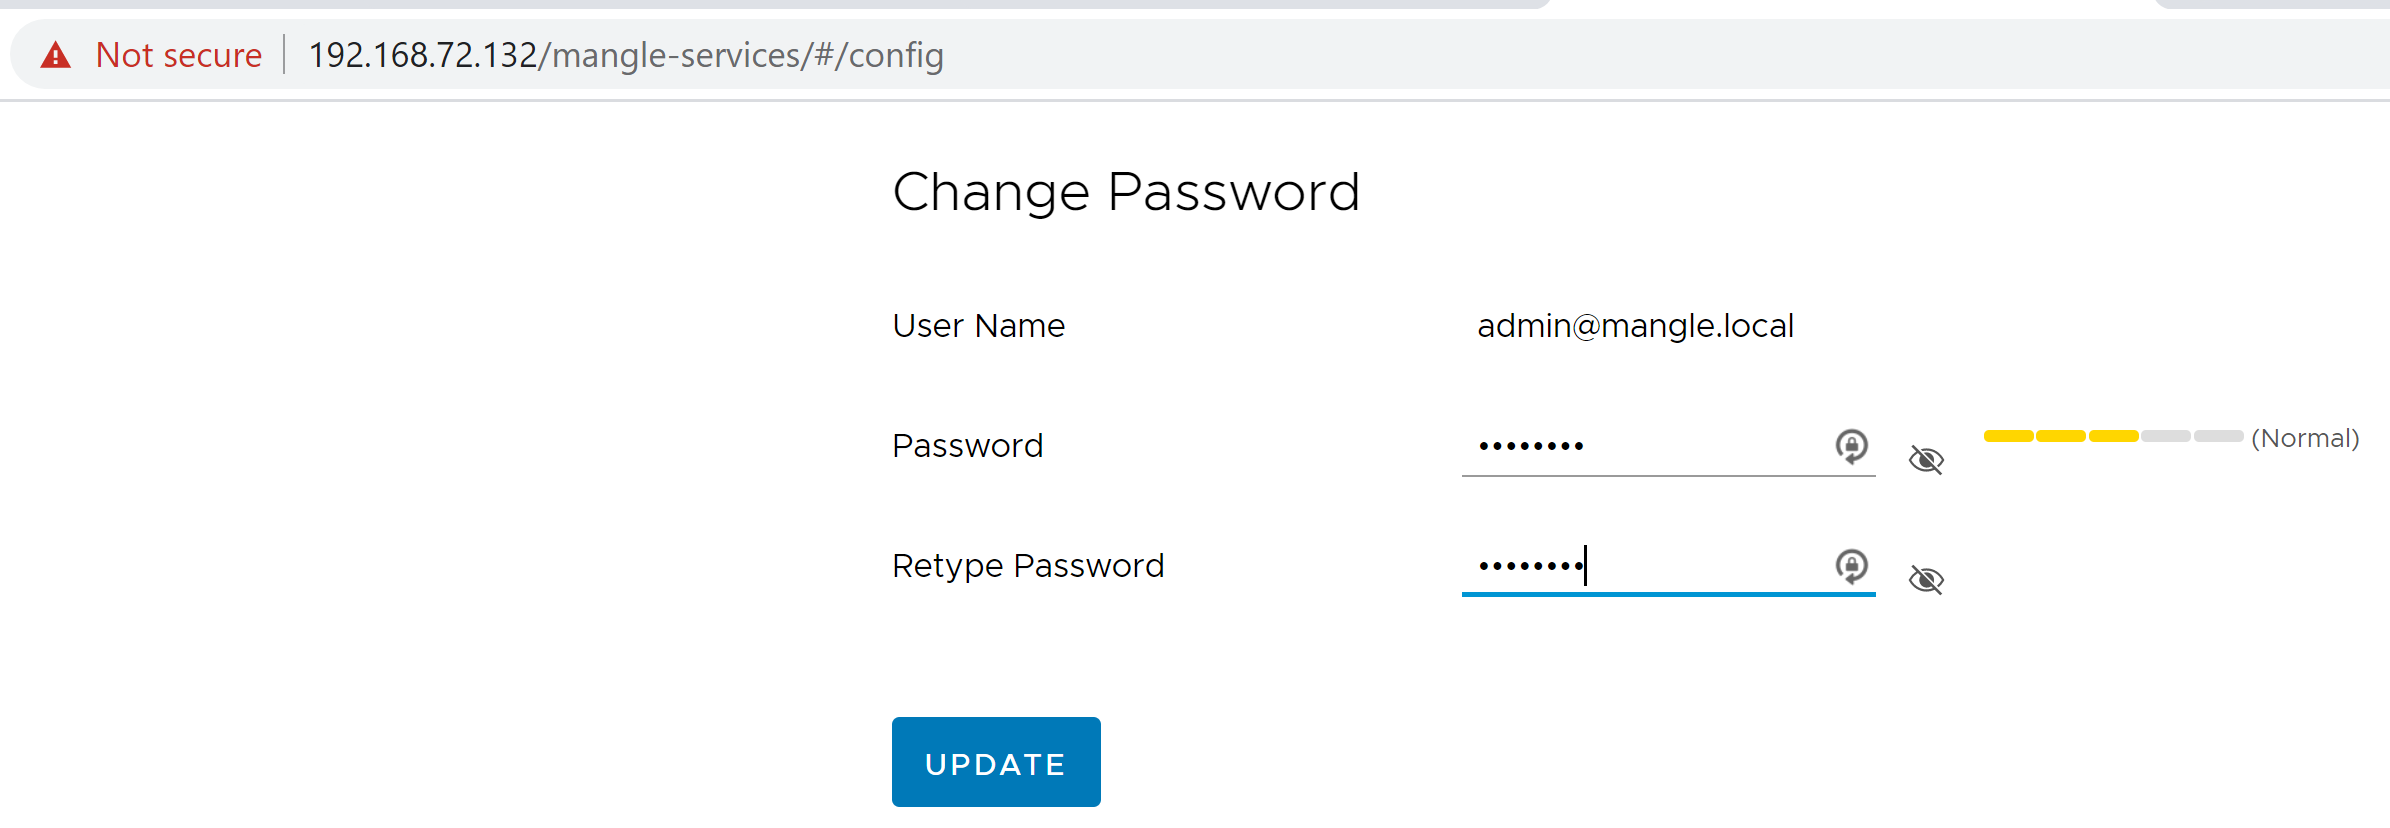
Let’s try visiting that web address in a browser. It will be https://ipaddressofappliance/mangle-services. This time the link worked to access the web interface of the appliance! I did get the normal Google Chrome security warning about an insecure certificate but chose to proceed. The first thing we are prompted to do (even before we have the option to login) is change the password for user [email protected]. This is going to be different from the root user whose password we set during appliance deployment. Enter the password here and click UPDATE to continue.
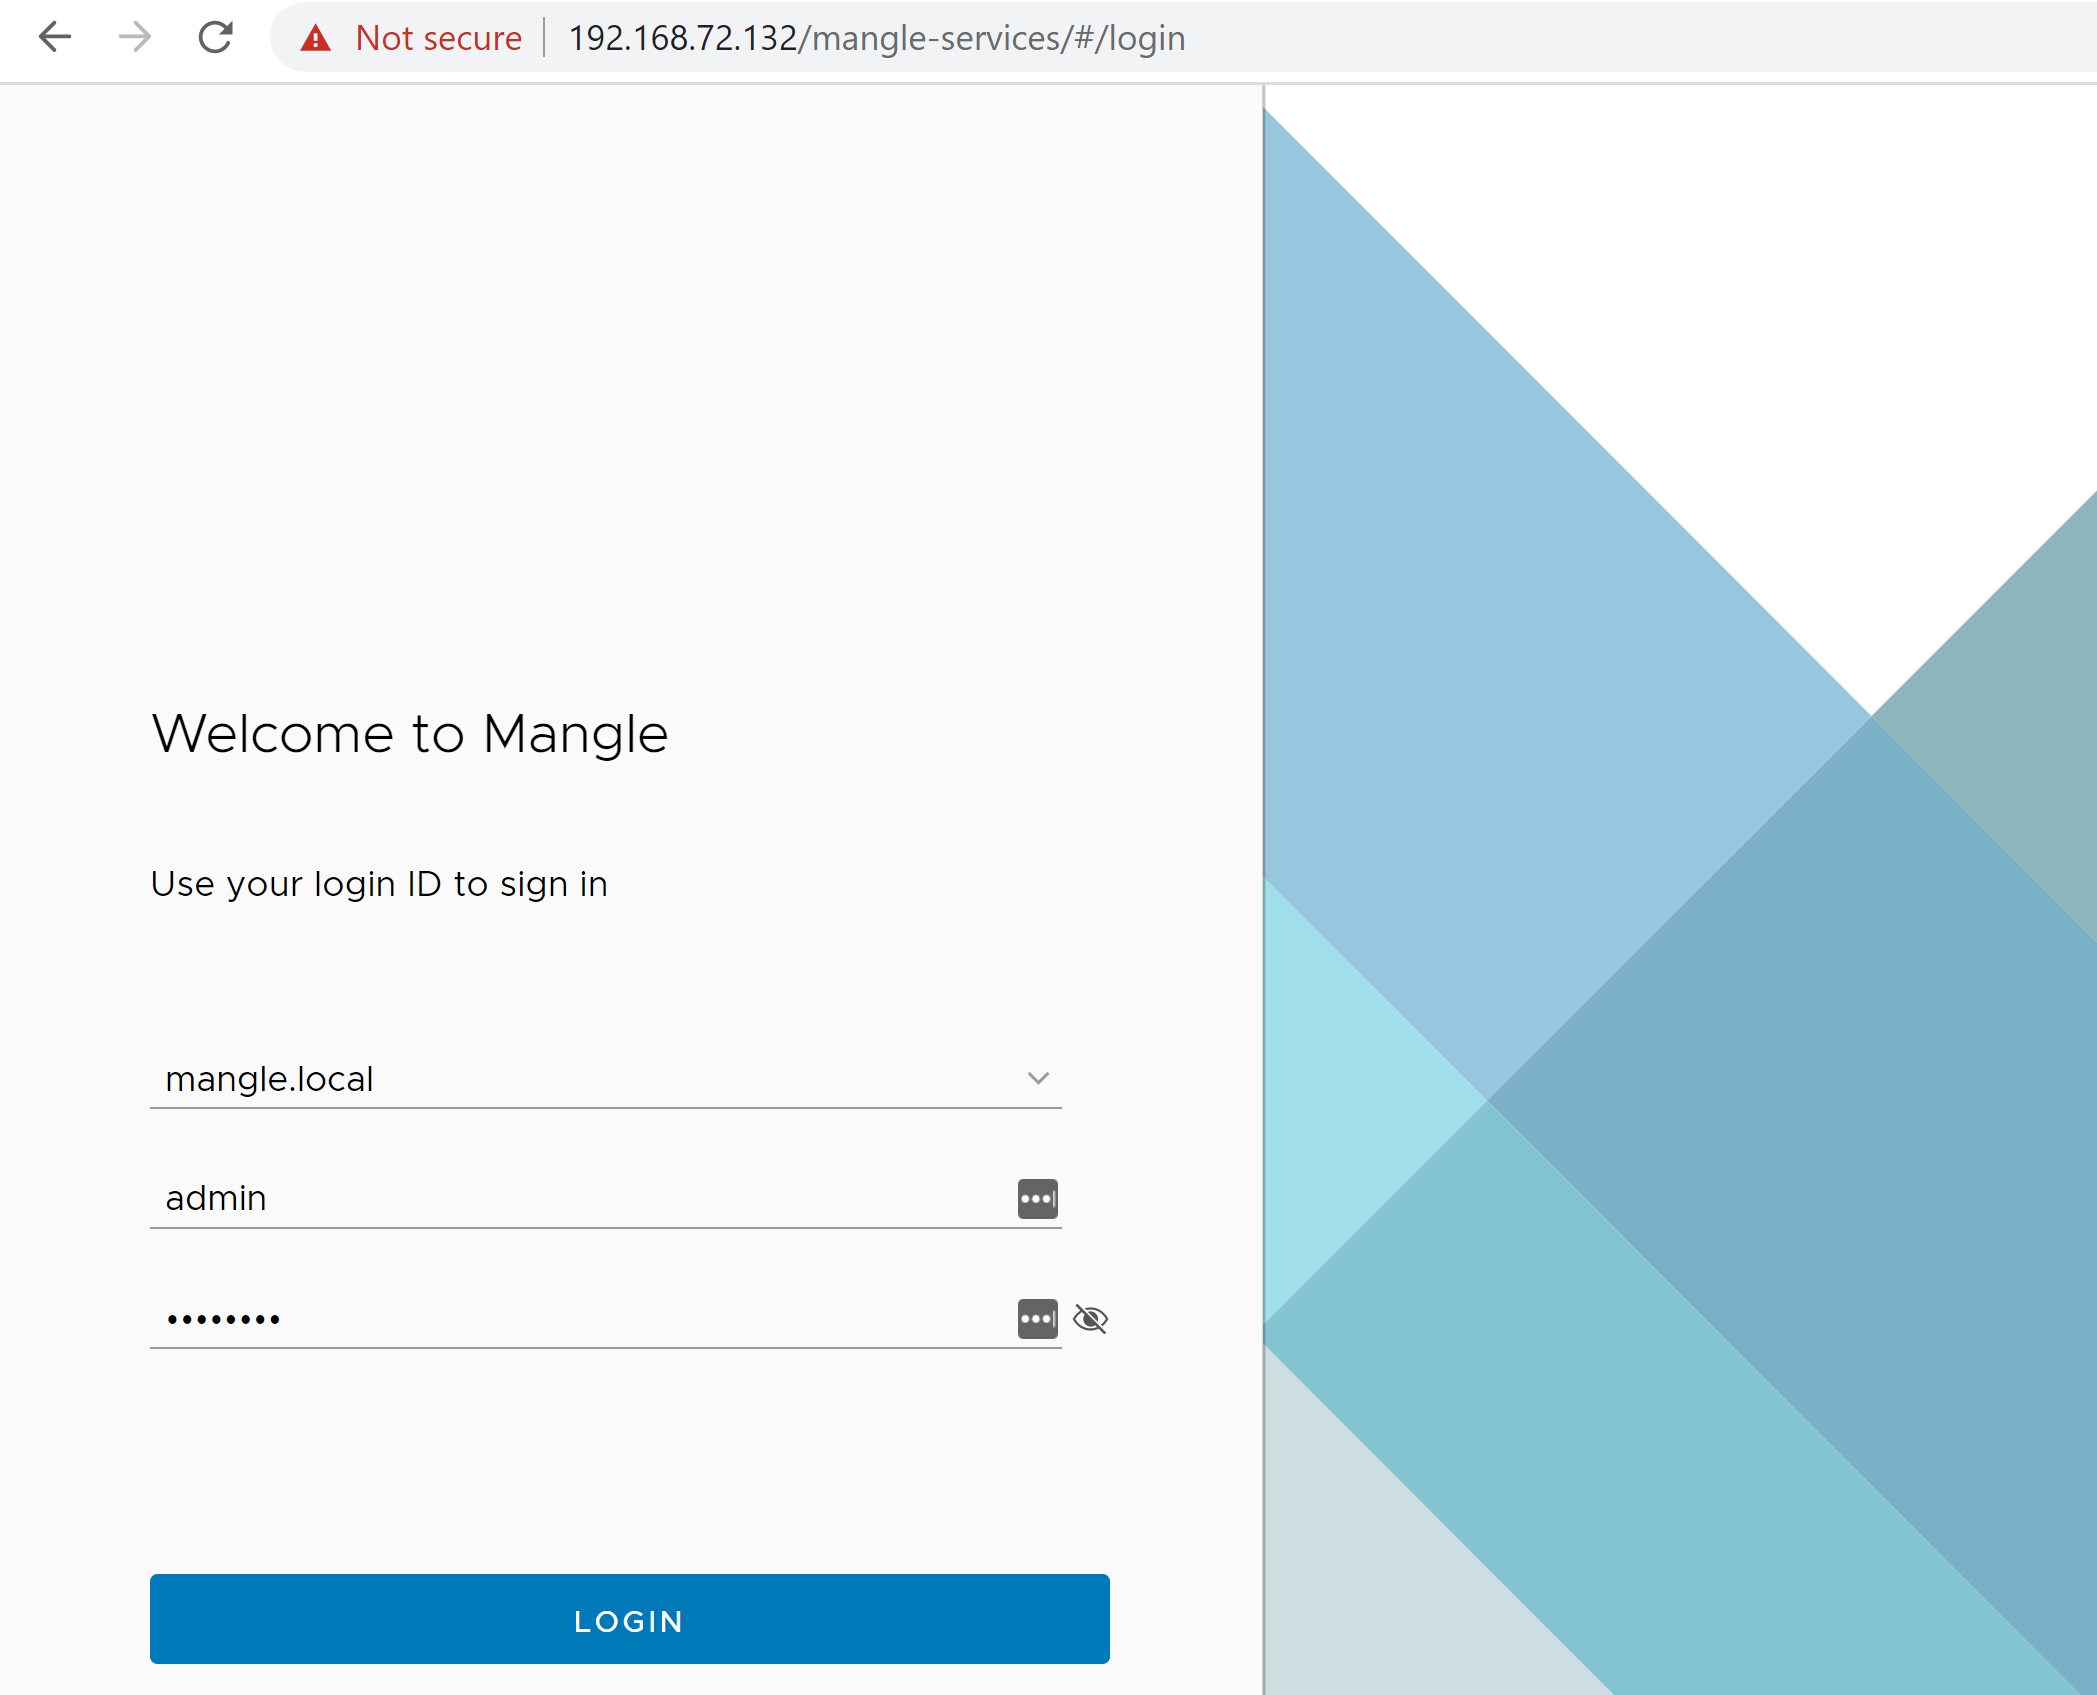
Now we’re at the appliance login screen. The only domain to select is the mangle.local domain. We’ll login as user admin and the password set in the previous step. The domain has to be selected, and the username has to be just admin (not [email protected]) to avoid throwing an error.
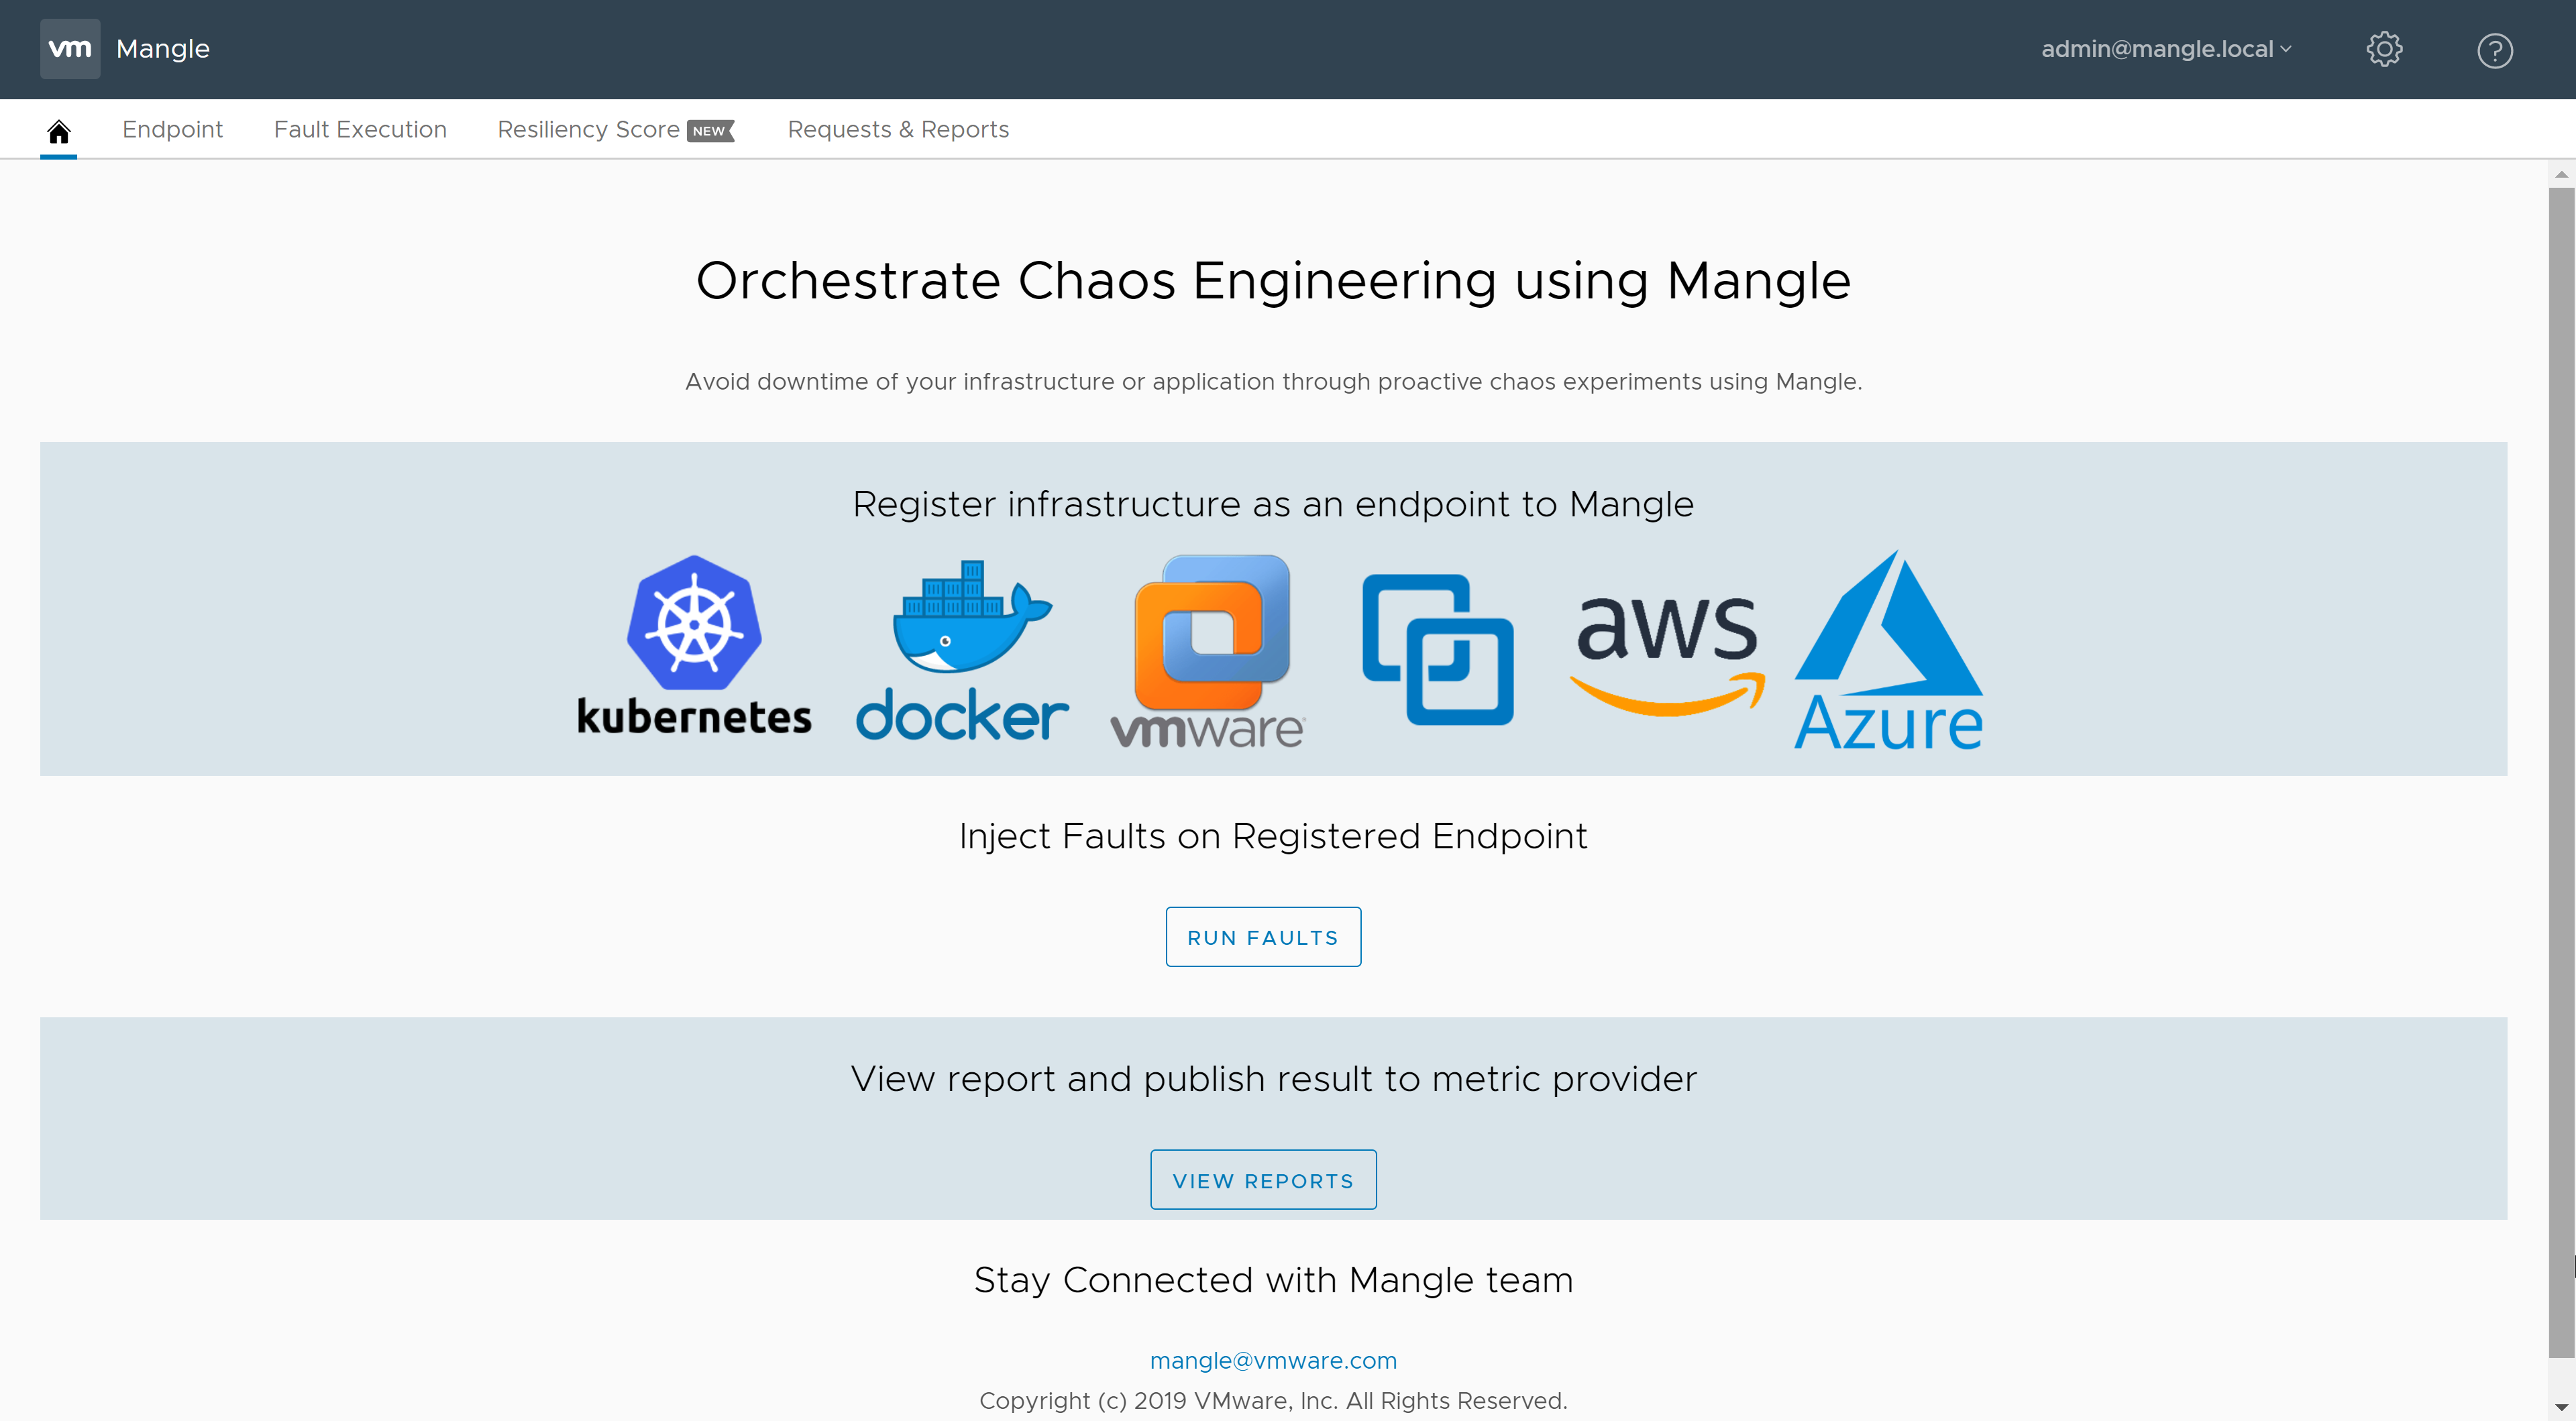
And just like that, we are officially logged into the Mangle appliance. It was a hard fought battle, but I consider it a success in the end.
Lessons Learned
That, dear readers, is where we stop for now. As we discovered, there are some small differences in the workflow when deploying an OVA directly on an ESXi host compared to deploying that same OVA using vCenter. In my opinion, the vCenter workflow was a bit cleaner, but both seemed very intuitive.
In this case taking a shortcut did not payoff, but now we have a newly deployed appliance with which we can start to tinker in future posts. Where do we go from here? As the story progresses, I will update with more blog posts.